Transferring data between Macs should be a simple process with Migration Assistant, but many users face a common frustration when the app can’t find their other computer. The most common causes include network connectivity issues, firewall settings, outdated software, or improper connection methods between the two devices. This problem occurs with both wireless transfers and when using physical connections like Ethernet or Thunderbolt cables.
Before panicking about lost data, know that there are several effective solutions to this problem. Disabling firewalls (including those in third-party security software like Norton), ensuring both Macs are on the same network, and using direct Ethernet connections instead of WiFi can often resolve detection issues. Some users report success after simply unplugging and reinserting cables without closing Migration Assistant.
Migration Assistant typically takes over both computers during the transfer process, and the initial search for other devices can sometimes appear to be stuck. Patience is important, as the program may need time to compute a Spotlight index of the data before showing the other computer, especially when transferring large amounts of information between macOS versions like Big Sur and Monterey.
Troubleshooting Procedure
If Mac Migration Assistant is not finding the other Mac, try the following troubleshooting steps:
1. Check Network Connection
- Ensure both Macs are on the same Wi-Fi network or connected via Ethernet.
- If using Wi-Fi, switch to Ethernet for a more stable connection.
- Restart your router to refresh the network.
2. Enable File Sharing
- On the source Mac, go to System Preferences > Sharing.
- Check File Sharing and ensure it’s enabled.
3. Restart Both Macs
- Restart both Macs and try running Migration Assistant again.
4. Disable Firewall & Security Software
- Go to System Preferences > Security & Privacy > Firewall.
- Click Turn Off Firewall temporarily and try again.
- If you have antivirus or VPN, disable them during the transfer.
5. Check macOS Updates
- Ensure both Macs are running the latest macOS version.
- Go to System Preferences > Software Update.
6. Use Target Disk Mode (For Intel Macs)
- Restart the source Mac and hold T while booting to enter Target Disk Mode.
- Connect the Macs using Thunderbolt or USB-C.
- The source Mac should appear as an external drive.
7. Use Time Machine Backup
- If Migration Assistant still doesn’t work, create a Time Machine backup on an external drive.
- On the new Mac, use Migration Assistant to restore from that backup.
8. Connect Directly With Thunderbolt or USB-C
- If both Macs have Thunderbolt 3 or USB-C, connect them directly using a Thunderbolt cable.
- Open Migration Assistant and try again.
9. Check Sharing & Discovery Settings
- On the source Mac, go to System Preferences > Sharing.
- Ensure Remote Login and File Sharing are enabled.
10. Try Manual File Transfer
- If all else fails, manually transfer files using:
- External drive (USB, SSD)
- AirDrop
- iCloud Drive
- Network File Sharing
After resolving the issue, re-enable firewall and security settings. Let me know if you need more help! 🚀
Key Takeaways
- Check network connectivity and disable all firewalls on both Macs to ensure Migration Assistant can find and connect to both devices.
- Use a direct Ethernet connection with a CAT5E or CAT6 cable instead of WiFi when Migration Assistant has trouble finding the other Mac.
- Allow sufficient time for the discovery process, especially when transferring between different macOS versions or with large amounts of data.
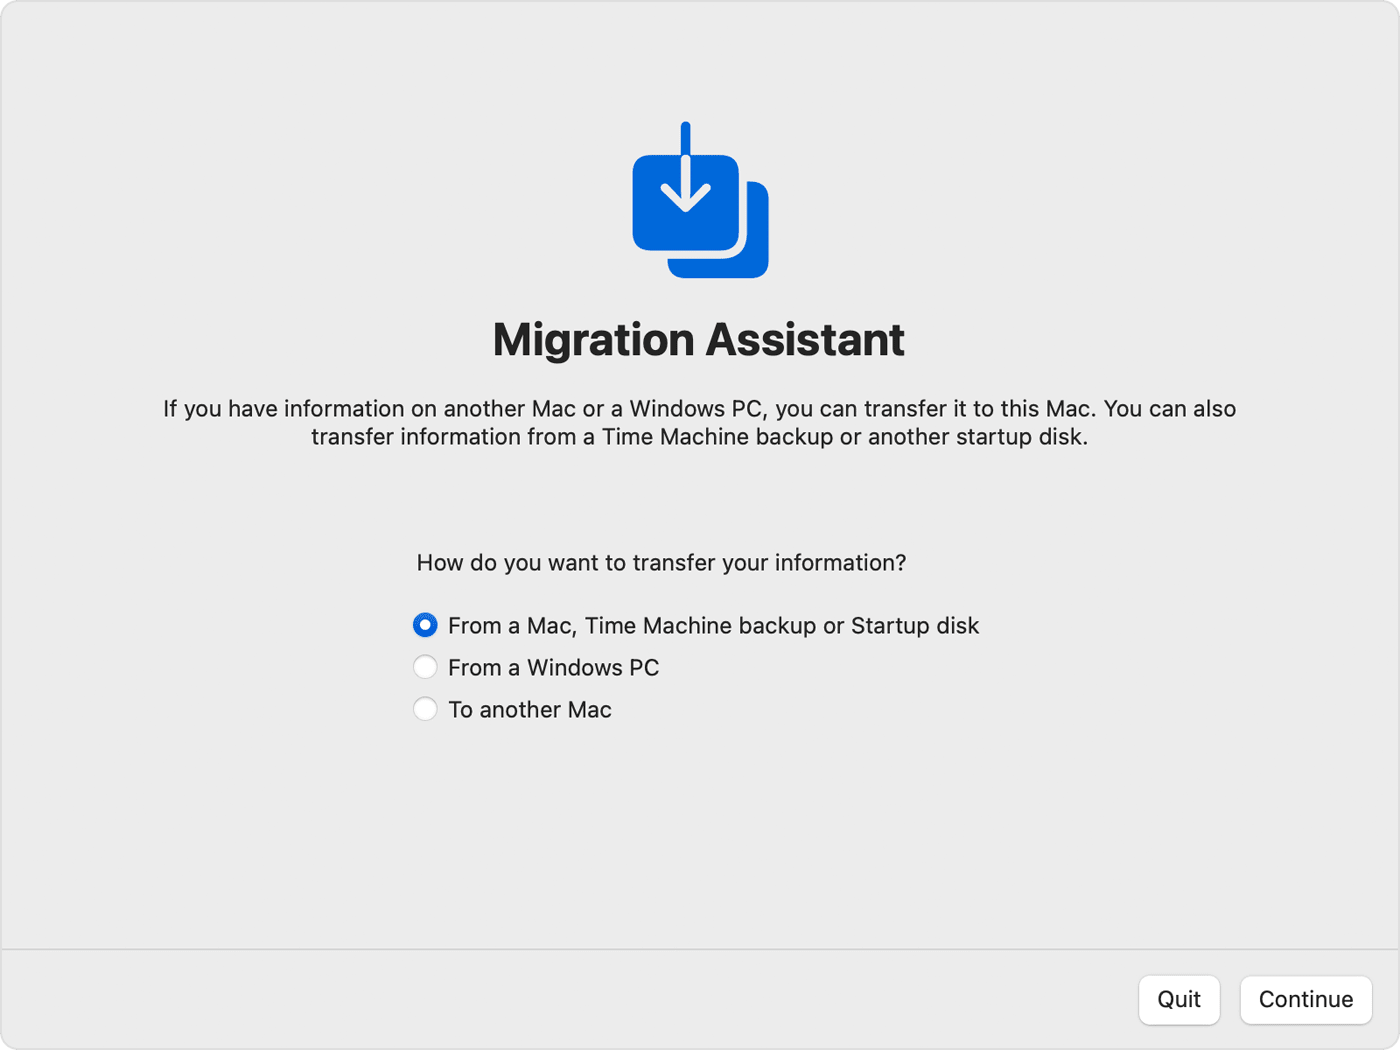
Understanding Migration Assistant
Migration Assistant is Apple’s built-in tool that helps users transfer data between Mac computers and from Windows PCs to Macs. This utility simplifies the process of setting up a new device by transferring important files, settings, and applications from an existing system.
What Is Migration Assistant?
Migration Assistant is a pre-installed utility on all Mac computers that facilitates the transfer of user data, applications, and settings from one computer to another. It eliminates the need for manual file transfers when upgrading to a new Mac or adding a secondary computer to your workflow.
The tool can transfer user accounts, applications, documents, music, photos, and other important files. Migration Assistant also works with Windows PCs, allowing users to bring their Windows data to macOS.
Apple designed this utility to minimize downtime when transitioning between computers. The application is accessible through the Utilities folder within the Applications directory on any Mac, making it easy to find when needed.
How Migration Assistant Works
Migration Assistant establishes a connection between two computers through various methods including Wi-Fi, Ethernet cable, or Thunderbolt cable. The fastest transfers typically occur through direct cable connections, which Apple recommends for large data transfers.
When launched, the utility scans for other computers running Migration Assistant on the same network. It can also connect to Time Machine backups if the user chooses to restore from a backup.
The process requires both computers to be awake and not in sleep mode. Users must authenticate with administrator credentials on both machines to proceed with the transfer. Migration Assistant provides options to select specific categories of data to transfer, allowing for customization of the migration process.
Benefits of Using Migration Assistant
Migration Assistant saves significant time compared to manual transfers, especially for users with large amounts of data. The automated process reduces the risk of forgotten files or settings that might otherwise be overlooked when manually moving to a new system.
The tool preserves user accounts exactly as they were configured on the original computer. This includes passwords stored in Keychain, email accounts, and desktop arrangements.
Application transfers include preferences and settings, allowing users to continue working with familiar software configurations. Migration Assistant handles complex file permission structures correctly, preventing potential issues that could arise from manual transfers.
For businesses, Migration Assistant reduces IT support requirements during device upgrades. The streamlined process minimizes productivity loss when transitioning to new hardware, making it valuable for both individual users and organizations.
Preparing for Migration
Successful data migration between Macs requires proper preparation before launching Migration Assistant. Taking these preparatory steps significantly increases the chances of a smooth transfer process and helps avoid common connection problems.
Checking System Requirements
Migration Assistant works best when both Macs meet certain compatibility requirements. The source and destination Macs should ideally run macOS versions that are not too far apart.
While Migration Assistant can work across different macOS versions, keeping both systems reasonably current minimizes potential issues. The new Mac must have enough storage space to accommodate all the data being transferred.
Users should verify available storage by clicking the Apple menu and selecting “About This Mac” to view storage information. If space is limited, consider removing unnecessary files from the old Mac before migration or have an external drive ready for overflow data.
Updating Software on Both Macs
Before starting migration, update both Macs to their latest compatible operating system versions. Open System Preferences (or System Settings in newer macOS), then click on “Software Update.”
Install all available updates for both machines. This ensures Migration Assistant has the most recent bug fixes and compatibility improvements.
Sometimes older Macs can’t run the latest macOS, but users should still install the most recent updates available for their specific hardware. Updating both devices helps synchronize their communication protocols and reduces connection problems.
After updates, restart both Macs completely before proceeding with migration.
Setting Up the Old Mac
The old Mac needs specific preparation to become discoverable by Migration Assistant. First, ensure both Macs are signed into the same Wi-Fi network with strong signals.
Turn off any VPN services or custom network settings that might interfere with direct communication. Open System Preferences and check that the firewall settings won’t block Migration Assistant.
If using firewall software, add Migration Assistant to the allowed applications list. Disable any third-party security software temporarily, as these can sometimes prevent proper discovery between devices.
Close all running applications on the old Mac to prevent file access conflicts during transfer.
Connecting to AC Power
Both Macs must remain powered throughout the entire migration process, which can sometimes take several hours depending on data volume. Connect both devices to AC power adapters before starting.
Don’t rely on battery power even if fully charged. Migration uses significant system resources and can drain batteries quickly.
Place both computers in a cool, well-ventilated area as the process may cause increased heat output. Keep power cables secure and away from foot traffic to prevent accidental disconnections.
A sudden power loss during migration could corrupt files or cause incomplete transfers, potentially resulting in data loss.
Establishing a Connection
When using Migration Assistant, the connection method between Macs significantly impacts whether devices can find each other. Several options exist for establishing reliable connections that will allow the data transfer to proceed smoothly.
Wired Connections
Wired connections provide the most reliable and fastest method for Migration Assistant transfers. Using a Thunderbolt cable directly between two Macs offers excellent transfer speeds and stability. For older Mac models without Thunderbolt 3 ports, users can connect via Thunderbolt 2 with the appropriate adapter.
If Thunderbolt isn’t available, using Target Disk Mode is another effective wired option. This requires connecting Macs with a FireWire, Thunderbolt, or USB-C cable, then starting the source Mac while holding the T key until the Thunderbolt symbol appears.
When making wired connections, users should ensure cables are firmly connected to both devices. Loose connections can prevent Migration Assistant from detecting the other Mac, leading to the common “Looking for other computers” message that never resolves.
Wi-Fi Connections
Wi-Fi connections offer convenience but may be less reliable for Migration Assistant. Newer Macs running macOS Sierra (10.12) or later can establish a direct ad-hoc Wi-Fi connection when placed near each other with Migration Assistant running on both devices.
Both Macs must be on the same Wi-Fi network for discovery to work properly. Users should position both computers physically close to each other and to the router to strengthen signal quality.
If the source Mac cannot see the destination Mac, temporarily disabling firewalls or security software like Norton can help. Some users report success after toggling Wi-Fi off and on again on both devices without closing Migration Assistant.
Network interference can impact Wi-Fi connections. Users should minimize potential interference sources and consider using a 5GHz network band if available, as it typically has less congestion than 2.4GHz networks.
Using Ethernet for Migration
Ethernet connections offer an excellent balance of reliability and speed for Migration Assistant transfers. Users should connect both Macs to the same network router using CAT5E or CAT6 Ethernet cables for optimal performance.
For Macs without built-in Ethernet ports, Thunderbolt-to-Ethernet or USB-to-Ethernet adapters work well. When using adapters, ensure they’re fully compatible with the Mac models being used.
If Migration Assistant still can’t find the other Mac after connecting via Ethernet, users should try unplugging and reinserting the cables without closing the application. This simple troubleshooting step often resolves connection problems.
For best results when using Ethernet:
- Connect both computers directly to the router (not through switches or hubs)
- Use high-quality, undamaged cables
- Ensure network settings match on both devices
- Temporarily disable VPNs or custom network configurations
Troubleshooting Migration Assistant
When Migration Assistant fails to find another Mac, several issues might be causing the problem. Network connectivity, software compatibility, and authentication problems are the most common culprits that prevent successful data transfers.
Resolving Network Issues
Network connectivity problems often prevent Migration Assistant from detecting other Macs. Both computers should be connected to the same Wi-Fi network or directly linked via Ethernet cable.
If using Wi-Fi, try positioning both Macs closer to the router. Signal interference can prevent proper discovery. Many users report better results using a direct Ethernet connection instead of Wi-Fi.
CAT5E or CAT6 Ethernet cables provide the most reliable connection. Simply connecting both Macs to the same network isn’t always enough – sometimes firewalls block the necessary communication.
Make sure to disable firewalls on both Macs during migration. This includes both macOS built-in firewalls and any third-party security software like Norton. Check System Preferences → Security & Privacy → Firewall to ensure it’s turned off.
Migration Assistant Not Working
When Migration Assistant fails to launch or crashes during use, several troubleshooting steps can help. First, ensure both Macs are running compatible macOS versions.
Version mismatches, especially when transferring between significantly different macOS versions (like Big Sur to Monterey), can cause detection problems. Update both systems to the latest compatible versions if possible.
Restart both Macs before attempting migration again. This clears temporary system states that might interfere with the transfer process.
Check if Migration Assistant needs administrator authentication. Sometimes the app requests permission but the dialog appears behind other windows. Look for any hidden permission requests.
Try running Migration Assistant in Safe Mode. Restart the Mac while holding the Shift key to enter Safe Mode, then attempt the migration process again without third-party software interference.
Dealing With Stuck Migrations
Migration Assistant sometimes freezes during data transfer. If the progress bar seems stuck, don’t immediately cancel the operation – large data transfers may appear frozen while working.
Wait at least 30-60 minutes before assuming the process has failed. Migration Assistant often needs to build a Spotlight index of data, which takes substantial time without visible progress.
If truly stuck, force quit Migration Assistant on both Macs (press Command+Option+Escape). Restart both systems and begin the process again, potentially selecting fewer items to transfer.
Consider transferring data in smaller batches rather than all at once. Start with essential documents before moving to larger libraries like Photos or Music.
Authentication Failures
Authentication problems frequently block successful migration. Ensure both Macs use the same Apple ID or have proper permissions configured.
Check that passwords for both user accounts are entered correctly. Even a single typo can prevent successful authentication between systems.
If using an older Mac with FileVault encryption, you might need to disable FileVault before migration. Go to System Preferences → Security & Privacy → FileVault to check the encryption status.
Reset NVRAM on both Macs if authentication problems persist. Shut down the Mac, then press and hold Option+Command+P+R during startup until you hear the startup sound twice.
Try creating a temporary admin user account on both Macs with simple credentials, then use Migration Assistant between these accounts to simplify the authentication process.
Alternative Migration Methods
When Migration Assistant fails to find another Mac, users can turn to reliable alternatives that offer different approaches to transferring data. These options provide workarounds that may solve connectivity issues while maintaining data integrity during the transfer process.
Time Machine Backups
Time Machine offers a robust alternative when direct Mac-to-Mac migration fails. This built-in backup solution creates complete snapshots of a Mac’s system that can be restored to a new device.
To use Time Machine for migration, connect the external drive containing the backup to the new Mac. During setup, select “Restore from Time Machine Backup” instead of using Migration Assistant. Users can also access this option later through System Preferences if the initial setup is complete.
Time Machine provides selective restoration options, allowing users to choose specific folders or applications to transfer. This selectivity helps avoid transferring problematic files that might cause issues on the new system.
The main advantage of this method is reliability—it doesn’t require both Macs to be running simultaneously or connected to the same network. This approach works well when network connectivity problems prevent direct migration.
Using Target Disk Mode
Target Disk Mode transforms one Mac into an external hard drive, creating a direct connection for file transfers. This method bypasses networking issues that often plague Migration Assistant.
To use Target Disk Mode:
- Connect both Macs using a Thunderbolt, USB-C, or FireWire cable
- Shut down the old Mac completely
- Start the old Mac while holding the T key until the Thunderbolt symbol appears
- The old Mac’s drive will appear on the new Mac’s desktop
Once connected, users can manually copy important files or use Migration Assistant, which may work better with this direct connection. Target Disk Mode provides a wired alternative that’s more reliable than wireless transfers.
For optimal results, use newer cables—CAT5E or CAT6 Ethernet cables show better performance than older options. If transfer speeds seem slow, try disconnecting and reconnecting cables without closing applications.
Finalizing Migration
Once Migration Assistant completes the data transfer process, several important steps remain to ensure a smooth transition to your new Mac. These final stages help verify that all your information transferred correctly and set up your new device for immediate use.
Setting Up the New Mac
After data migration completes, the Setup Assistant will guide users through the final configuration steps. Users need to confirm their Apple ID, set up iCloud preferences, and enable or disable services like Find My Mac.
Setting up Touch ID (if available on the new Mac) adds an extra layer of security. Users should also verify that login options match their preferences in System Preferences > Users & Groups.
If Migration Assistant didn’t automatically transfer certain settings, users may need to manually configure display settings, network connections, or printer setups. Checking System Preferences ensures all hardware functions correctly.
Some third-party apps might require re-activation or license verification on the new Mac. This is particularly common with professional software that uses machine-specific licensing.
Verifying Data on New Mac
Checking that all data transferred correctly is crucial. Users should verify that important documents, photos, music, and other files appear in their expected locations in Finder.
Applications should be examined to ensure they launch properly. Some apps may require updates to work with the current macOS version on the new Mac. The Applications folder should be reviewed to confirm all expected software is present.
User accounts should match the original Mac’s configuration. Check that email accounts, browser bookmarks, and saved passwords transferred correctly. Mail, Safari, and system keychain items deserve special attention.
The Photos library, iTunes/Music library, and Documents folder are particularly important to verify. Calendar events, contacts, and messages history should also be confirmed if these were included in the migration.
Post-Migration Cleanup
Once everything works properly on the new Mac, users can free up space by removing any temporary migration files. These are typically found in a folder named “Transferred Items” on the desktop.
Updates should be applied to the new Mac right away. Open the App Store and check for any available software updates to ensure all applications have their latest versions compatible with the current macOS.
Some users may want to reset their old Mac to factory settings before selling or recycling it. This involves signing out of iCloud, iTunes, iMessage, and other services, then erasing the disk using macOS Recovery.
Backing up the new Mac after migration creates a restore point with the freshly transferred data. Time Machine or a third-party backup solution should be configured immediately to protect against data loss.
Additional Resources and Support
When Migration Assistant fails to find another Mac, several support avenues can help resolve the issue. Apple offers multiple troubleshooting resources specifically designed to address connectivity problems between devices during the migration process.
Consulting Apple Support
Apple Support provides comprehensive assistance for Migration Assistant issues. Users experiencing problems can contact support through multiple channels:
- Apple Support website: Contains searchable knowledge base articles about common Migration Assistant issues
- Apple Support app: Allows scheduling appointments with Apple Specialists
- Phone support: Direct technical assistance for complex migration problems
- Apple Store Genius Bar: In-person help for migration issues that can’t be solved remotely
Apple Support technicians often recommend checking that both Macs are running compatible versions. Older systems running Mavericks or OS X El Capitan may require updates before they can connect to newer macOS versions.
The support team can also help determine if third-party security software is blocking the connection between devices. They maintain current information about known compatibility issues between specific Mac models or operating system versions.
System Management Controller Reset
The System Management Controller (SMC) manages many hardware functions that can affect Migration Assistant connectivity. Performing an SMC reset often resolves connection problems:
For MacBook Pro with non-removable battery:
- Shut down the Mac
- Connect the power adapter
- Press Shift+Control+Option and the power button simultaneously for 10 seconds
- Release all keys and then press the power button to turn on the Mac
For desktop Macs:
- Shut down the Mac
- Unplug the power cord for 15 seconds
- Reconnect the power cord
- Wait 5 seconds and press the power button
An SMC reset can fix network interface issues that prevent the old Mac from discovering the new Mac. This process resets hardware systems without affecting user data, making it a safe troubleshooting step.
Running Apple Diagnostics
Apple Diagnostics (formerly Apple Hardware Test) can identify hardware problems that might prevent Migration Assistant from connecting to another Mac:
- Disconnect all external devices except keyboard, mouse, display, and Ethernet if using
- Restart the Mac while holding the D key
- Select language when prompted
- Diagnostics will run automatically (takes 2-5 minutes)
- Note any error codes displayed
Hardware issues like failing Wi-Fi cards or Ethernet ports can prevent Migration Assistant from finding other Macs. Apple Diagnostics provides specific error codes that help identify exactly which component is causing problems.
If diagnostics reveals a hardware issue, users can determine whether repair is needed before attempting migration again. For MacBook Pro models with upgradeable components, replacing a faulty network card might resolve connectivity issues.


