Streaming from a Nintendo Switch isn’t as plug-and-play as other consoles, but with the right setup, you can produce a high-quality stream that brings your favorite games—like Tears of the Kingdom, Smash Ultimate, or Splatoon 3—straight to your Twitch audience.
Since the Switch doesn’t support native Twitch broadcasting, you’ll need a few extra tools to bridge the gap between your console and the streaming platform. This guide walks you through a complete, updated process that includes setup tips, equipment recommendations, and expert-level tweaks to make your stream stand out.
What You’ll Need to Stream from a Nintendo Switch
Because the Switch lacks built-in streaming support, you’ll need a capture card and streaming software on your PC to broadcast your gameplay.
| Equipment | Purpose |
|---|---|
| Nintendo Switch (Docked model only) | Provides HDMI video output |
| HDMI Capture Card (e.g., Elgato HD60 X) | Captures gameplay and sends it to your PC |
| Computer (Windows or macOS) | Runs the streaming software (OBS/Streamlabs) |
| OBS Studio or Streamlabs | Broadcasting platform for video, audio, and overlays |
| 2 HDMI Cables | Connect Switch to Capture Card and Capture Card to TV |
| USB Cable (included with capture card) | Connects capture card to your computer |
| Microphone (optional) | For live commentary |
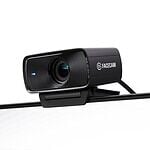
| Webcam (optional) | Adds your face to the stream |
| USB Ethernet Adapter (recommended) | Ensures stable online gameplay on the Switch |
⚠️ Note: The Nintendo Switch Lite is not compatible because it doesn’t support video output via HDMI.
Step-by-Step Hardware Setup
Here’s how to physically connect your Switch to your PC through a capture card:
Connect the Hardware
- Dock your Switch and ensure it’s powered on.
- HDMI #1: Connect from the Switch Dock to the Input on your capture card.
- HDMI #2: Connect from the Output of the capture card to your TV or monitor (this lets you game while streaming).
- USB Cable: Connect the capture card to your PC using the included USB cable.
Once connected, your PC should recognize the capture card as a video input device. If not, download the latest drivers from the card manufacturer’s website.
Configuring OBS Studio (or Streamlabs)
OBS Studio is free, open-source, and one of the most popular streaming programs available. Streamlabs is based on OBS but includes additional widgets and a more beginner-friendly interface.
Install and Launch OBS
- Download from obsproject.com
- Run the Auto-Configuration Wizard or set it up manually
Add Your Nintendo Switch as a Source
- In Sources, click the + and select Video Capture Device
- Name it something like “Switch Gameplay”
- Choose your capture card from the device list
- Set Resolution/FPS Type to Custom
- Resolution: 1920×1080
- FPS: 60
Add Audio Sources
- Your capture card should send game audio automatically
- Add a separate Audio Input Capture source if you’re using a microphone
- Monitor your audio levels in OBS and balance accordingly
Customize Your Scene Layout
- Add your Webcam as another video source
- Include Twitch chat boxes, follower alerts, or custom overlays
- Organize layout elements and test the scene before going live
Connecting OBS to Your Twitch Account
To broadcast your gameplay, you’ll need to link OBS with your Twitch account:
Option 1: Stream Key Method
| Step | Action |
|---|---|
| 1 | Visit your Twitch Creator Dashboard |
| 2 | Go to Settings > Stream |
| 3 | Copy your Primary Stream Key |
| 4 | In OBS, go to Settings > Stream |
| 5 | Select Twitch as the service and paste the key |
Option 2: Direct Account Login
OBS also allows you to link directly via OAuth:
- In OBS, go to Settings > Stream > Connect Account
- Log in with your Twitch credentials
- No need to copy/paste a stream key
Best Capture Cards for Nintendo Switch Streaming
| Capture Card | Max Resolution | PC Required | Notable Features |
|---|---|---|---|
| Elgato HD60 X | 1080p @ 60fps | Yes | Ultra-low latency, VRR pass-through, OBS optimized |
| AVerMedia Live Gamer Portable 2 Plus | 1080p @ 60fps | No (PC-Free Mode) | Records directly to SD card, plug-and-play |
| Razer Ripsaw HD | 1080p @ 60fps | Yes | Dual mix audio, sleek form factor |
Avoid knock-off or generic capture cards—even if cheaper, they often suffer from poor resolution, audio lag, or bad software compatibility.
Pro Tips to Enhance Your Twitch Stream
- Use Ethernet: Switch’s Wi-Fi can be unreliable—use a USB Ethernet adapter for stability.
- Enable Low-Latency Mode on Twitch: Helps your viewers react in near real-time during interactive streams.
- Stream Alerts & Overlays: Services like StreamElements and OWN3D offer free and paid templates to polish your presentation.
- Add Background Music: Use royalty-free music or integrate Spotify (be careful of copyright).
- Fix Audio Delay: Use OBS’s Advanced Audio Properties to add milliseconds of delay to your mic if it’s ahead of gameplay.
- Clip Highlights: Use OBS Replay Buffer or Twitch clips to save moments for TikTok or YouTube Shorts.
Key Takeaways
- Streaming involves sharing live gameplay with an audience on Twitch.
- A capture card is needed to connect the Nintendo Switch to a streaming software.
- Setting up the hardware properly is crucial before going live on Twitch.
Setting Up the Hardware for Twitch Streaming
To start streaming Nintendo Switch games on Twitch, the right connections and settings for audio and video are crucial.
Connecting Your Nintendo Switch to a Capture Card
To capture video from your Nintendo Switch, you will need a capture card like the Elgato HD60. First, ensure your Switch is seated in its dock. Connect an HDMI cable from the dock’s HDMI out to the HDMI input of your capture card. Next, using another HDMI cable, connect the capture card’s HDMI out to your TV or monitor. This connection allows you to see the game on your screen. Finally, connect the capture card to your PC or Mac using a USB cable. This should be a USB 3.0 cable to handle the data transfer effectively.
Setting up Audio and Video
After the physical connections, turn your attention to the software on your computer. Install the capture card’s software from the manufacturer’s website. This software will let you configure video and audio settings. For audio, make sure it’s set to capture both the game sound and your commentary, which typically means having a microphone connected to your computer. For video, choose the correct resolution and frame rate to match your Twitch stream’s quality requirements. These adjustments ensure clear audio for your commentary and crisp video for your viewers.


