Splitting your laptop screen allows you to multitask by displaying multiple applications side by side. This feature enhances productivity as it reduces the need to constantly switch between programs. You can easily compare documents, transfer data, and keep pertinent information visible while working on another task. Most modern operating systems on laptops offer native solutions to split the screen without the need for additional software.
Setting up a split screen is straightforward once you learn the necessary keyboard shortcuts or mouse gestures. On Windows 10 and Windows 11, for instance, you can use keyboard commands or drag and drop windows into corners for different split-screen configurations. This functionality is embedded in the system to create a seamless user experience designed for efficiency.
Mastering Split Screen on Your Laptop: A Simple Guide
Windows 10 and 11: Snap Assist to the Rescue
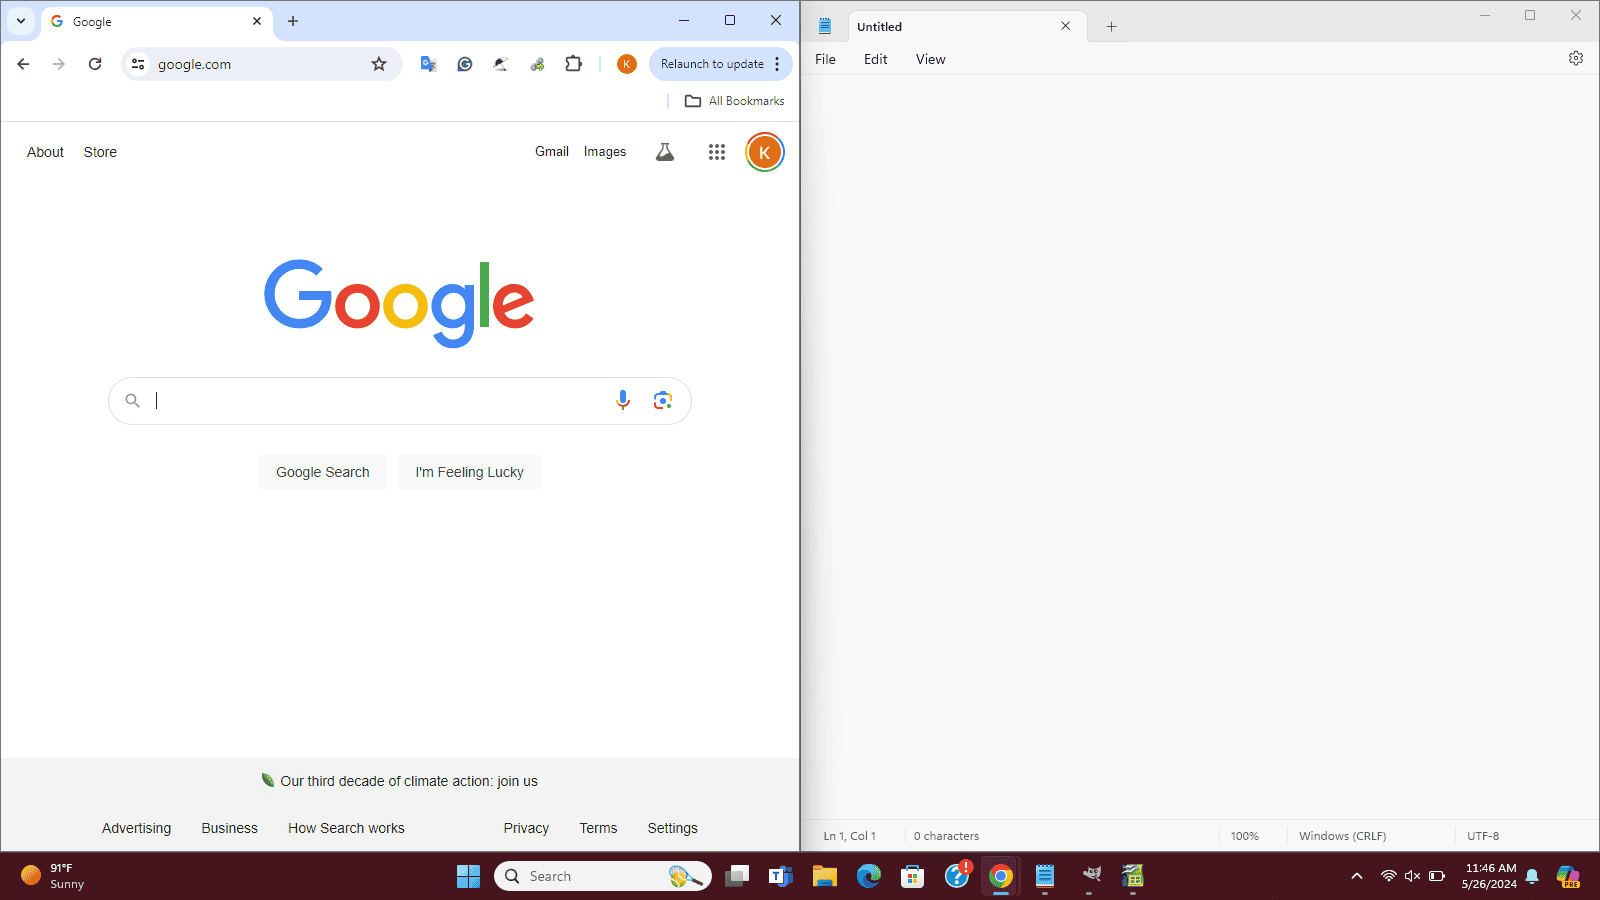
Both Windows 10 and 11 offer a handy feature called Snap Assist. To activate it, simply drag a window to the left or right edge of your screen. It’ll then “snap” into place, taking up half of your display. You can repeat the process with another window to fill the other half, effectively splitting your screen in two.
If you prefer keyboard shortcuts, Windows offers those too! Press the Windows key + left or right arrow key to snap the current window to the corresponding side. For a full-screen view, press Windows key + up arrow.
macOS: Split View for Easy Multitasking
On a Mac, Split View makes multitasking a breeze. Click and hold the full-screen button (the green circle in the top-left corner of a window). Drag the window to the left or right edge of the screen, and it’ll snap into place. Then, select another window to fill the other half of your screen.
Chrome OS: Multiple Windows Made Easy
Chrome OS lets you easily arrange multiple windows side-by-side. Simply click and hold the maximize button (the square in the top-right corner of a window). Choose whether you want the window to occupy the left or right half of the screen. You can then open another window and repeat the process for the other side.
Third-Party Apps: Additional Options for Split Screen
If you want more customization options, consider using third-party apps designed for split-screen multitasking. Some popular options include:
- Windows: PowerToys, FancyZones
- macOS: Magnet, Moom
- Chrome OS: SnapLeo
| Operating System | Built-in Feature | Keyboard Shortcut (if applicable) | Third-Party Apps (examples) |
|---|---|---|---|
| Windows 10/11 | Snap Assist | Windows key + left/right arrow | PowerToys, FancyZones |
| macOS | Split View | Click and hold full-screen button | Magnet, Moom |
| Chrome OS | Split-screen feature | Click and hold maximize button | SnapLeo |
Key Takeaways
- Splitting a laptop screen supports multitasking and enhances productivity.
- Keyboard shortcuts enable quick setup of split-screen viewing on most laptops.
- The split-screen capability is a built-in feature across various operating systems.
Executing Split Screen on Various Operating Systems
Splitting a screen helps users multitask by displaying multiple windows simultaneously. This feature enhances productivity and makes comparing information easy.
Windows Operating Systems
Windows 10 and Windows 11 provide several ways to split the screen. Users can drag a window to the screen’s edge until they see a transparent outline. This indicates the window will snap into place. For more precision, keyboard shortcuts prove useful. Pressing Win + right arrow or Win + left arrow moves the active window to the right or left half of the screen. Press Win + up arrow to place it in one of the screen’s corners. The Settings app houses these features under the System category and Multitasking options. Windows 7 and 8 also offer snapping but with more basic functionality. They lack some newer features of Windows 10 and 11 like snap layouts and corner snap for four windows.
Mac Operating Systems
Macs use a different method. They rely on the Mission Control feature or split view for multitasking with multiple windows. Users can click and hold the maximize icon in a window’s title bar to snap it to half of the screen. Dragging the window to the desired side of the screen resizes it automatically. Mac users do not have keyboard shortcuts like Windows for snapping windows but can manage multiple spaces for organizing applications.
Mobile Operating Systems
Android tablets and iPads have split-screen features for multitasking. Users tap and hold the app icon in the recent apps overview and then choose to open in split screen. The display then divides letting users interact with two apps at once. Each side of the screen can be resized with a dividing line control. Some Android phones also support this feature but it depends on the screen size.
Adapting to Different Screen Layouts and Sizes
Consider screen resolution and monitor size when using split screen. Larger screens can comfortably display more apps at once. Users can resize windows to use a third or quarter of the screen on large computer monitors. For multiple monitors, the process is similar but one can move apps across different displays. Each app snaps to its monitor’s edges or corners keeping the workflow organized. When resizing windows, ensure that content is not too cramped by adapting to the available screen real estate.