Windows 11 users may sometimes face system issues that prevent their computers from operating correctly. Recovery options are essential in these scenarios to fix problems without losing personal data. Windows 11 offers a variety of recovery tools that can help restore the system to a working state.
Creating a recovery drive is a proactive step to ensure that you can troubleshoot your system in case of failure. Windows Recovery Environment is a vital component that allows you to access recovery options even when your system cannot boot normally. Regularly updating this drive with system files can be the difference between a quick recovery and a lengthy system outage.
Reviving Your Windows 11 PC: A Step-by-Step System Recovery Guide
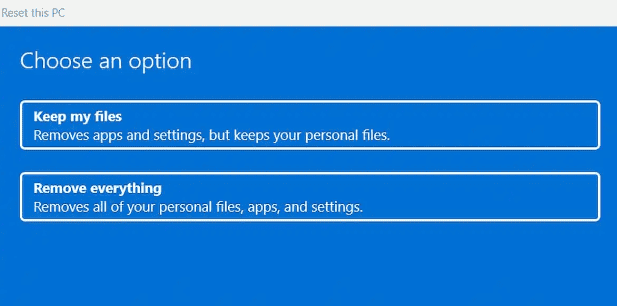
Option 1: Reset this PC (Keep my files)
This option reinstalls Windows 11 but keeps your personal files. It’s a good choice if your PC isn’t running well and you haven’t made a recent backup.
- Open Settings: Go to the Start menu and click the gear icon to open Settings.
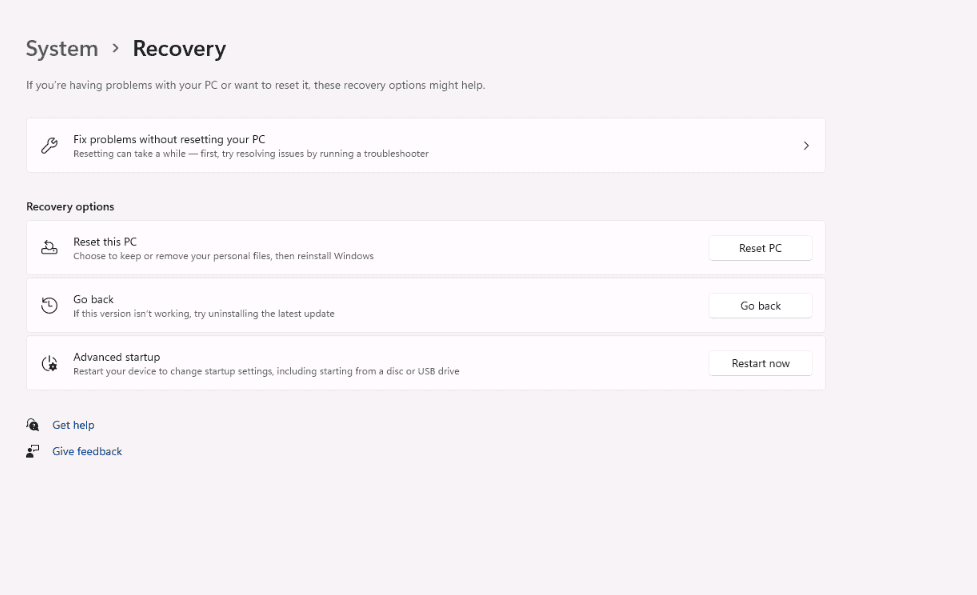
- Navigate to Recovery: In the Settings window, click on “System” and then select “Recovery.”
- Reset this PC: Under “Recovery options,” click “Reset this PC.”
- Keep my files: Choose “Keep my files” and follow the on-screen instructions to complete the reset process.
Option 2: Reset this PC (Remove everything)
This option reinstalls Windows 11 and removes all your personal files, apps, and settings. It’s a more drastic measure, but it can be helpful if your PC is infected with malware or has other serious issues.
- Follow steps 1-3 above.
- Remove everything: Choose “Remove everything” and follow the on-screen instructions.
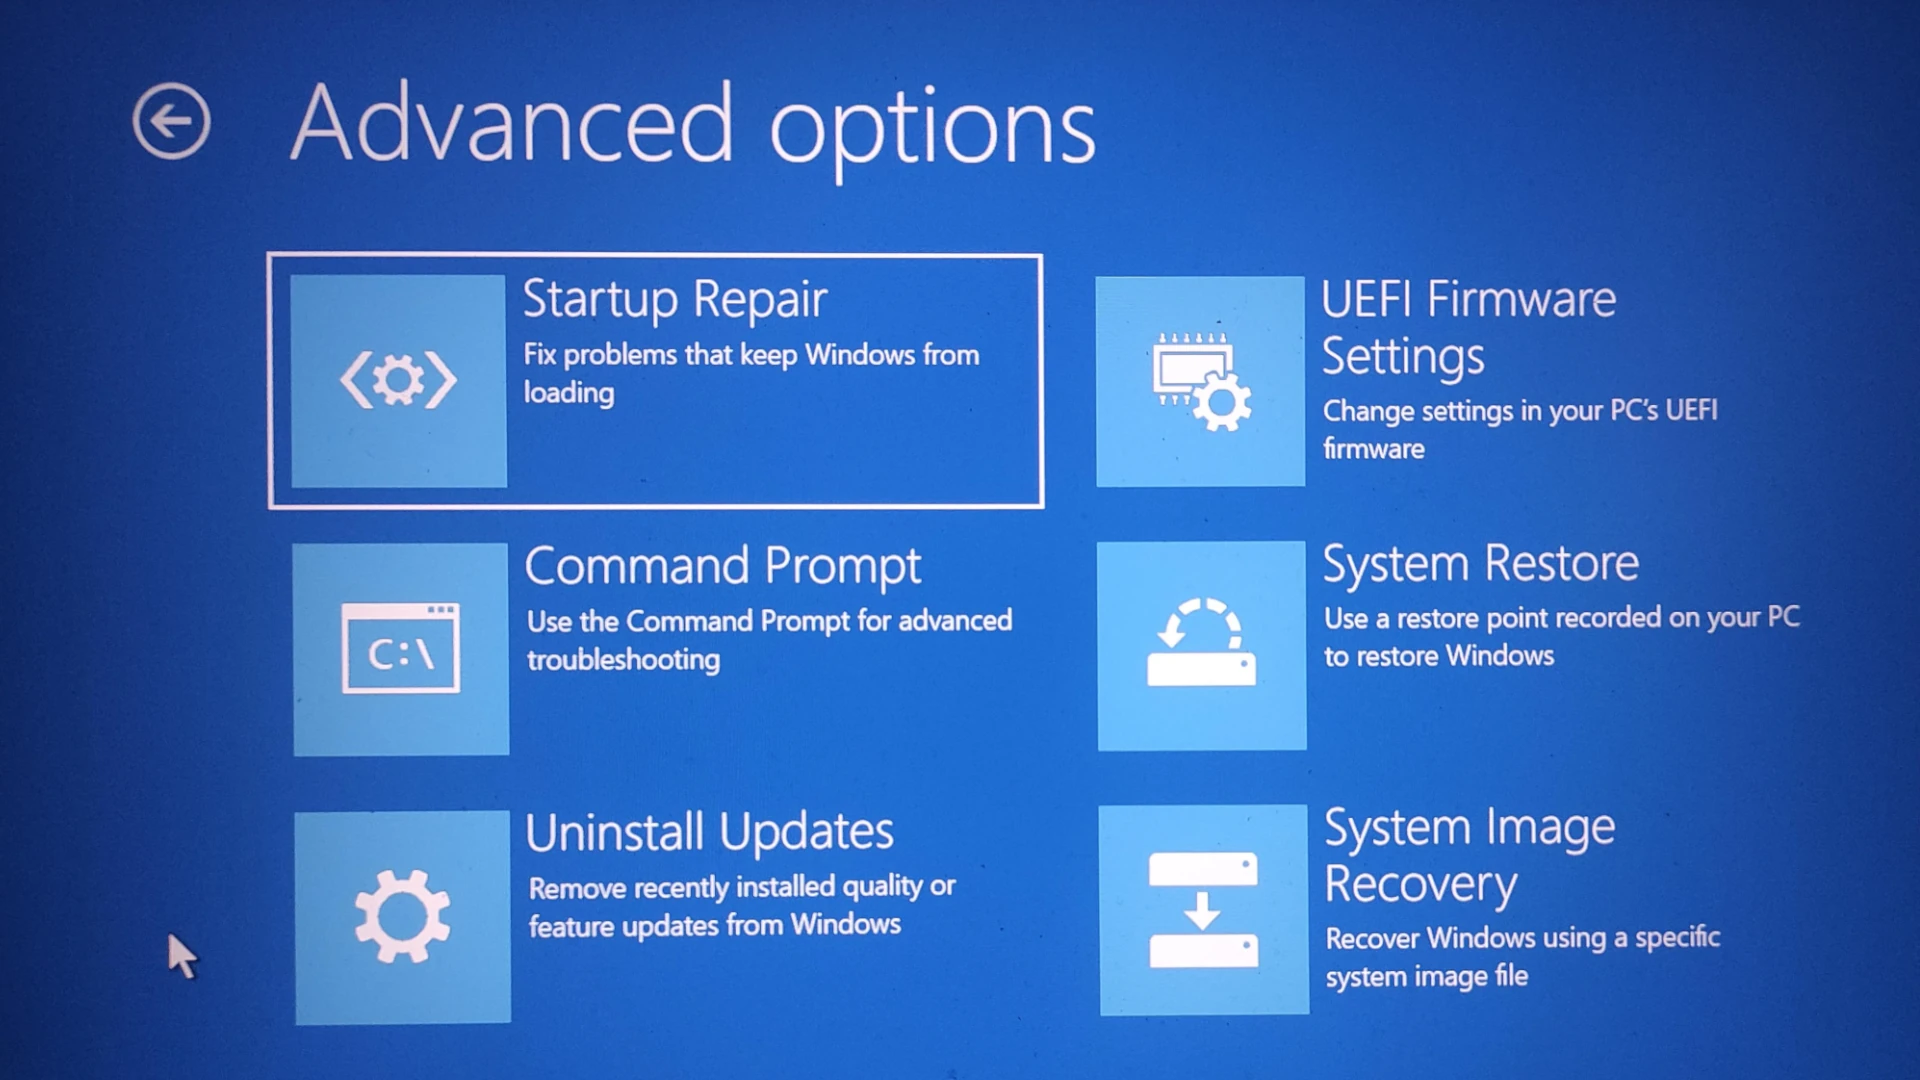
Option 3: Advanced startup (System Restore, Startup Repair, etc.)
This option provides access to more advanced recovery tools like System Restore, Startup Repair, and Command Prompt. It’s a good choice if you know what you’re doing and need more control over the recovery process.
- Open the Start menu: Click the Windows icon in the lower-left corner.
- Hold Shift and click Restart: Hold down the Shift key while clicking the Power button and then selecting “Restart.”
- Troubleshoot: Your PC will restart into the Windows Recovery Environment. Click on “Troubleshoot.”
- Advanced options: Click on “Advanced options” to access the various recovery tools.
Recovering from a Recovery Drive
If you created a recovery drive beforehand, you can use it to reinstall Windows 11.
- Connect the recovery drive: Plug the recovery drive into your PC.
- Restart your PC: Turn off your PC and turn it back on.
- Boot from the recovery drive: Your PC should automatically boot from the recovery drive. If not, you may need to change the boot order in your BIOS settings.
- Follow the on-screen instructions: The recovery process will start automatically. Follow the instructions to reinstall Windows 11.
Table: Windows 11 Recovery Options
| Option | Description | When to Use |
|---|---|---|
| Reset this PC (Keep files) | Reinstalls Windows 11, keeps personal files. | PC not running well, but personal files are not backed up. |
| Reset this PC (Remove all) | Reinstalls Windows 11, removes all personal files, apps, and settings. | PC has serious issues, malware infection, or you want a fresh start. |
| Advanced Startup | Access to System Restore, Startup Repair, Command Prompt, and other recovery tools. | You know what you’re doing and need more control over the recovery process. |
| Recovery Drive | Reinstalls Windows 11 using a recovery drive created beforehand. | You have a recovery drive and want to reinstall Windows 11 from scratch. |

Key Takeaways
- Recovery options can fix Windows 11 issues without data loss.
- Creating a recovery tool is crucial for troubleshooting.
- Windows Recovery Environment aids in restoring system functionality.
Creating and Using Recovery Tools
Creating a Windows 11 recovery drive and using recovery options can help restore a PC’s system to its default state. This helps when troubleshooting issues or when one needs to reset their PC. Below are specific steps for the preparation of recovery media, accessing the Windows Recovery Environment, and performing a system restore.
Preparation of Recovery Media
To create a Windows 11 recovery drive, a USB flash drive with sufficient storage is required. The process begins by connecting the USB drive to the PC. One must search for the Recovery Drive app and select it. A key step is to select the option to back up system files to the recovery drive. This ensures that one has everything needed for a full reinstall of Windows 11 including system files.
Accessing the Windows Recovery Environment
To use the recovery drive, insert it into the PC. Restart the PC and enter the boot menu, usually by pressing an F-key or the Esc key during startup. This leads to the Windows Recovery Environment (WinRE). From here advanced startup options are accessible. This may include resetting the PC or other troubleshooting tools.
Performing a System Restore
In the Windows Recovery Environment, users can choose to reinstall Windows 11 completely. The ‘Reset this PC’ feature allows one to keep personal files or remove everything. Another option is to use a system restore point, which brings the system back to a previous state without affecting personal files. This option is helpful if recent changes caused problems.
For each step, it’s essential that the user does not turn off their PC as this could lead to further system issues. Also, a user should ensure to back up important personal files before attempting a system restore to protect against any accidental data loss.