Encountering the “This PC can’t run Windows 11” error can be frustrating, but it’s usually solvable. This error often happens because of compatibility issues or specific hardware requirements. To fix this, you might need to enable Secure Boot and TPM 2.0 in your system’s settings. Microsoft has set strict requirements for Windows 11, including UEFI boot mode and specific security features. Make sure your device meets the minimum system requirements to avoid this error message. If your PC doesn’t meet these criteria, updating the system or performing a compatibility check may help. Upgrading hardware components like TPM chips can also resolve the issue. Read on for detailed steps to address these compatibility errors and upgrade smoothly.
Troubleshooting the “PC Can’t Run Windows 11” Error
Understanding the Error
The “This PC can’t run Windows 11” error means your computer doesn’t meet Microsoft’s minimum system requirements for the operating system. These requirements ensure optimal performance and security.
Common Reasons for the Error
- TPM 2.0: This security chip is essential for Windows 11. Check your BIOS settings to see if it’s enabled.
- Secure Boot: This security feature prevents unauthorized software from loading during startup. Ensure it’s enabled in your BIOS.
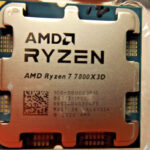
- CPU Compatibility: Windows 11 supports specific processors. Check Microsoft’s compatibility list to see if yours is included.
- RAM: Your computer needs at least 4GB of RAM.
- Storage: You’ll need at least 64GB of free storage space.
Troubleshooting Steps
- Check System Requirements: Use the PC Health Check app or visit Microsoft’s website to verify your system’s compatibility.
- Enable TPM 2.0 and Secure Boot: Enter your BIOS settings (usually by pressing a specific key during startup) and enable both features.
- Update BIOS: An outdated BIOS can cause compatibility issues. Check your motherboard manufacturer’s website for updates.
- Upgrade Hardware: If your CPU or RAM doesn’t meet the requirements, consider upgrading them.
- Bypass Requirements (Not Recommended): There are unofficial ways to bypass the requirements, but they may compromise security and stability.
Troubleshooting Table
| Issue | Solution |
|---|---|
| TPM 2.0 not enabled | Enter BIOS settings and enable TPM 2.0. |
| Secure Boot not enabled | Enter BIOS settings and enable Secure Boot. |
| Outdated BIOS | Visit your motherboard manufacturer’s website and download the latest BIOS version. Follow their instructions for updating. |
| Incompatible CPU or RAM | If your CPU or RAM doesn’t meet the requirements, consider upgrading them. |
| Not enough storage space | Uninstall unnecessary programs, delete temporary files, or move files to an external drive to free up space. |
| PC Health Check app issues | Try running the app as an administrator or use an alternative tool like WhyNotWin11 to check your system’s compatibility. |
Seeking Further Help
If you’re still unable to resolve the error, seek help from Microsoft support or a qualified technician. They can help diagnose and fix any underlying issues preventing your PC from running Windows 11.
Key Takeaways
- Enable Secure Boot and TPM 2.0 to resolve compatibility issues.
- Check that your device meets minimum system requirements for Windows 11.
- Upgrading hardware components might be necessary for compatibility.
Diagnosing Compatibility and System Requirements
Diagnosing why a PC can’t run Windows 11 involves checking the system’s hardware and firmware. The process includes using the PC Health Check app, examining TPM requirements, verifying processor and RAM specifications, and confirming BIOS, UEFI, and firmware updates.
Utilizing the PC Health Check App
The Microsoft PC Health Check App helps determine if a PC is compatible with Windows 11. This app checks the system’s specifications and ensures they meet the minimum requirements. If the app indicates incompatibility, it provides specific reasons, such as insufficient RAM or lack of TPM 2.0.
Download and run the app from Microsoft’s website. It will scan your hardware and provide a compatibility report. This quick check can save users from guessing about their system’s readiness for Windows 11.
Understanding TPM and Secure Boot Requirements
Trusted Platform Module (TPM) is essential for Windows 11. TPM 2.0 is preferred, but TPM 1.2 might also work. Check TPM status by pressing Windows + R, typing tpm.msc, and pressing Enter. This opens TPM Management. Ensure TPM is enabled.
Secure Boot is another requirement. Enter the BIOS by pressing a specific key like F2 or Del during boot. Navigate to the Security tab and enable Secure Boot. This adds an additional layer of security by ensuring only trusted software runs at startup.
Checking Processor, RAM, and Storage Specifications
Windows 11 requires specific hardware. A compatible processor (CPU) from Intel 8th Gen or AMD Ryzen 2000 series or newer is necessary. The system should have at least 4 GB of RAM and 64 GB of storage.
To check these specifications, right-click on This PC and select Properties. Under System Information, you can see details about the processor, RAM, and storage. This will help identify if your hardware needs an upgrade.
Verifying BIOS, UEFI, and Firmware Updates
Updating the BIOS or UEFI firmware can solve compatibility issues. Each motherboard manufacturer provides tools or instructions for updating firmware. Check the manufacturer’s website for the latest updates and follow their instructions carefully.
Some updates improve hardware compatibility with Windows 11. Ensure the firmware is the latest version. It’s crucial to backup data before updating firmware as the process can reset system settings. This step helps maintain hardware and software harmony.


