Bent pins on an AM5 motherboard can cause significant concern for any PC builder, as these small connectors in the CPU socket are vital for proper functionality. Even a slight misalignment can prevent the system from operating, and if a pin breaks off completely, the motherboard could become unusable. Therefore, it is important to handle the motherboard carefully and avoid causing further damage during any repair attempts.
Fortunately, a bent pin can often be fixed at home using simple tools like a credit card, a mechanical pencil, or fine-tipped tweezers to gently straighten the affected pins. The best approach is to prevent this issue in the first place. During CPU installation, it’s essential to pay close attention to the socket area, ensuring proper alignment before applying any pressure. Many builders have successfully repaired bent pins with patience and precise movements.
AM5 Socket Pin Repair
Understanding the AM5 Socket
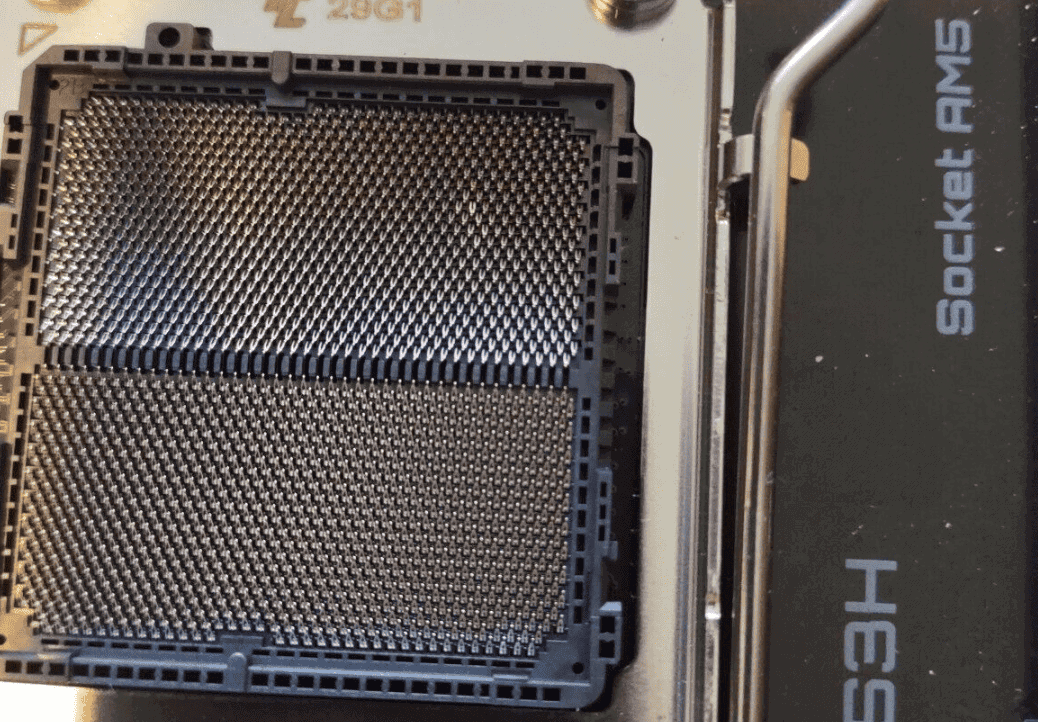
The AM5 socket, used with AMD’s Ryzen processors, is a Land Grid Array (LGA) socket. This means the pins are on the motherboard, not the CPU. This design makes the socket more vulnerable to damage. Bent pins can prevent your CPU from working, or worse, damage it. Knowing how to handle this delicate hardware is important for any PC builder or enthusiast.
Causes of Bent Pins
Bent pins happen for several reasons. Dropping the motherboard, mishandling the CPU during installation, or even static electricity can cause problems. Sometimes, the pins are bent from the factory, although this is less common.
Tools for Pin Straightening
You’ll need a few things to fix bent pins:
- Magnifying glass: Helps you see the tiny pins clearly.
- Precision tweezers or a dental pick: Used to carefully adjust the pins.
- Good lighting: Essential for clear visibility.
The Repair Process
- Inspection: Carefully examine the socket with the magnifying glass. Identify all bent pins. Note their direction and severity.
- Straightening: Gently use the tweezers or dental pick to straighten the bent pins. Be patient and work slowly. It’s easy to break a pin if you’re not careful. Try to align the bent pin with the surrounding pins.
- Testing: After straightening, carefully install the CPU. If it seats properly, you’re likely good to go. If not, re-inspect and readjust any remaining bent pins. Don’t force the CPU into the socket.
Prevention is Key
- Handle with care: Always hold the motherboard by its edges. Avoid touching the socket.
- Proper CPU installation: Align the CPU correctly with the socket markings. Don’t force it. It should drop in smoothly.
- Anti-static measures: Wear an anti-static wrist strap when handling components.
Troubleshooting Tips
- Multiple bent pins: If many pins are bent, the repair becomes more difficult. Consider professional repair in this situation.
- Broken pins: If a pin breaks, it might be possible to solder a replacement. This is an advanced technique and requires specialized tools.
- CPU not working: Even after straightening, the CPU might not work. This could indicate damage to the CPU or the motherboard.
AM5 Pin Repair Cost
The cost of AM5 pin repair varies. If you attempt it yourself, the cost is minimal (just the tools). However, if you need professional repair, expect to pay between $50 and $150, depending on the severity and the repair shop.
| Repair Method | Pros | Cons |
|---|---|---|
| DIY | Low cost, control over the process | Risk of further damage, requires skill |
| Professional Repair | Higher chance of success, less risk | More expensive |
Alternative Cooling Solutions
While on the topic of CPUs and motherboards, it’s worth considering cooling solutions. Overheating can damage your CPU, so a good cooler is essential. Air coolers are a cost-effective option, while liquid coolers provide better cooling performance, especially for high-end CPUs. Choosing the right cooler depends on your budget, CPU, and how much you plan to overclock. For example, a high-TDP processor will benefit greatly from a liquid cooler to maintain safe operating temperatures. Proper cooling also extends the lifespan of your components.
Key Takeaways
- Bent pins can be fixed at home using common household tools
- Proper CPU alignment prevents pin damage during installation
- Professional repair services offer a backup solution for severe cases
Identifying and Assessing Bent Pins on AM5 Motherboards
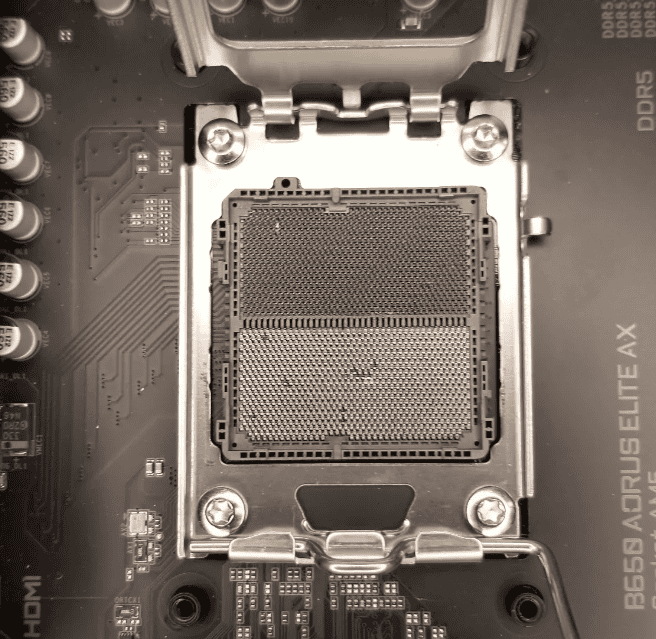
The AM5 socket contains a high density of fragile pins that require careful examination and handling. Physical damage to these pins can prevent proper CPU installation and system functionality.
Initial Inspection and Diagnosis
A magnifying glass or phone camera with zoom capabilities helps spot bent pins in the AM5 socket. Good lighting is essential – use a bright LED light at different angles to create shadows that highlight pin irregularities.
Essential inspection tools:
- Magnifying glass (5x-10x magnification)
- Bright LED flashlight
- Smartphone camera with zoom
- Clean microfiber cloth
Look for pins that deviate from the uniform grid pattern. A single bent pin can cause system failures or prevent CPU installation.
Understanding Pin Density and Structure of AM5
AM5 sockets feature 1718 pins arranged in a Land Grid Array (LGA) format. The pins are spaced mere millimeters apart, making them susceptible to damage.
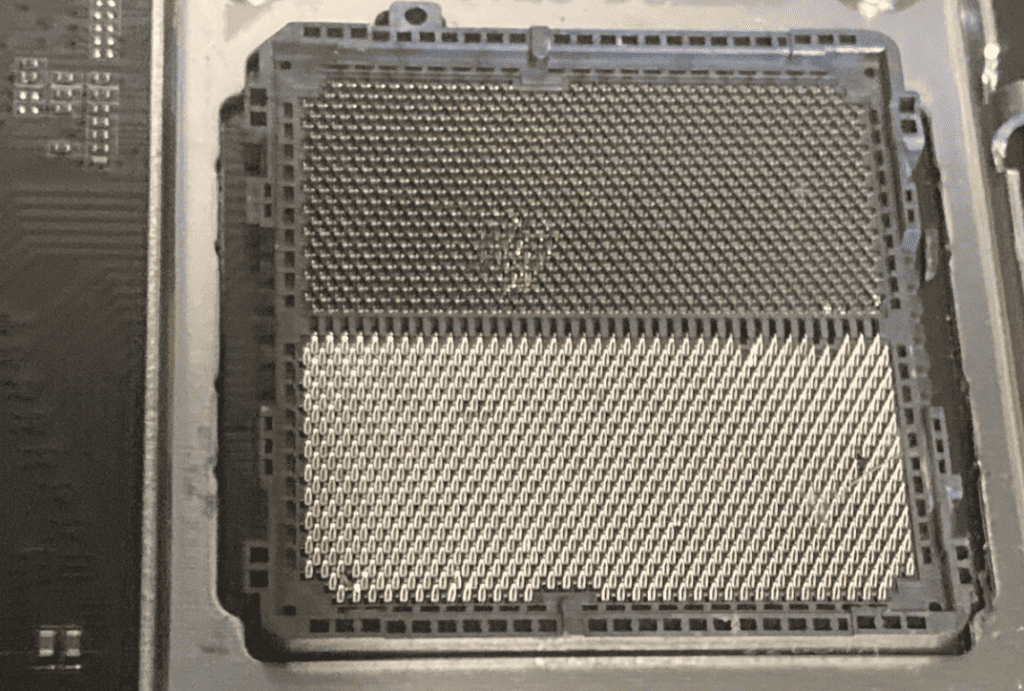
AM5 Pin Characteristics:
- Spring-loaded design
- Gold-plated contacts
- Organized in precise rows and columns
- Uniform height when properly aligned
Each pin serves a specific function, from power delivery to data transmission. The dense arrangement requires precise alignment for proper CPU contact.
Risks of Bent and Broken Pins
Bent pins can create various problems depending on their function and location in the socket. Power delivery pins pose the highest risk – damaged pins in these areas may cause system instability or component failure.
Common risks include:
- CPU failure to mount properly
- System boot failures
- Random crashes or freezes
- Potential electrical damage to CPU or motherboard
- Memory channel malfunctions
Physical force during CPU installation often causes pin damage. Dropping objects onto the socket can bend multiple pins simultaneously.
Frequently Asked Questions
AM5 motherboard pin issues require careful diagnosis and repair techniques to avoid permanent damage to expensive components. Proper tools and methods make the difference between a successful fix and a costly replacement.
How can I identify bent pins on an AM5 motherboard?
Visual inspection with bright lighting reveals misaligned pins in the CPU socket. A magnifying glass helps spot pins that deviate from the uniform grid pattern.
The pins should form straight rows at consistent heights when viewed from different angles. Any irregularities or pins that break this pattern indicate damage.
What steps should be taken to fix bent pins on an AM5 CPU socket?
Start by documenting the bent pins with clear photos for reference. Use a credit card or mechanical pencil to gently realign pins along their original rows.
Work slowly and methodically pin by pin. Check alignment frequently from multiple angles as corrections progress.
Is it possible for a motherboard with lightly bent pins to function correctly?
Minor pin damage may allow a system to boot and operate. The stability depends on which pins are affected and the severity of the bends.
Socket pins carry power and data signals. Bent power pins often cause boot failures while signal pin damage can lead to system instability or limited functionality.
What is the recommended method for realigning bent pins on an X670 motherboard?
Use precision tools like a jeweler’s loupe and fine-tipped tweezers. Work in a well-lit area with a steady hand and minimal distractions.
Straighten pins in small increments while checking alignment. Stop immediately if resistance increases to prevent pin breakage.
How to prevent bending pins on an AM5 motherboard when installing a CPU?
Align the CPU using the corner triangles before lowering it into place. Never force the CPU if resistance occurs during installation.
Keep the socket cover on until CPU installation. Handle the motherboard by its edges and avoid touching the socket area.
Are there any tools recommended for correcting bent pins on AM5 motherboards?
A magnifying glass or jeweler’s loupe provides essential visibility. Fine-tipped tweezers or a mechanical pencil work well for pin manipulation.
LED lighting helps spot misaligned pins. Credit cards or thin plastic tools can guide multiple pins back into position.


