AirPods get dirty with regular use. Earwax, dust, and oils from skin build up on these small devices, affecting both sound quality and hygiene. To clean AirPods properly, use a soft, lint-free cloth for the exterior surfaces and a dry cotton swab for hard-to-reach areas, avoiding water or sharp objects that could damage them.
The charging case needs attention too. Apple recommends wiping it with a dry cloth, though a slightly dampened cloth with isopropyl alcohol works well for stubborn spots. Let the case dry completely before putting your AirPods back inside. This simple maintenance prevents dirt buildup that could interfere with charging connections.
For AirPods Max, the cleaning process differs slightly. These over-ear headphones have more surface area to clean. Wipe them down with a slightly damp lint-free cloth, followed by a dry cloth to remove any moisture. Regular cleaning keeps your AirPods looking and sounding their best.
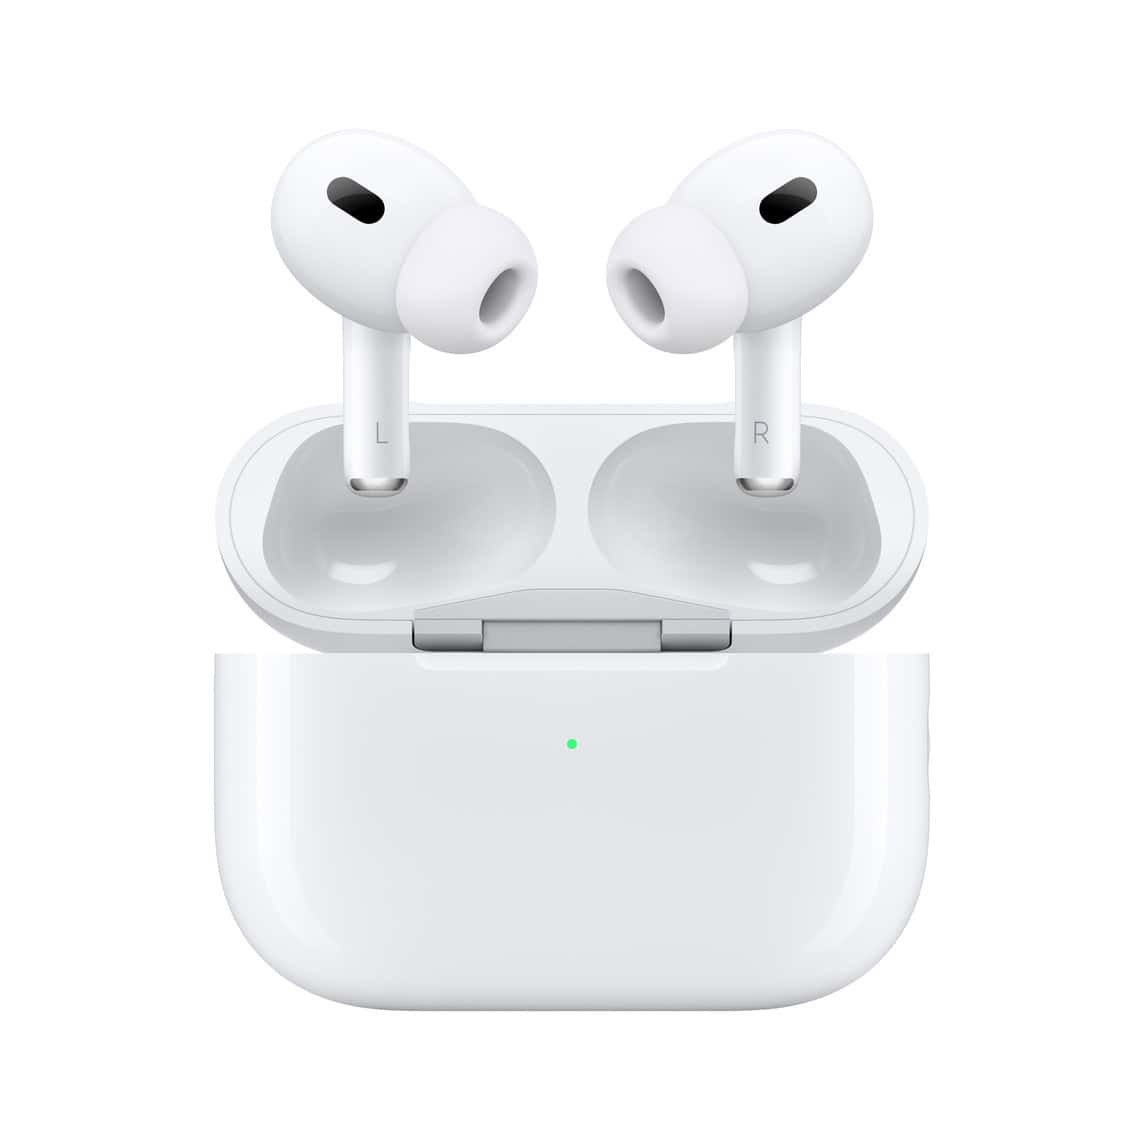
How to Clean AirPods & AirPods Pro
Cleaning your AirPods regularly can help maintain their sound quality and longevity. Here’s a step-by-step guide to safely clean your AirPods, AirPods Pro, and AirPods Max:
What You’ll Need:
- Lint-free, microfiber, or dry cloth
- Cotton swabs
- Soft-bristled brush or toothbrush
- Toothpick or SIM ejector tool (optional)
- 70% isopropyl alcohol (for disinfecting)
- Dry cotton swabs or Blu-Tack (to remove debris)
Step-by-Step Cleaning:
1. Clean the Ear Tips & Mesh Grille
- Use a soft, dry brush (or a toothbrush) to gently remove dirt and earwax from the speaker mesh.
- For AirPods Pro, remove the silicone ear tips and rinse them with water. Dry them completely before reattaching.
2. Wipe Down the AirPods
- Use a dry, lint-free cloth to wipe the body of the AirPods.
- If there’s dirt or grime, dampen the cloth slightly with 70% isopropyl alcohol (don’t oversaturate).
- Avoid getting moisture into any openings.
3. Clean the Charging Contacts
- Use a dry cotton swab to remove any dust or grime inside the charging port.
- If needed, use a toothpick (or SIM ejector tool) to gently scrape away buildup in hard-to-reach areas.
How to Clean AirPods Case
What You’ll Need:
- Lint-free cloth
- Cotton swabs
- Soft brush
- 70% isopropyl alcohol
- Toothpick (for deep cleaning crevices)
Step-by-Step Cleaning:
1. Wipe the Exterior
- Use a soft cloth to wipe down the case.
- If there are stubborn stains, lightly dampen the cloth with isopropyl alcohol.
2. Clean the Inside & Charging Port
- Use a soft brush or cotton swab to clean the interior, especially around the charging connectors.
- Be careful not to damage the metal contacts.
- To clean the Lightning or USB-C port, use a toothpick or dry brush to remove any lint or debris.
How to Clean AirPods Max
If you have AirPods Max (Over-Ear), follow these steps:
1. Remove & Wash the Ear Cushions
- Detach the magnetic ear cushions and wipe them with a damp cloth.
- If necessary, clean them with a mild soap and water solution and let them dry.
2. Wipe the Headband & Exterior
- Use a damp, lint-free cloth to clean the headband and ear cups.
- Avoid excess moisture near mesh areas.
3. Clean the Digital Crown & Charging Port
- Use a cotton swab or soft brush to remove dust.
- If needed, use a small amount of isopropyl alcohol to disinfect.
Additional Cleaning Tips
✅ Do NOT use compressed air, as it can damage the mesh.
✅ Never submerge your AirPods in water.
✅ Avoid household cleaners like bleach or hydrogen peroxide.
✅ Use a small amount of isopropyl alcohol for disinfecting, but never let it seep into openings.
Keeping your AirPods clean will help improve sound quality, maintain hygiene, and extend their lifespan!
Key Takeaways
- Clean AirPods with soft, lint-free cloths and dry cotton swabs, avoiding water and abrasive materials.
- Wipe the charging case with a dry cloth or one slightly dampened with isopropyl alcohol.
- Establish a regular cleaning routine to maintain sound quality and extend the life of your AirPods.
Understanding AirPods Cleaning Fundamentals
Proper AirPods maintenance requires specific techniques and an understanding of each model’s unique design features. Regular cleaning prevents performance issues and extends the lifespan of these premium audio devices.
Importance of Regular Maintenance
AirPods accumulate debris, earwax, and oils with daily use. These substances can block speaker meshes and reduce sound quality over time. Regular cleaning prevents these build-ups from affecting audio performance.
Dirt accumulation can also impact charging connections, potentially leading to battery issues. Clean AirPods charge more efficiently and maintain optimal battery health.
Although AirPods aren’t waterproof, newer models like AirPods 3 and AirPods 4 offer some water resistance. After exposure to sweat or moisture during workouts, proper drying and cleaning are essential to prevent damage.
Apple specifically warns that substances like makeup, sunscreen, and lotions can cause skin irritations and damage the devices. Cleaning these off promptly helps maintain both the AirPods and user comfort.
Recognition of AirPods Models
AirPods models have distinct cleaning requirements based on their design. AirPods 4 and AirPods 3 feature specific mesh areas that can be safely cleaned, while other parts should be avoided.
AirPods Pro includes silicone ear tips that require separate cleaning. These tips can be removed and washed with water, while the electronic components need gentler treatment.
AirPods Max has fabric ear cushions and a headband that collects oils and sweat. These materials demand different cleaning approaches than the plastic components of standard AirPods.
Understanding which model you own determines the appropriate cleaning tools and techniques. Each generation has evolved with different materials and levels of water resistance.
Assessing AirPods Condition
Before cleaning, inspect AirPods for visible debris, discoloration, or damage. This assessment helps determine the cleaning intensity required.
Look for:
- Earwax buildup on speaker meshes
- Dust in charging case crevices
- Discoloration on white surfaces
- Sticky residue from handling
Evaluate charging performance and sound quality to identify potential internal issues. Reduced volume or muffled sound often indicates blocked speaker meshes that need cleaning.
Test microphone functionality, as debris can obstruct voice pickup. Poor call quality might signal that cleaning is necessary for optimal performance.
For heavily soiled AirPods, a more thorough cleaning approach may be needed. However, aggressive cleaning methods risk damage, so a gentle approach is always recommended initially.
Preparing for Cleaning
Before diving into the cleaning process, it’s essential to gather the right materials and set up a proper workspace to effectively clean AirPods without causing damage.
Gathering Necessary Materials
To clean AirPods properly, you’ll need several specific items. A lint-free microfiber cloth is crucial as it won’t leave fibers behind on your AirPods. This type of cloth is gentle enough to prevent scratches yet effective for removing oils and smudges.
For more detailed cleaning, cotton swabs help reach tight spaces and crevices. Some cleaning kits, like the Belkin AirPods Cleaning Kit mentioned in Apple’s support documentation, include specialized tools.
A small amount of 70% isopropyl alcohol can be useful for stubborn dirt, but it should be used sparingly and never applied directly to speakers or microphone meshes. Apply it to a cloth first, never to the AirPods directly.
Other helpful items include:
- Soft-bristled children’s toothbrush
- Small cups for water solutions
- Paper towels for drying
- Distilled water for cleaning solutions
Ensuring a Safe Cleaning Environment
Choose a well-lit, clean workspace with a flat surface. Good lighting helps spot tiny dirt particles and ensures thorough cleaning. Place a clean soft cloth on the surface to prevent AirPods from rolling away or getting scratched.
Remove any potential hazards from the area. Keep liquids at a safe distance to avoid accidental spills that could damage your AirPods. Water and electronics don’t mix well!
Turn off and disconnect your AirPods before cleaning. This prevents accidental activation during the cleaning process. Make sure your hands are clean and dry to avoid transferring additional oils or moisture to the AirPods.
Set aside enough time—rushing could lead to mistakes or incomplete cleaning. The entire process typically takes about 10-15 minutes when done properly.
External AirPods Cleaning
Regular cleaning of the outer surfaces of AirPods helps maintain their appearance and functionality. Proper external maintenance prevents dirt buildup that can affect sound quality and microphone performance.
Wiping the AirPods Exterior
To clean the exterior of AirPods, users need a few basic supplies. A lint-free cloth works best for daily cleaning and removing fingerprints. For more thorough cleaning, lightly dampen the cloth with water or use disinfecting wipes that contain 70% isopropyl alcohol.
Apple recommends avoiding excessive moisture when cleaning AirPods. Users should never submerge AirPods in cleaning agents or water.
For stubborn dirt or stains from substances like lotions, oils, or perfumes, gently wipe the exterior with a cloth slightly dampened with fresh water. Allow the AirPods to dry completely—at least two hours—before placing them back in the charging case.
The charging case can be cleaned with the same methods. A soft, dry cloth removes most dust and fingerprints from the case.
Cleaning the Microphones and Speakers
The speaker meshes and microphone openings require special attention. These small openings can collect earwax, dust, and debris that affect sound quality.
Recommended cleaning tools:
- Soft-bristled brush (like a clean children’s toothbrush)
- Cotton swabs (used dry)
- Wooden toothpick (for careful debris removal)
Gently brush across the speaker meshes to loosen debris. For AirPods 4, Apple specifically notes that users can clean only the encircled mesh areas.
When cleaning microphone openings, use light pressure. Pressing too hard can push debris further inside and damage internal components.
Never use sharp objects like needles or pins on mesh areas. These can puncture the delicate screens and permanently damage the AirPods.
For particularly dirty meshes, a very slightly damp cotton swab can help, but ensure no excess moisture enters the openings.
Internal AirPods and Case Cleaning
The interior components of your AirPods and their case require special attention to prevent audio quality issues and charging problems. Proper cleaning techniques help remove accumulated earwax and dirt while protecting delicate electronic components.
Removing Dirt and Earwax
Earwax and debris naturally collect on AirPods speaker meshes during regular use. This buildup can muffle sound quality and potentially damage the internal components over time.
To clean the speaker meshes, use a dry cotton swab with gentle, circular motions. Never apply pressure that might push debris further into the mesh. For stubborn wax, very slightly dampen the cotton swab with isopropyl alcohol, being extremely careful to avoid excess moisture.
The small microphone openings require similar attention. A soft-bristled brush, like a clean toothbrush, can effectively remove gunk from these tiny crevices. Some users find that a wooden toothpick can help with precision cleaning of stubborn debris, but extreme caution must be exercised.
For AirPods Pro or other models with removable ear tips, separate these silicone pieces and rinse them with plain water. Allow them to dry completely before reattaching.
Handling the Charging Case Interior
The charging case interior houses critical contact points that transfer power to the AirPods. When these points accumulate dirt, charging efficiency decreases.
Use a dry cotton swab to gently clean the charging contacts inside the case. These small metal areas can be identified as the points that align with the AirPods when inserted. Pay special attention to these areas, as they often collect invisible debris that affects charging.
For the deeper recesses of the case, a compressed air canister on its lowest setting can help dislodge particles without introducing moisture. Hold the case upside down while using compressed air to allow debris to fall out rather than being pushed deeper inside.
Never use liquid cleaners directly inside the case. If necessary, a very slightly dampened microfiber cloth can be used for the interior plastic surfaces, but moisture must be kept away from the charging components and hinge mechanism.
Advanced Cleaning Techniques
For thorough AirPods maintenance, specialized methods can remove stubborn buildup and sanitize earbuds properly without causing damage to delicate components.
Disinfecting Your AirPods
Isopropyl alcohol is the safest disinfectant for AirPods. Users should apply a small amount (70% concentration) to a lint-free cloth—never directly to the AirPods themselves. The cloth should be damp but not wet enough to drip.
Gentle wiping of external surfaces will kill most germs without risking moisture damage to internal electronics. Commercial disinfecting wipes specifically designed for electronics can also work effectively.
After disinfecting, AirPods need at least two hours to dry completely before returning them to their charging case. This prevents potential short circuits and extends the lifespan of the devices.
Important safety note: Never use bleach, hydrogen peroxide, or harsh household cleaners on AirPods as these chemicals can permanently damage the plastic and internal components.
Dealing with Stubborn Stains and Build-Up
For persistent ear wax buildup, a dry cotton swab works best for the speaker meshes and microphone areas. Users should apply very gentle pressure and twist rather than push to avoid forcing debris deeper into openings.
For AirPods Pro, removing the silicone tips allows for more thorough cleaning. The tips can be soaked in warm, soapy water for 30 minutes to dissolve stubborn earwax and oils.
Dried-on dirt on the AirPods body can be addressed with a slightly dampened cloth with minimal moisture. For hard-to-reach crevices where dirt accumulates, a soft-bristled brush (like a clean toothbrush) can gently dislodge particles.
Cleaning tools to avoid:
- Metal tools (can scratch surfaces)
- Sharp objects (may puncture speaker mesh)
- Abrasive materials (will damage the glossy finish)
AirPods Cleaning Do’s and Don’ts
Proper cleaning of AirPods requires using the right materials and techniques to prevent damage while effectively removing dirt and grime. Understanding what products and methods are safe will extend the life of your earbuds and maintain sound quality.
Safe Cleaning Agents and Tools
To clean AirPods effectively, use a soft, dry, lint-free cloth for the exterior surfaces. This removes most dust, fingerprints, and light dirt without risking damage to the sensitive components.
For slightly more stubborn dirt, lightly dampen the cloth with water or isopropyl alcohol (70%). Alcohol wipes designed for electronics are also safe for the outer surfaces but should be used sparingly.
Recommended tools:
- Microfiber cloths
- Cotton swabs for tight spaces
- Soft brushes (like clean makeup brushes)
- Isopropyl alcohol (70%)
For the speaker meshes, use a dry cotton swab to gently remove debris. A soft-bristled brush can help dislodge particles without pushing them further into the mesh.
Materials and Substances to Avoid
Never run AirPods under water or submerge them, as they aren’t waterproof. This can cause permanent damage to the internal electronics.
Avoid using sharp objects like toothpicks or pins. These can puncture the speaker mesh or scratch the plastic surface of your AirPods.
Never use these substances:
- Bleach (causes discoloration and damages plastics)
- Hydrogen peroxide (too harsh for electronics)
- Household detergents or soaps (leave residue)
- Strong solvents like acetone or paint thinner
- Abrasive materials like paper towels
Heat sources should also be avoided when drying AirPods. Don’t use hair dryers, as excessive heat can warp the plastic or damage internal components.
Maintaining AirPods After Cleaning
Proper maintenance after cleaning extends the life of AirPods and preserves sound quality. Regular care prevents buildup of earwax and debris that can affect performance.
Dry and Store Properly
After cleaning AirPods, allow them to dry completely for at least two hours before placing them in the charging case or using them. This prevents moisture damage to internal components.
Use a soft, lint-free cloth to gently dry any remaining moisture on the exterior surfaces. For hard-to-reach areas, a dry cotton swab can remove lingering dampness without pushing it further inside.
Never use heat sources like hair dryers to speed up drying. The natural air-drying process is safer for the delicate electronics.
Store AirPods in their charging case when not in use. The case protects them from dust, debris, and physical damage while maintaining battery charge.
Keep the charging case clean by wiping it regularly with a soft cloth. This prevents transferring dirt back to cleaned AirPods.
Regular Cleaning Schedule
Establish a weekly cleaning routine to prevent buildup. Light cleaning with a soft, dry, lint-free cloth removes oils from handling before they accumulate.
For AirPods used during workouts, wipe them immediately after use to prevent sweat damage. Moisture from perspiration can seep into openings and cause long-term issues.
Clean the ear tips (removable on some models) monthly by rinsing with water only. Avoid soap or chemicals that might damage the material. Let them dry completely before reattaching.
Inspect mesh screens regularly for debris. If sound becomes muffled, that’s a sign cleaning is needed. Use dry cotton swabs to gently clean these delicate areas without applying pressure.
Check charging contacts regularly and clean with a dry swab to ensure proper charging connection.
Troubleshooting Post-Cleaning Issues
After cleaning AirPods, users might encounter a few common problems that affect performance or connectivity. These issues are typically easy to resolve with the right approach and understanding of how AirPods function.
Addressing Reduced Audio Performance
If audio quality diminishes after cleaning, check for moisture trapped in speaker meshes. Use a soft, dry cotton swab to gently dab—never push—any remaining liquid. Allow AirPods to dry completely for 2-3 hours before using them again.
For muffled sound, inspect the speaker grilles for residual debris. Use a soft-bristled brush (like those in Apple-approved cleaning kits) to carefully remove buildup without pressing into the mesh.
Volume imbalance often occurs when one AirPod is cleaner than the other. Try this quick fix:
- Go to iPhone Settings → Accessibility → Audio/Visual
- Toggle “Mono Audio” on and then off
- Adjust the balance slider to center
If sound problems persist, check audio settings on your device. Sometimes cleaning can accidentally change volume limits or equalizer settings.
Managing Connectivity Problems
Pairing difficulties after cleaning typically stem from moisture affecting the sensors. Place AirPods in their case for at least 30 minutes to ensure they’re completely dry before attempting reconnection.
For persistent connection issues, perform a reset:
- Place AirPods in the charging case
- Hold the setup button on the back for about 15 seconds
- Wait for the status light to flash amber, then white
Bluetooth interference might increase after cleaning if residue affects the antenna performance. Keep AirPods away from other wireless devices during reconnection attempts.
If AirPods won’t charge properly post-cleaning, inspect the charging contacts in both the AirPods and case. Clean these with a dry cotton swab to remove any moisture or residue that might be blocking proper connections.


