Recording sound on Windows is a straightforward process, thanks to both built-in tools and third-party options. The Windows Voice Recorder offers a simple solution for capturing audio directly on your computer. This free app allows users to easily record lectures, conversations, and other sounds. For those looking for more advanced features, Audacity is a powerful alternative.
This open-source software enables users to record, edit, and manipulate audio files with precision. Windows 10 and 11 users can also use the Snipping Tool for screen recording with audio, which is ideal for creating tutorials or capturing online content. To achieve quality results, it’s essential to set up your recording environment properly. Choose a quiet location and select the appropriate microphone in your Windows sound settings. Be sure to test your audio levels before starting your recording session to ensure clear and balanced sound capture.

Recording Sound on Windows: A Step-by-Step Guide
Windows has built-in tools that make it easy to record audio. Whether you need to capture your voice, music, or other sounds, here’s how to do it:
Using Voice Recorder
Voice Recorder is a simple app for basic sound recording.
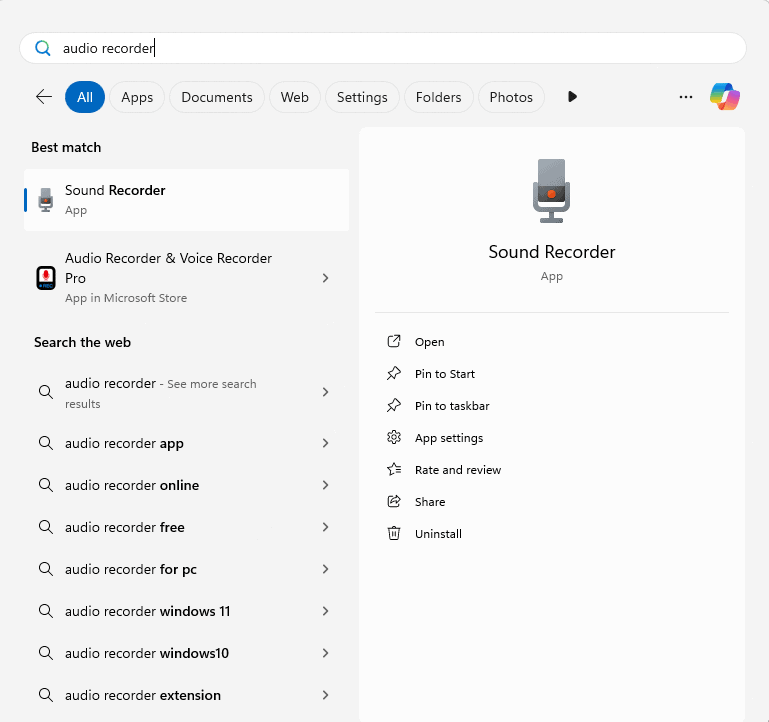
- Open Voice Recorder: Search for “Voice Recorder” in the Start menu and open the app.
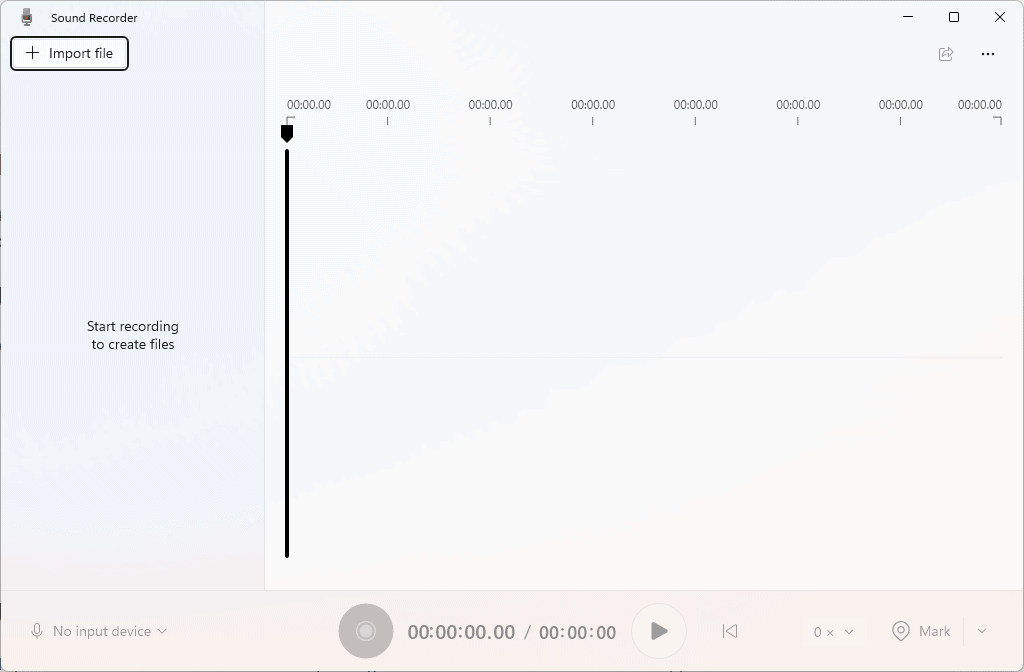
- Start Recording: Click the Record button (microphone icon) to begin recording.
- Pause/Resume: Click the Pause button to pause recording and the Resume button to continue.
- Stop Recording: Click the Stop button to end the recording.
- Save the Recording: The recording will be automatically saved with a default name. You can rename it by clicking the three dots (More options) and selecting Rename.
- Listen to the Recording: Click the Play button to listen to your recording.
Using Windows Sound Recorder (Older Versions)
If you have an older version of Windows, you might have the classic Sound Recorder app.
- Open Sound Recorder: Search for “Sound Recorder” in the Start menu.
- Start Recording: Click the Start Recording button.
- Stop Recording: Click the Stop Recording button.
- Save the Recording: Choose a file name and location to save your recording.

Advanced Recording with Audacity (Free Software)
For more advanced recording and editing, Audacity is a popular free and open-source audio editor.
- Download and Install: Download Audacity from their official website and install it on your computer.
- Select Recording Device: In Audacity, ensure the correct microphone is selected from the device toolbar.
- Adjust Levels: Click the Record button to start recording. Monitor the input levels to ensure they are not too high or too low.
- Edit and Export: Use Audacity’s editing tools to trim, adjust volume, add effects, and more. Export your recording in your desired format (e.g., MP3, WAV).
Tips for Better Sound Recordings
- Quiet Environment: Record in a quiet environment to minimize background noise.
- Microphone Position: Position the microphone close to the sound source.
- Microphone Quality: Use a good quality microphone for clearer recordings.
- Adjust Input Levels: Ensure the input levels are not too high to avoid distortion.
- Monitor with Headphones: Use headphones to monitor the recording in real-time.
Troubleshooting Sound Recording Issues
If you’re having trouble recording sound, check the following:
- Microphone Connection: Make sure your microphone is properly connected to your computer.
- Microphone Permissions: Ensure that apps have permission to access your microphone. Go to Settings > Privacy > Microphone.
- Driver Updates: Update your audio drivers to the latest version.
- Sound Settings: Check your sound settings in the Control Panel to ensure the correct input and output devices are selected.
- Hardware Issues: If you’re still having problems, there might be an issue with your microphone or sound card.
Key Takeaways
- Windows Voice Recorder provides a user-friendly option for basic audio recording
- Audacity offers advanced features for more complex audio projects
- Proper setup of recording environment and equipment improves audio quality
Setting Up Your Recording Environment on Windows
Recording sound on Windows requires careful setup and configuration. A proper environment, suitable hardware, and the right software are essential for capturing high-quality audio.
Choosing Your Recording Device
Windows PCs offer various options for recording audio. Built-in microphones are convenient but often produce lower quality sound. External USB microphones provide better audio quality and are easy to set up. For professional-grade recordings, consider XLR microphones connected through an audio interface.
USB microphones are plug-and-play devices. They work well for voice recordings, podcasts, and basic music capture. XLR microphones offer superior sound quality but require an audio interface. This setup is ideal for professional music recording or high-end voiceover work.
Headset microphones are suitable for gaming and voice calls. They isolate your voice from background noise effectively.
Audio Setup and Configuration
Proper audio setup ensures optimal recording quality. Open the Windows Sound settings by right-clicking the speaker icon in the taskbar. Select “Open Sound settings” from the menu.
In the Sound settings, choose your input device under the “Input” section. Click “Device properties” to adjust microphone levels and boost settings.
For advanced settings, click “Sound Control Panel” on the right side. In the Recording tab, select your microphone and click “Properties”. Adjust levels, enhancements, and spatial sound settings here.
Enable “Listen to this device” in the Listen tab to hear your microphone through your speakers or headphones. This helps monitor your audio in real-time.
Windows Sound Recorder Applications
Windows 10 and 11 come with built-in sound recording applications. The Voice Recorder app is simple and effective for basic audio capture.
To use Voice Recorder:
- Type “Voice Recorder” in the Start menu search bar
- Open the app
- Click the microphone button to start recording
- Click the stop button when finished
Voice Recorder saves files in M4A format. It offers basic editing features like trimming.
For more advanced recording, Windows Sound Recorder provides additional options. It allows you to choose input devices and adjust recording quality.
Recording with Third-Party Software
Third-party software offers more features and control over your recordings. Audacity is a popular free option with powerful editing tools.
OBS Studio, primarily used for video streaming, also excels at audio recording. It allows you to capture system sound and microphone input simultaneously.
EaseUS RecExperts is user-friendly and offers scheduled recordings. QuickTime, though primarily for Mac, has a Windows version that provides high-quality audio capture.
These applications often support multiple audio inputs, allowing you to record from your microphone and computer audio simultaneously.
Optimizing Sound Quality
Achieving high-quality recordings requires attention to your environment and settings. Minimize background noise by choosing a quiet location. Use acoustic treatments like foam panels to reduce echo if possible.
Position your microphone correctly. For most mics, speak directly into the top or front at a distance of 6-12 inches.
Adjust your microphone’s gain to prevent clipping. Your recording software should show audio levels. Aim for peaks around -6 dB to -12 dB for optimal quality.
Use a pop filter to reduce plosive sounds (like “p” and “b”). This improves overall audio clarity.
Enable noise reduction features in your recording software. These can help minimize unwanted background sounds.


