Moving data from a Mac hard drive to a Windows PC might seem complicated, but it can be done with the right tools and steps. Anyone can recover files from a Mac hard drive and transfer them to a Windows machine by using third-party software or special utilities that can read Mac-formatted drives. Understanding the basic compatibility differences between Mac drives and Windows systems helps make the process much easier.
People often run into trouble because Windows cannot read Mac-formatted hard drives by default. This means that extra steps or software are necessary. Learning these methods lets users save important documents, photos, and other files, even if they seem stuck on a Mac hard drive.
Recovering data from a Mac-formatted hard drive to a Windows PC can be challenging due to compatibility issues between macOS file systems (like HFS+ and APFS) and Windows. However, with the right tools and methods, it’s entirely feasible. Here’s a comprehensive guide to help you through the process:
Step-by-Step Guide to Recover Data from a Mac Hard Drive on Windows
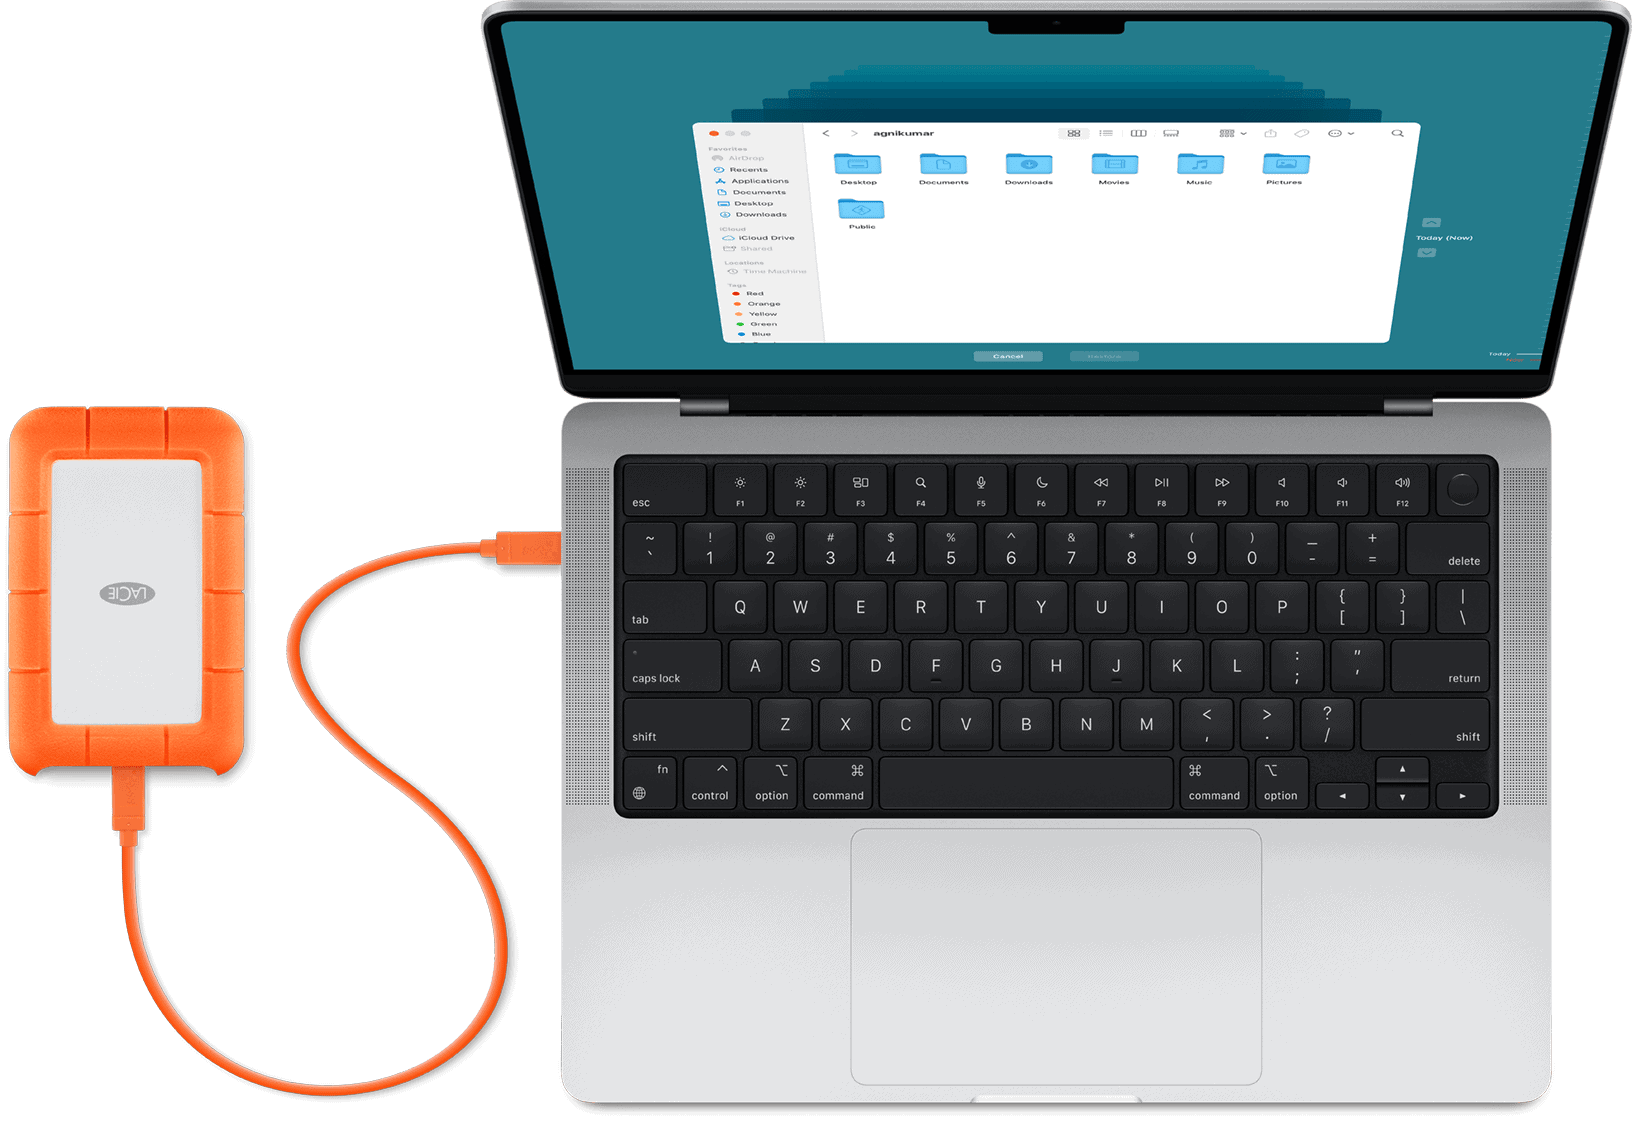
1. Connect the Mac Drive to Your Windows PC
- Use a USB or SATA-to-USB adapter to connect the Mac hard drive to your Windows computer.
- Ensure the drive powers on and is recognized by the system.
2. Understand File System Compatibility
- Mac drives typically use HFS+, APFS, or HFS file systems, which Windows doesn’t natively support.
- To access these file systems, you’ll need specialized software.
3. Use Specialized Data Recovery Software
Disk Drill
- A versatile tool that supports multiple file systems, including APFS, HFS+, NTFS, FAT32, and exFAT.
- It can detect and scan Mac drives even if they don’t appear in Windows File Explorer.
- Steps to use Disk Drill:
- Download and install Disk Drill for Windows.
- Launch the application and select the connected Mac drive.
- Initiate a scan to locate recoverable files.
- Preview and select the files you wish to recover.
- Choose a destination on your Windows PC to save the recovered files.
PhotoRec
- An open-source tool that uses data carving techniques to recover lost files from various storage devices.
- It supports over 480 file extensions and is compatible with Windows, macOS, and Linux.
- Note: PhotoRec has a text-based user interface, which might be less intuitive for some users.
TestDisk
- Often bundled with PhotoRec, TestDisk is designed to recover lost partitions and repair corrupted file systems.
- It supports a wide range of partition table formats, including the Apple Partition Map and GUID Partition Table.
4. Alternative Methods
HFSExplorer
- A free tool that allows Windows users to read Mac-formatted HFS+ drives.
- While it doesn’t offer data recovery features, it can be useful for accessing and copying files from a healthy Mac drive.
Professional Data Recovery Services
- If the drive is physically damaged or the data is highly valuable, consider consulting professional services.
- They specialize in recovering data from various storage devices, including those with T2 and M1-powered Macs.
Tips for Successful Data Recovery
- Avoid Writing New Data: Once data is lost, refrain from adding new data to the drive to prevent overwriting recoverable files.
- Use Reliable Software: Opt for reputable data recovery tools to ensure the best chance of retrieving your files.
- Regular Backups: To prevent future data loss, maintain regular backups using tools like Time Machine or cloud-based solutions.
Troubleshooting Common Issues and Advanced Scenarios
What to Do If Your Windows PC Doesn’t Recognize the Mac Drive:
Sometimes, your Windows PC might not even see the connected Mac hard drive. Here are a few quick checks:
- Check the Connection: Ensure the USB or SATA-to-USB adapter is securely connected to both the Mac drive and your Windows PC. Try using a different USB cable or a different USB port on your computer.
- Power On the Drive: Make sure the Mac hard drive is receiving power. External drives often have their own power adapters – verify it’s plugged in and switched on.
- Listen for Unusual Sounds: If you hear clicking, grinding, or other unusual noises coming from the Mac drive, it could indicate a serious hardware problem. In such cases, attempting data recovery yourself might worsen the issue, and professional help is recommended.
Understanding Read-Only Access:
Some third-party tools might mount your Mac drive in a read-only mode. This is often a safety feature to prevent accidental modifications to the data on the Mac drive during the transfer process. While you won’t be able to write new files to the drive in this mode, you can still safely copy existing files to your Windows PC.
Dealing with Slow Transfer Speeds:
Transferring large amounts of data can take time. However, if the speeds seem unusually slow:
- Check USB Standards: Ensure both your Windows PC and the adapter/enclosure support the same USB standard (e.g., USB 3.0 offers much faster speeds than USB 2.0).
- Large Number of Small Files: Transferring many small files can be slower than transferring a few large ones. This is due to the overhead involved in processing each individual file.
- Background Processes: Close any unnecessary applications running on your Windows PC that might be consuming system resources.
Advanced Data Recovery Considerations:
- RAID Configurations: If the Mac hard drive was part of a RAID (Redundant Array of Independent Disks) setup, data recovery becomes significantly more complex. The data is often striped or mirrored across multiple drives, and specialized tools or professional services are usually required to reconstruct the data.
- Encrypted Drives (FileVault): If the Mac hard drive was encrypted using FileVault, you will likely need to decrypt it on a working Mac before you can access the files on a Windows PC. Some advanced data recovery software might offer decryption capabilities, but this is not always guaranteed and can be complex.
- Solid State Drives (SSDs) and TRIM: Modern Macs often use SSDs, which utilize a feature called TRIM to optimize performance. When files are deleted from an SSD with TRIM enabled, the operating system can immediately erase the underlying data blocks, potentially making data recovery more challenging compared to traditional hard disk drives.
Choosing the Right Software: A Quick Comparison
To help you decide which software might be best for your situation, here’s a brief overview of some of the tools mentioned:
| Software | Supported Mac File Systems | Data Recovery Capabilities | Ease of Use | Free Version | Key Advantages | Potential Drawbacks |
|---|---|---|---|---|---|---|
| Disk Drill (Windows) | APFS, HFS+ | Yes | Generally Easy | Limited | User-friendly interface, supports various file systems, preview feature. | Free version has data recovery limits. |
| PhotoRec | HFS+, APFS, others | Yes | Moderate | Yes | Powerful data carving, supports many file types, cross-platform, free. | Text-based interface can be less intuitive for some users. |
| TestDisk | APFS, HFS+, others | Partition & File Recovery | Moderate | Yes | Excellent for partition recovery, often bundled with PhotoRec. | Primarily command-line interface. |
| HFSExplorer | HFS+ | No (File Access Only) | Easy | Yes | Free, allows reading and copying files from healthy HFS+ drives. | Does not offer data recovery features. |
| Paragon HFS+ | HFS+ | No (Driver for Read/Write) | Seamless | Trial | Integrates directly into Windows, providing read/write access to HFS+ drives. | Not primarily a data recovery tool, trial version limitations. |
| MacDrive | HFS+, APFS | No (Driver for Read/Write) | Seamless | Trial | Similar to Paragon HFS+, offers read/write access. | Not primarily a data recovery tool, trial version limitations. |
| EaseUS (Windows) | APFS, HFS+ | Yes | Generally Easy | Limited | User-friendly interface, often effective for various data loss scenarios. | Free version has data recovery limits. |
| MiniTool (Windows) | HFS+, APFS | Yes | Generally Easy | Limited | Offers partition management and data recovery features. | Free version has data recovery limits. |
Export to Sheets
Note: This table provides a general overview. Always check the latest features and compatibility on the software vendor’s website.
Preparing Your Windows Drive for Recovery
Before you begin recovering data, ensure the drive on your Windows PC where you plan to save the recovered files has enough free space to accommodate the data. It’s also a good practice to check the health of your Windows drive using built-in tools like chkdsk (run Command Prompt as administrator and type chkdsk /f /r) or third-party disk health utilities to ensure there are no underlying issues that could interfere with the recovery process.
Important Reminder About Formatting
While you might be tempted to format the Mac drive to a Windows-compatible file system (like NTFS or exFAT), do not do this before attempting data recovery. Formatting will erase all data on the drive, making recovery significantly more difficult, if not impossible. If you need to use the Mac drive with Windows in the future, perform data recovery first, then reformat the drive. Even a “quick format” can make data recovery more challenging.
By keeping these additional points in mind, you’ll be well-equipped to navigate various scenarios and successfully recover your valuable data from a Mac hard drive to your Windows PC. Remember, if you encounter physical damage or highly critical data loss, seeking professional data recovery services is always the safest option.
Key Takeaways
- Compatibility issues require special tools to move data from Mac to Windows.
- Proper preparation and the right software make data recovery easier.
- Advanced solutions exist for troubleshooting complicated cases.
Understanding Mac Hard Drives and Windows Compatibility
Mac and Windows computers use different types of file systems and partition schemes. This can make moving or recovering files between them confusing, especially if the file system is not supported by both.
Overview of macOS and Windows File Systems
macOS mainly uses the APFS (Apple File System) and Mac OS Extended (HFS+) formats for its hard drives. APFS is the default for newer Macs and offers features like encryption and fast directory sizing. HFS+ (sometimes called Mac OS Extended) is used for older systems.
Windows PCs usually work with file systems such as NTFS, FAT32, and exFAT. NTFS is the standard for most Windows installs, while FAT32 and exFAT are simpler file systems that can work across different operating systems.
APFS and HFS+ drives are not readable by Windows without third-party tools. In contrast, FAT32 and exFAT drives can be used by both macOS and Windows right away. For external drives you want to share between systems, using exFAT is the simplest choice.
Common Partition Schemes and Formats
Partition schemes control how a drive’s data is organized. macOS often uses the GUID Partition Table (GPT), which supports large drives and many partitions. Older Mac hardware may use Apple Partition Map (APM).
Windows PCs also favor GPT, especially for newer systems using UEFI, but older machines may use the MBR (Master Boot Record) scheme. USB drives often use MBR to ensure wider compatibility.
Popular Mac drive formats include APFS, HFS+, HFSX (a case-sensitive version of HFS+), and sometimes MS-DOS (FAT32) or exFAT. Drives formatted as APFS or HFS+ require special drivers or software for Windows to access them. By contrast, exFAT and FAT32 are cross-platform formats, but exFAT is better for large files and modern hardware.
| File System | macOS Support | Windows Support |
|---|---|---|
| APFS | Yes (default) | No (needs third-party software) |
| HFS+ | Yes | No (needs third-party software) |
| exFAT | Yes | Yes |
| FAT32 | Yes | Yes |
| NTFS | Read only (by default) | Yes |
File System Limitations and Compatibility Issues
Transferring data from a Mac hard drive to a Windows PC can be difficult because of file system differences. APFS, HFS+, and HFSX file systems are not recognized by Windows natively.
To recover or move files from a Mac drive formatted as APFS or HFS+, users need to use specialized file recovery software or utilities designed to read Mac file systems on Windows. Some tools support reading these drives, but others may only support certain file types or be read-only.
Drives formatted as exFAT or FAT32 are the most compatible between macOS and Windows, but FAT32 cannot handle files larger than 4 GB. exFAT removes this limit but may not be supported on very old computers or hardware. When planning to transfer files, it’s important to know the drive’s format and check what both systems can support natively or with help from third-party software.
Preparing for Data Recovery and Transfer
Successful data transfer starts with a healthy Mac hard drive, the right storage devices, and a proper setup for file sharing. Ensuring that drives are readable and formatted for both systems will help make the process much smoother and prevent data loss.
Assessing the Condition of the Mac Hard Drive
Check if the Mac hard drive powers on and mounts on a Mac computer. Listen for any unusual noises, like clicking or grinding, which could mean hardware problems. If the drive is not recognized, try switching cables or using a different USB port.
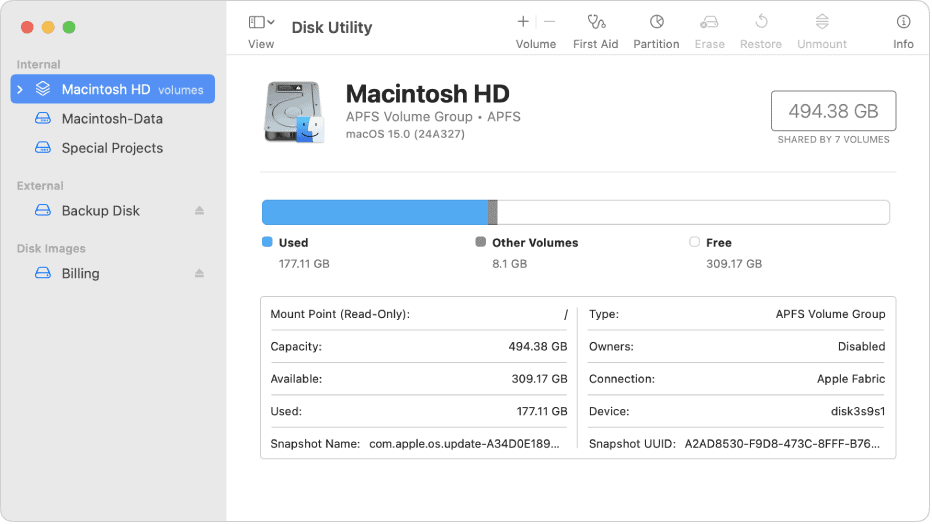
A corrupted hard drive may ask to be initialized or may run very slowly. In this case, it is best to use disk utility tools like Disk Utility on macOS to check and repair the disk. If repairs are not possible, consider professional help before trying data transfer.
It is important to avoid writing new data to the Mac HDD. This reduces the risk of overwriting lost or damaged files. Make a backup if the drive is still accessible, even if only some files are visible.
Choosing the Right External Storage Device
Pick an external drive or USB flash drive with enough free space for your files. For large backups, an external hard drive or external disk is preferred over a small USB stick. Drives with Thunderbolt or USB 3.0 connections transfer data faster, which saves time during large moves.
Choose storage formatted with exFAT or FAT32. Both Windows and macOS read and write to these formats, making them useful for transferring files between systems. Some external drives come pre-formatted for Windows (NTFS) or Mac (HFS+). Reformatting may be needed before moving files.
Match the connection type to your computer ports. For Macs, Thunderbolt or USB-C often work fastest. On a Windows PC, standard USB-A or USB-C ports are most common. Using the proper cable or adapter prevents transfer problems.
Setting Up File Sharing and Cloud Services
File sharing allows users to connect their Mac and Windows PC directly using a local network. On the Mac, enable file sharing in System Preferences > Sharing. Add folders to share and set user permission levels. On Windows, access shared Mac folders over the network using the Mac’s IP address.
Cloud services such as iCloud, Google Drive, or Dropbox provide another way to move files. Upload files from the Mac hard drive to the chosen cloud service. Download them later onto the Windows PC. These services are useful for large files or when physical drives are not available.
Using cloud storage makes cross-platform access easier. Take note of upload and download speeds, since large files may take longer to transfer over the internet. Free space on most basic cloud accounts is limited, so plan accordingly.
Formatting and Partitioning for Cross-Platform Use
Before transferring files, ensure external hard drives use a file system supported by both Windows and macOS. The best options are exFAT or FAT32. These allow read and write access from both platforms without extra drivers. To change the format, use Disk Utility on Mac or Disk Management on Windows.
Create partitions if the external drive will be used for more than one purpose. For example:
| Partition For | File System | Use Case |
|---|---|---|
| Mac Backup | HFS+ | Time Machine |
| Windows Transfers | exFAT | File transfers |
Never reformat a drive without first backing up important data, as formatting erases everything. If the external disk is already in HFS+ (Mac only) or NTFS (Windows only), reformat to a compatible system like exFAT for safest results. Using the GUID Partition Map ensures smooth mounting on both computers.
Recovering and Transferring Data from Mac Hard Drive to Windows PC
Mac hard drives often use a different file system than Windows PCs, which makes direct transfers difficult. With the right data recovery software and transfer methods, users can move, recover, and protect important files between operating systems.
Using Mac Data Recovery Software
To recover data from a Mac hard drive on a Windows PC, specialized data recovery software is often needed. Tools like Disk Drill, EaseUS Data Recovery Wizard, and MiniTool Partition Wizard can scan Mac-formatted drives and restore files. These programs support HFS+, APFS, and other Mac file systems, making them more effective than native Windows utilities.
Users start by connecting the Mac drive to the Windows computer with a USB adapter or enclosure. Once recognized, the software can scan the drive for lost files, pictures, videos, or documents. Preview features let users check files before recovering them, which saves time and space.
Most data recovery applications offer a simple interface with step-by-step instructions. However, free versions sometimes have limits on how much data can be restored. Paid versions remove these restrictions and offer more support options if there are problems transferring files from a damaged or formatted Mac drive. Learn more about this approach at How to Recover Data from Mac Hard Drive to PC.
Manually Transferring Files with an External Drive
If the Mac hard drive is in good shape and not deleted or corrupted, users can manually transfer files to a Windows PC. The first step is to check the file system on the external drive. Most Mac drives use HFS+ or APFS, which Windows cannot read by default.
To solve this, users can install third-party programs that allow Windows to read Mac file systems. Examples include HFSExplorer, Paragon HFS+, and MacDrive. Once the software is installed, the Windows PC will recognize the Mac hard drive as a normal external disk.
Users can then copy and paste files to the Windows desktop or another drive. This process is useful for moving folders, documents, or media files between systems. It’s a direct way to transfer files, but if the drive has problems or there are deleted files, a file recovery tool may still be required. Instructions and more details are available at Recover Data from Mac Hard Drive to PC.
Recovering Data from Deleted or Formatted Drives
Accidentally deleted files or formatted Mac hard drives require data recovery methods that go beyond standard file transfers. Hard drive data recovery tools designed for file recovery after deletion or formatting—like Disk Drill or EaseUS Data Recovery Wizard for Mac—can often retrieve lost data even if it’s no longer visible.
The recovery process usually involves scanning the Mac hard drive with the data recovery software. The software searches for traces of deleted or lost files, then lists recoverable items. Users select what they want to restore and choose a location on the Windows PC for saving the recovered files.
If the drive was badly damaged or reformatted with a different file system, recovery success can depend on how much the drive has been used since the data loss. It’s best to stop using the drive immediately and run the recovery process as soon as possible to avoid overwriting files. Some reliable programs and step-by-step tutorials can be found at this data recovery walkthrough.
Advanced Methods and Troubleshooting
More complex data recovery often requires specific tools and setups. Different techniques work best for different situations, such as damaged drives, deleted files, or accessing Mac-formatted drives from Windows.
Accessing Mac Drives on Windows with Third-Party Tools
When a Mac hard drive is plugged into a Windows PC, the operating system usually cannot read it because macOS uses HFS+ or APFS file systems. Third-party software like HFSExplorer can read these file systems. Users must download and install the tool, then connect the Mac drive with a USB adapter.
After launching HFSExplorer, select the connected drive and it will display all available Mac files and folders. Files can be selected and copied directly to a local Windows folder. Some data recovery programs, such as Disk Drill, also run on Windows and offer additional options to scan for deleted files or errors. For more details about using recovery software see the InsanelyMac guide.
If the drive is damaged or inaccessible, even with these tools, specialized data recovery services may be required. Avoid writing to the drive to prevent further data loss.
Using Target Disk Mode and Share Disk Mode
Some Mac models allow users to access their internal drives by using Target Disk Mode or Share Disk Mode. In Target Disk Mode, a Mac can work like an external drive when connected to another computer. To use this feature, connect the Mac to a Windows PC using a Thunderbolt or USB-C cable, then put the Mac into Target Disk Mode by holding the ‘T’ key during startup.
Share Disk Mode works if macOS Recovery is accessible on the Mac. From macOS Recovery, use the Mac Disk Utility to share the drive over the network. On the Windows PC, open File Explorer and connect to the shared disk using the Mac’s IP address.
These methods can help copy large files quickly if the Mac is still functional. They are not effective if the drive itself has failed completely.
Restoring Data from Time Machine Backups
If Time Machine backups exist, they provide a reliable way to retrieve lost data. Connect the Time Machine backup drive to the Windows PC. Since Time Machine uses HFS+ or APFS formats, Windows will need software like HFSExplorer for access.
Browse to the “Backups.backupdb” folder within the backup. Manually copy files from the backup to a local Windows folder. This method does not support restoring system settings, but it works well for recovering documents, photos, and other personal files.
If files were deleted before the last backup, specialized recovery methods or data recovery services may be needed to attempt to recover deleted files. Regular backups reduce the risk of permanent data loss.
Frequently Asked Questions
Retrieving or transferring data from a Mac hard drive to a Windows PC can be confusing due to differences in file systems. Several types of software and tools can help, but the right choice depends on the situation and the type of files involved.
What software can be used to transfer files from a Mac formatted external hard drive to a Windows PC?
Programs like HFSExplorer, Paragon HFS+, and MacDrive allow users to access and copy files from Mac-formatted drives. These tools can read HFS+ and APFS file systems, which are common on Macs. Read more about using such software to recover data from Mac drives on a PC.
How can I read a Mac-formatted drive on a Windows PC without any data loss?
To read a Mac-formatted drive safely, use software that mounts the disk as read-only or that has built-in protection against unwanted changes. HFSExplorer and Paragon HFS+ are commonly used for this. Avoid formatting the drive or writing new data to it to prevent data loss.
Is it possible to convert a Mac hard drive to a Windows-compatible file system without losing the stored data?
Converting a Mac hard drive to NTFS or exFAT without deleting data is not directly possible with most basic tools. Data must first be backed up, the drive reformatted, and the files then restored. Specialized third-party software might claim to do this, but using them carries a risk of data loss, so always create backups first.
What steps are involved in recovering data from a Mac hard drive using a Windows computer?
First, connect the Mac drive to the Windows PC. Then, use compatible software like HFSExplorer or Paragon HFS+ to browse and copy data. For drives that are corrupted, data recovery tools may be required. Here is a step-by-step overview on how to do this.
How do you format a Mac drive on Windows 10 or Windows 11 while preserving the data?
Before formatting, copy all needed files to another location using access tools that support Mac drives. Once the data is safely stored elsewhere, use Disk Management in Windows to format the drive to NTFS or exFAT. After formatting, move the data back to the drive.
Are there any free tools available to access a Mac drive from a Windows PC?
Yes, HFSExplorer is a free program that lets users view and extract files from Mac-formatted drives on Windows PCs. There are some other open source options, but they may have limited features or slower speeds. For more details, discussions on forums and community threads can provide helpful tips and suggestions, such as this forum post about recovering data from a Mac HDD using Windows.


