When you connect a laptop to a projector, you can easily share content, such as giving a presentation or watching movies on a big screen. You can do this using HDMI cables, VGA cables, or wirelessly. Connecting your laptop to a projector allows you to deliver presentations in a boardroom or enjoy a movie night with friends and family.
In this article, we will explore the various connection methods, their pros and cons, and troubleshooting tips to ensure a successful setup every time. Most laptops have built-in ports that work with projectors, making the setup process quick and easy. You may need to adjust a few settings to get the best picture quality. Some newer projectors allow wireless connections, which can be convenient for presentations and sharing screens from different devices.
Connecting Laptop to Projector: A Comprehensive Guide
Wired Connections
Wired connections are the traditional and often the most reliable way to connect your laptop to a projector. They offer stability and high image quality, which is particularly important for presentations or when streaming high-resolution content. Let’s delve into the common wired connection types:
HDMI
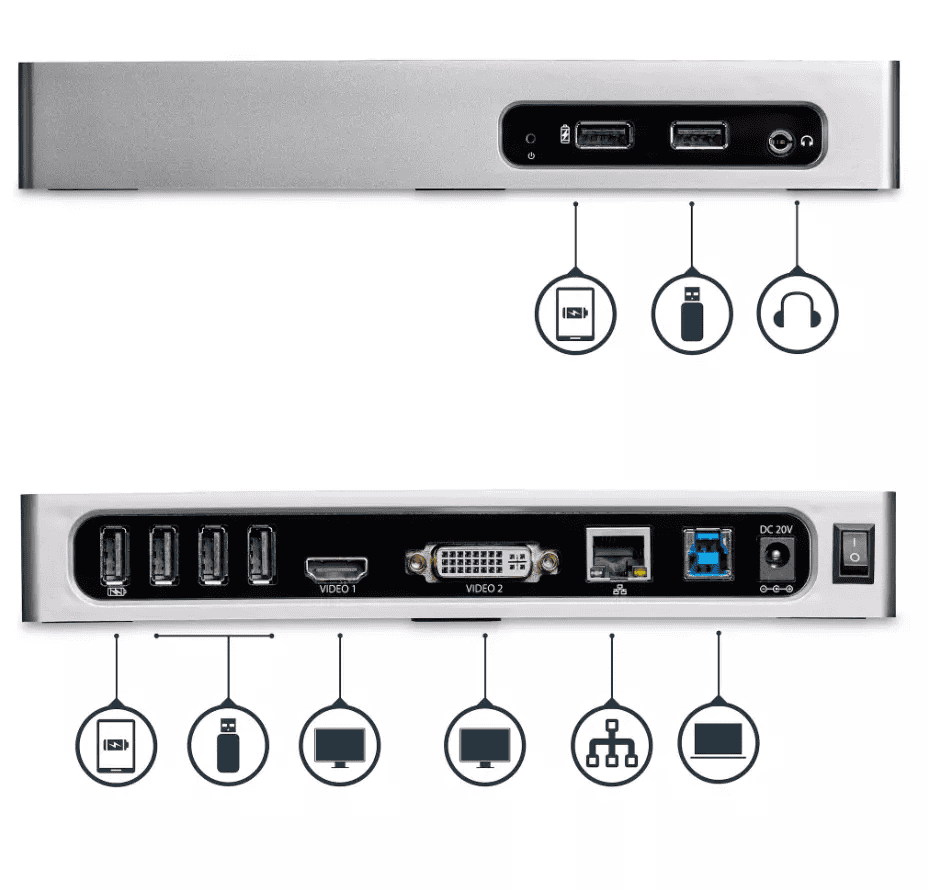
HDMI is currently the most popular and versatile option. It transmits both high-definition video and audio signals through a single cable, making it convenient and clutter-free. If your laptop and projector both have HDMI ports, you can simply connect them directly using an HDMI cable.
VGA
VGA is an older standard that is still used in some setups. It carries only video signals, requiring a separate audio cable for sound transmission. While VGA connections are less common in newer laptops, they are a viable option if your devices support them.
DisplayPort
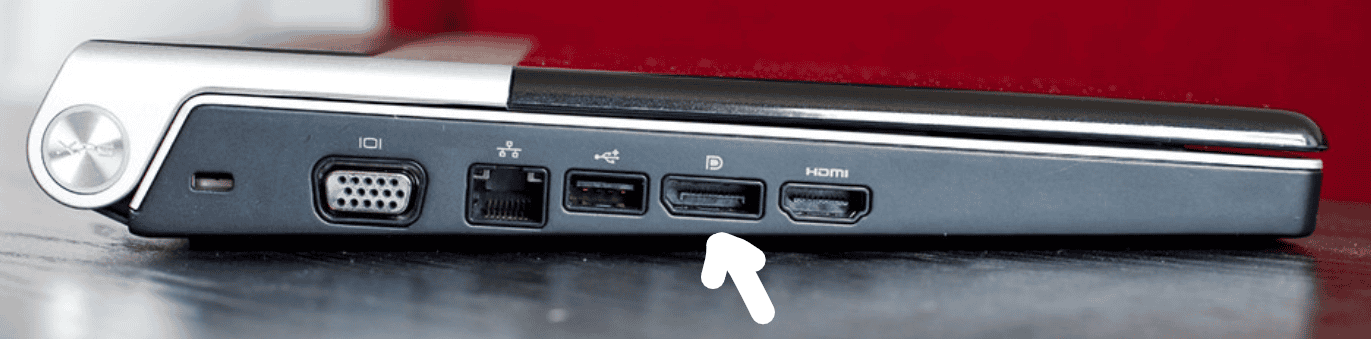
DisplayPort, like HDMI, transmits high-quality video and audio. It’s particularly prevalent in professional settings due to its support for high resolutions and refresh rates. You’ll need a DisplayPort cable or an adapter if your devices have different port types.
USB-C
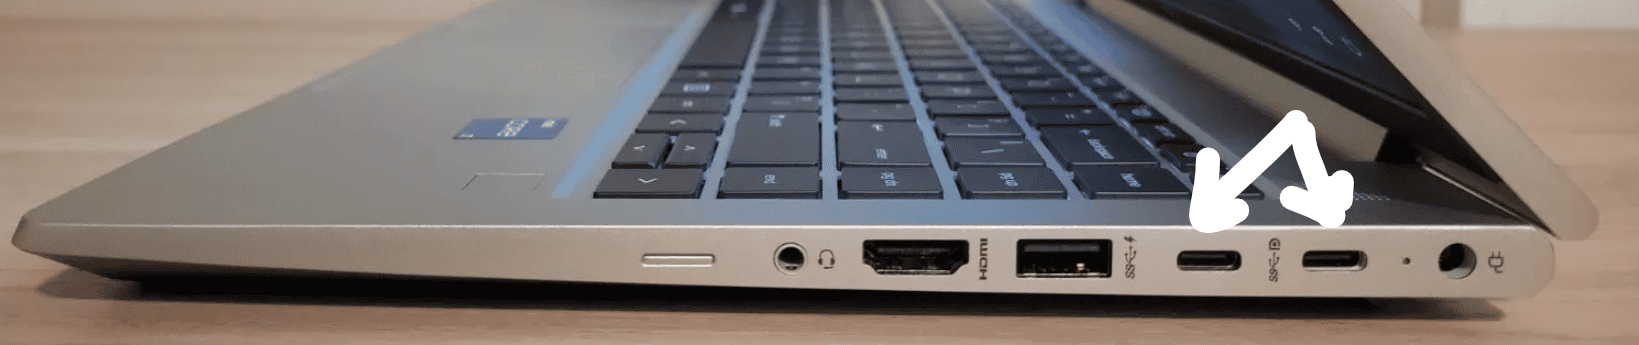
USB-C is rapidly gaining popularity due to its versatility. It can carry various types of data, including video signals. If your laptop has a USB-C port, you might need a USB-C to HDMI or DisplayPort adapter to connect to the projector.
Wireless Connections
Wireless connections offer greater flexibility and eliminate the need for cables. While they can be slightly less reliable than wired connections, they are ideal for casual settings and impromptu presentations.
Wi-Fi

Many modern projectors have built-in Wi-Fi, allowing you to connect your laptop wirelessly. This often involves screen mirroring or casting your laptop’s display to the projector.
Bluetooth
Bluetooth can also be used for connecting laptops to projectors, although less common. It’s primarily suitable for audio transmission, but some projectors might support video streaming over Bluetooth.
Troubleshooting Tips
Sometimes, connecting your laptop to a projector might encounter hiccups. Here are some quick fixes:
- Check Connections: Ensure all cables are securely plugged in at both ends.
- Select Correct Input: Use the projector’s remote or controls to select the appropriate input source.
- Adjust Display Settings: Access your laptop’s display settings to configure the projection mode (extend or duplicate) and adjust the resolution.
- Restart Devices: Try restarting both your laptop and projector.
Choosing the Right Connection for You
The ideal connection type depends on your specific needs and available equipment. Here’s a quick comparison to help you decide:
| Connection Type | Pros | Cons | Best for |
|---|---|---|---|
| HDMI | High quality video and audio, single cable | Might require an adapter | Presentations, movies, general use |
| VGA | Simple setup | Lower quality, requires separate audio cable | Older devices, basic presentations |
| DisplayPort | High resolution and refresh rates | Less common, might require an adapter | Professional settings, demanding tasks |
| USB-C | Versatile, single cable | Might require an adapter | Modern laptops, adaptable use |
| Wi-Fi | Wireless freedom, convenient | Less reliable, potential lag | Casual settings, impromptu presentations |
| Bluetooth | Wireless for audio, sometimes video | Limited video support, less common | Audio transmission, specific projector models |
Remember, having the right adapter can significantly expand your connection options. With a bit of preparation, connecting your laptop to a projector can be a breeze, enabling you to share your content effortlessly on a larger screen.
Key Takeaways
- HDMI is the simplest way to connect most laptops to projectors
- Wireless options offer more freedom of movement during presentations
- Adjusting display settings can improve the projected image quality
Preparing to Connect Your Laptop to a Projector
Before you start, you need to know your laptop’s ports and settings. You also need to pick the right cable.
Identify Available Ports
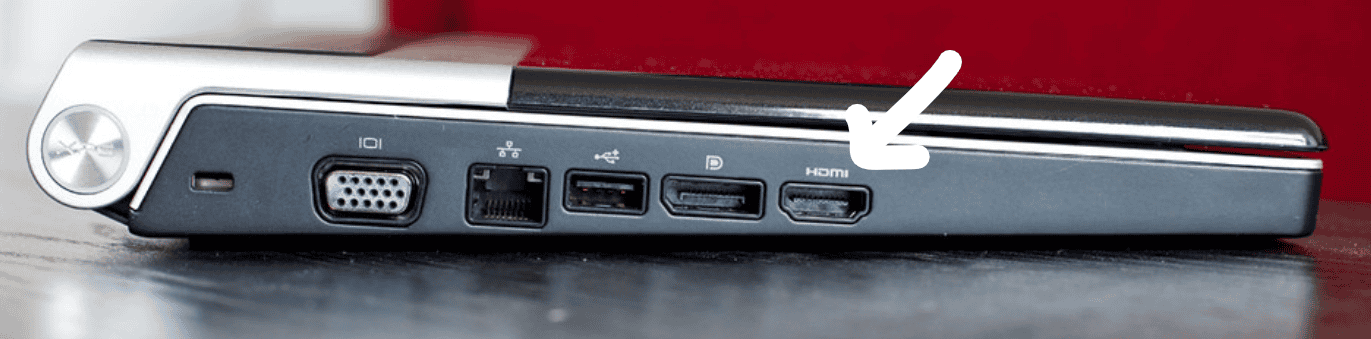
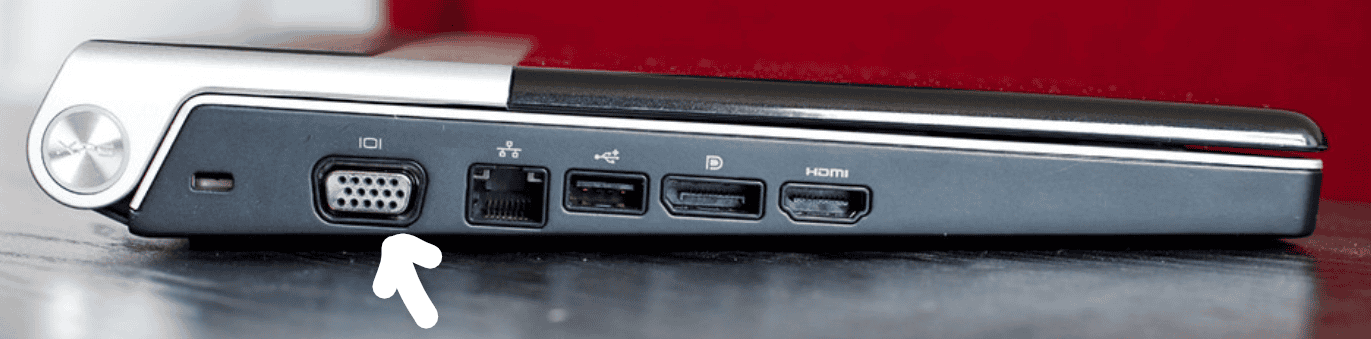
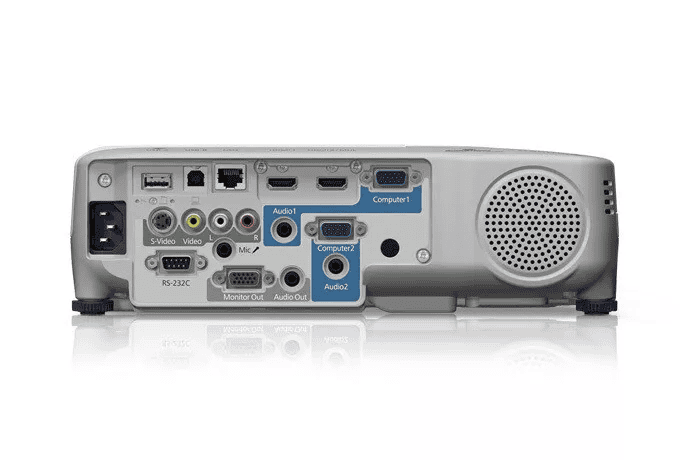
Look at the sides of your laptop. You might see HDMI, VGA, or DVI ports. HDMI is small and shaped like a trapezoid. VGA is bigger and has 15 pins in three rows. DVI is the largest and has many small pins.
New laptops often have HDMI ports. Older ones may have VGA. Some have both. If you can’t find these ports, check for a USB-C port. This small, oval port can work with an adapter.
Understand Your System Preferences
Windows and Mac laptops handle projectors a bit differently. On Windows, press the Windows key and P at the same time. This shows display options. You can choose to mirror your screen or extend it.
On a Mac, click the Apple menu and go to System Preferences. Then click Displays. Here you can set up your projector. You can mirror your screen or use the projector as a second display.
Selecting the Right Cable and Adapters
Pick a cable that fits both your laptop and the projector. HDMI is best for high-quality video and audio. VGA works too, but it’s older and doesn’t carry sound.
If your laptop and projector have different ports, you’ll need an adapter. For example, you might need an HDMI to VGA adapter. Some new laptops only have USB-C ports. In this case, you’ll need a USB-C to HDMI or VGA adapter.
Make sure your cable is long enough to reach from your laptop to the projector. A 6-foot cable works for most setups. But you might need a longer one for big rooms.
Connecting and Configuring Settings
Connecting a laptop to a projector involves setting up the physical connection and adjusting display settings. There are different methods and options to optimize the viewing experience.
Wired Connection Setup
To set up a wired connection, plug an HDMI or VGA cable into your laptop’s port. Connect the other end to the projector. Turn on both devices. On Windows, press Windows + P to open display options. Choose from:
- PC screen only
- Duplicate
- Extend
- Second screen only
For Macs, go to System Preferences > Displays. Pick “Mirror Displays” or set up an extended desktop.
Adjusting Display Settings
After connecting, you may need to adjust display settings. On Windows, right-click the desktop and select Display Settings. You can change:
- Resolution
- Orientation
- Scaling
For best results, match the projector’s native resolution. On Macs, use the Displays menu in System Preferences. Adjust the resolution and arrangement of screens as needed.
Establishing Wireless Connections
Wireless options let you connect without cables. For Windows 10 and up, use Miracast:
- Press Windows + K
- Select your wireless display
- Follow on-screen steps
Some projectors work with Chromecast. Install the Google Home app on your device. Set up the Chromecast, then cast your screen.
Macs can use AirPlay with compatible projectors. Click the AirPlay icon in the menu bar and select the projector.