Changing drive letters in Windows can be a useful way to organize your storage devices and improve system navigation. The process involves using the built-in Disk Management tool or the Settings app to assign new letters to drives. This simple task can help you create a more logical system for your hard drives, SSDs, and removable media.
Windows offers multiple methods to change drive letters. The most common approach uses Disk Management, accessible through the Start menu search or by right-clicking the Start button. For newer versions of Windows, the Settings app provides an alternative route under the Storage section.
Modifying drive letters can affect how programs and shortcuts access files. It’s important to consider potential impacts before making changes. Backing up important data is always a good practice when altering system settings.
Managing Your Drive Letters in Windows
Changing drive letters in Windows is handy for organizing your drives or fixing conflicts. Here’s how to do it:
Using Disk Management
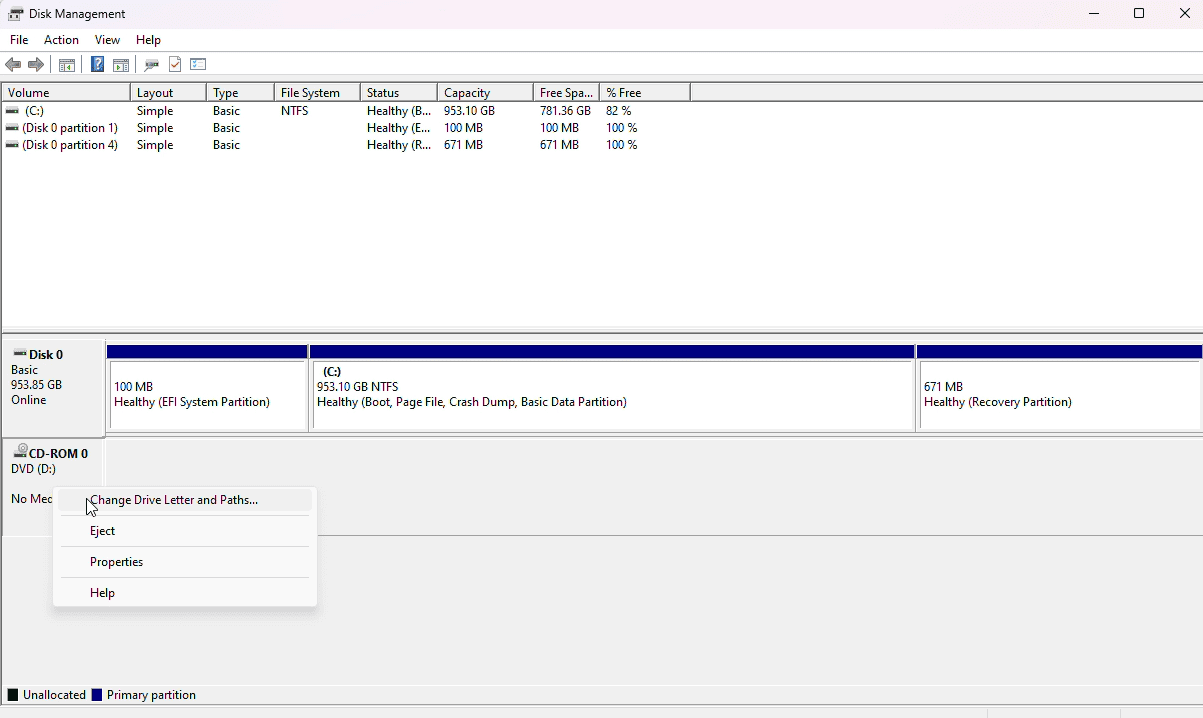
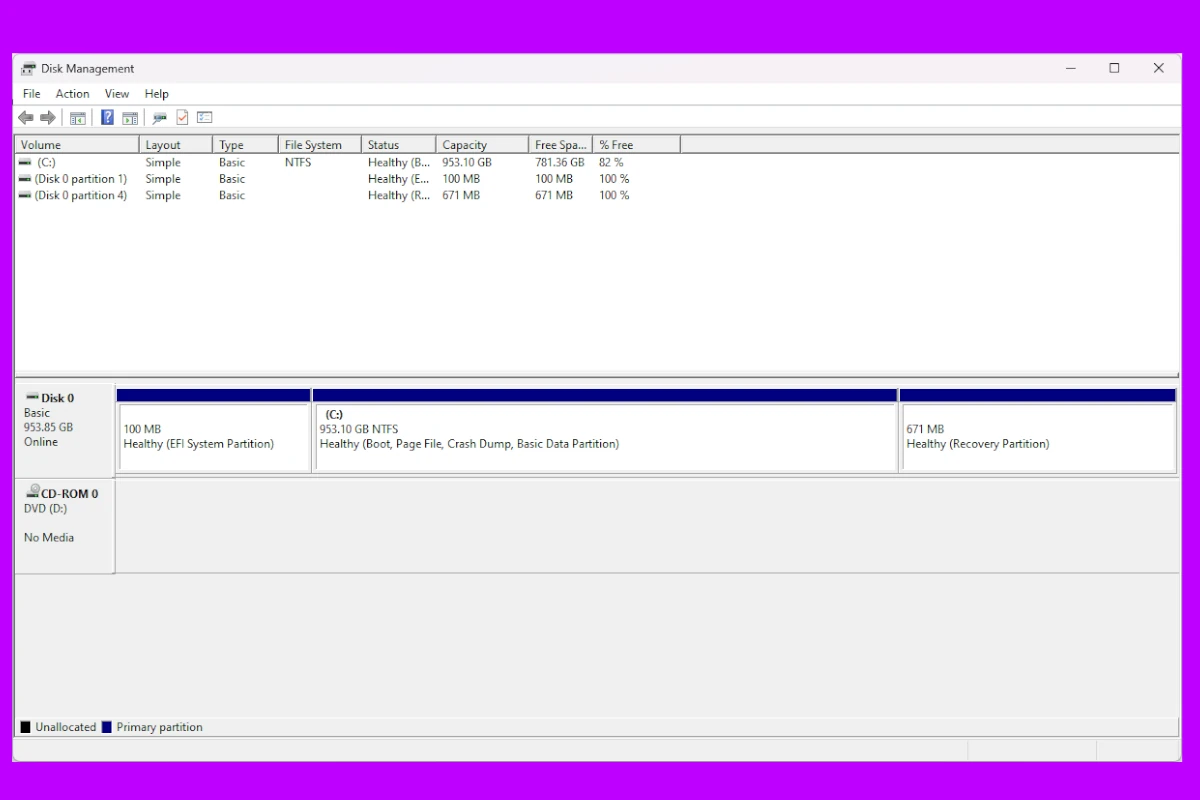
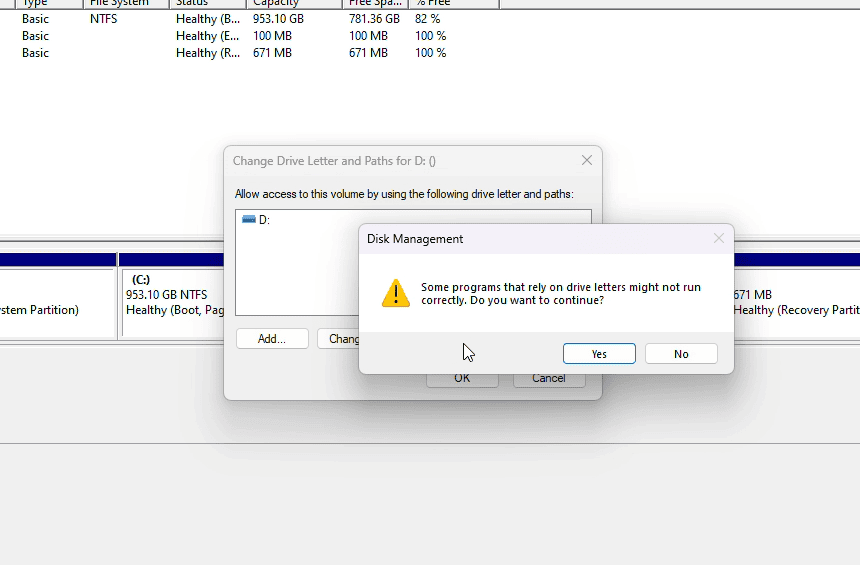
- Open Disk Management: Right-click the Start button and choose “Disk Management.”
- Find Your Drive: In the lower section, locate the drive you want to change.
- Right-click and Choose: Right-click the drive and select “Change Drive Letter and Paths…”
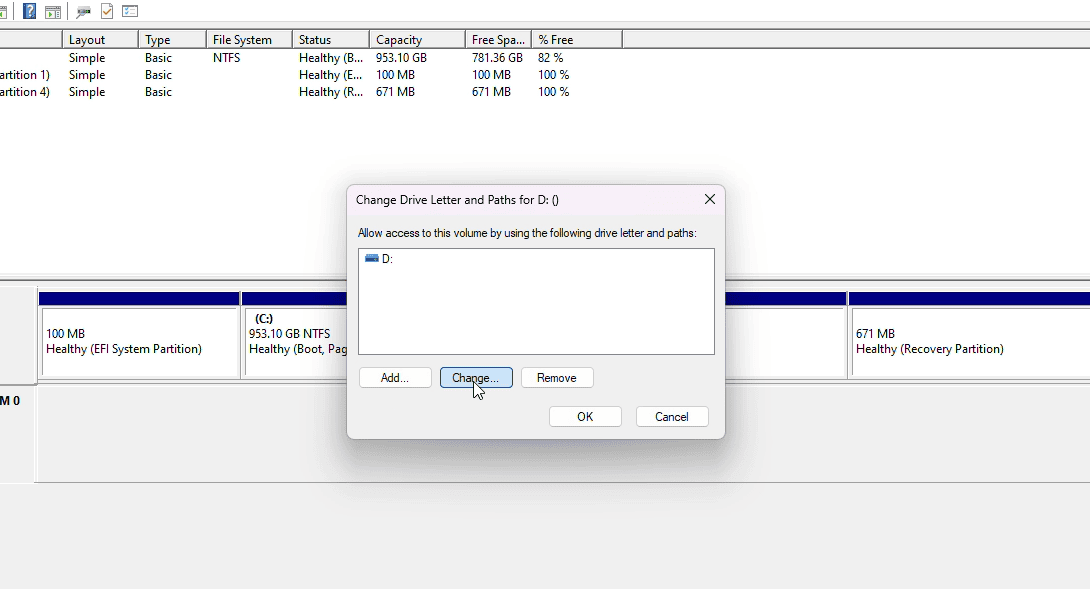
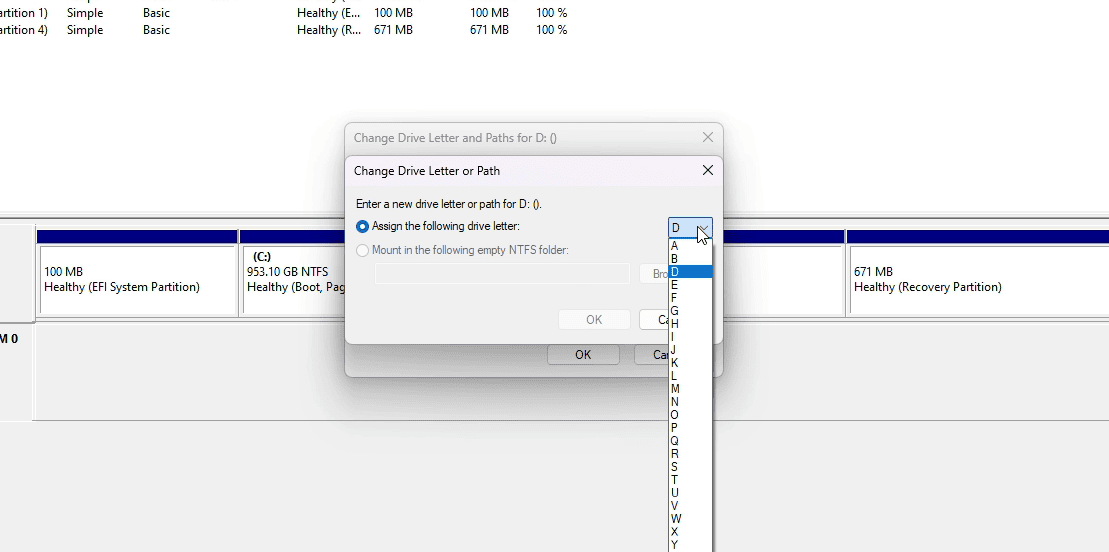
- Change or Add: If the drive has a letter, click “Change” and pick a new one. If it doesn’t, click “Add” and assign a letter.
- Confirm: Click “OK” and then “Yes” if prompted. Your drive letter is now changed!
Important Notes
- Don’t Change the System Drive: Avoid changing the letter of your main drive (usually C:), as this can cause problems.
- Be Careful with Programs: Some programs might rely on specific drive letters. Changing them could cause issues.
- Back Up Your Data: It’s always a good idea to back up important files before making changes like this, just in case.
Troubleshooting
| Problem | Solution |
|---|---|
| The “Change Drive Letter and Paths…” option is grayed out. | This might happen with system or recovery partitions. You usually can’t change their letters. |
| I get an error message when trying to change the letter. | The letter might already be in use by another drive. Try a different one. |
| A program stopped working after I changed the drive letter. | You might need to reinstall the program or change its settings to point to the new drive letter. |
Remember, changing drive letters is easy, but be cautious and back up your data first. With a few clicks, you can organize your drives and keep your system running smoothly.
Key Takeaways
- Changing drive letters helps organize storage devices in Windows
- Disk Management and Settings app are the main tools for this task
- Consider potential impacts on file access when modifying drive letters
Changing Drive Letters in Windows
Modifying drive letters in Windows can help organize storage devices and improve system navigation. This process can be done through various methods, each suited for different user needs and technical skill levels.
Using Disk Management
Disk Management is a built-in Windows tool for managing storage devices. To change a drive letter:
- Open Disk Management by typing “diskmgmt.msc” in the Start menu.
- Right-click the drive you want to change.
- Select “Change Drive Letter and Paths.”
- Click “Change” and pick a new letter.
- Confirm your choice.
This method works for internal and external drives. It’s user-friendly and doesn’t require advanced skills. Disk Management also lets users view all connected drives and their properties.
Utilizing Command Line Tools
Command line tools offer a text-based way to change drive letters. Two main options are available:
Command Prompt with Diskpart:
- Open Command Prompt as admin.
- Type “diskpart” and press Enter.
- Use “list volume” to see all drives.
- Select the volume you want to change.
- Use “assign letter=X” (replace X with desired letter).
PowerShell:
- Open PowerShell as admin.
- Use “Get-Partition” to list drives.
- Use “Set-Partition” to change the letter.
These methods are faster for users comfortable with command line interfaces. They’re also useful for remote management or scripting tasks.
Adjusting Drive Letters for External Devices
Changing letters for external drives is similar to internal ones. Here are some key points:
- Use Disk Management or command line tools.
- Ensure the device is connected and recognized.
- Be careful not to assign a letter already in use.
- Some devices may need to be reformatted if letter changes fail.
External drives include USB flash drives, external hard drives, and DVD drives. Letter changes for these devices are often temporary and reset when reconnected.
Advanced Method: Registry Editor
The Registry Editor allows for permanent drive letter changes. This method is for advanced users:
- Open Registry Editor by typing “regedit” in the Start menu.
- Navigate to HKEY_LOCAL_MACHINE\SYSTEM\MountedDevices.
- Find the entry for the drive you want to change.
- Modify the value data to reflect the new drive letter.
This method is risky and can cause system issues if done incorrectly. It’s best used when other methods fail or for specific system configurations.
System Considerations and Restrictions
Some important factors to keep in mind when changing drive letters:
- The system drive (usually C:) can’t be changed easily.
- Some programs may stop working if their installation drive letter changes.
- It’s best to change letters soon after adding a new drive.
- Back up important data before making changes.
- Avoid using letters A: and B: as they’re reserved for floppy drives.
Windows 10 and 11 both support drive letter changes through these methods. The process is largely the same across recent Windows versions.


