Setting your computer’s name in Windows is a straightforward process that allows for easier identification of your device, especially when you are part of a network or using multiple PCs. This is essential for both personal and professional contexts to differentiate between devices for file sharing, remote access, and system management. The name you assign to your computer acts as an identifier, making it simpler for others on the same network to recognize your machine, and for you also to manage your devices if you use more than one.
Your computer’s name can be something unique that reflects its purpose, your personality, or simply be a standard naming convention used within a business infrastructure. It is not permanent and can be changed following a few simple steps. Whether it is a Windows laptop or desktop, the method to change the device name remains user-friendly and can be done within the system settings without the need for advanced technical knowledge.
Renaming Your Windows PC: A Simple Guide
Your computer’s name is how it shows up on networks and makes it easy to identify if you have multiple devices. Changing your computer’s name in Windows is a simple process, but the steps vary slightly depending on your version of Windows.
Windows 10 and 11:
- Open Settings: Click on the Start menu and select the gear icon (“Settings”).
- Go to System: In the Settings menu, click on “System.”
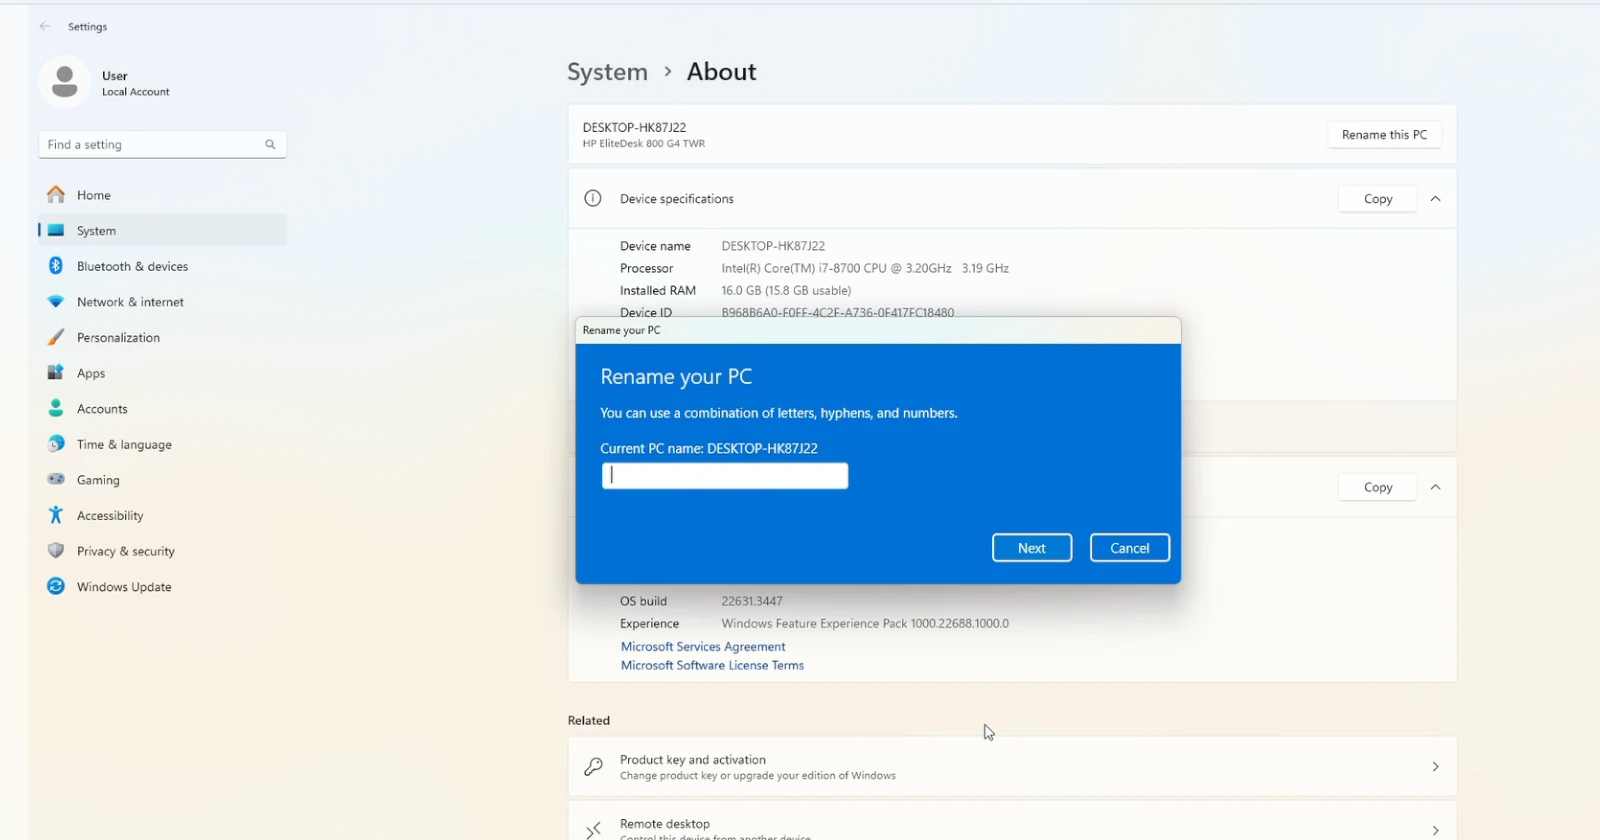
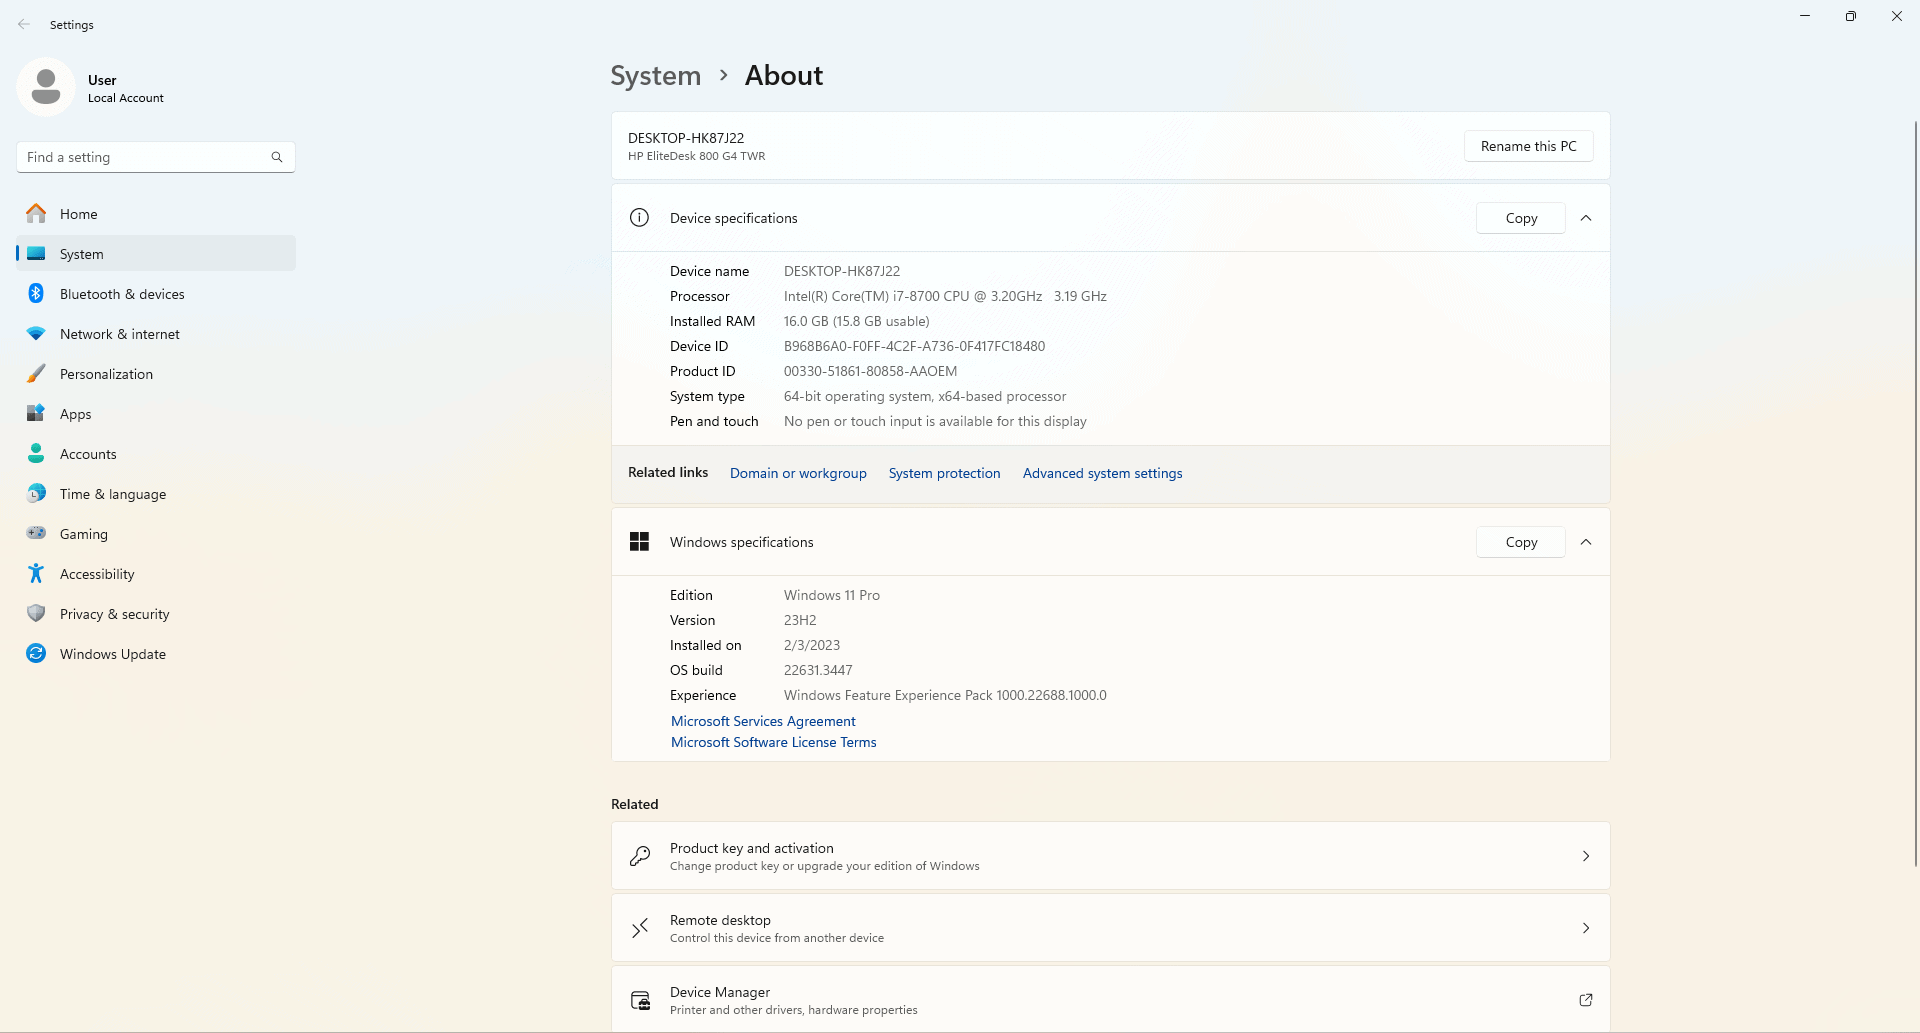
- About: Scroll down on the left-hand side and click “About.”
- Rename: You should see a button labeled “Rename this PC.” Click it.
- New Name: Enter the new name you want for your computer. Remember, no spaces or special characters!
- Restart: After renaming, you’ll be prompted to restart your computer. This is necessary for the changes to take effect.
Older Versions of Windows (7, 8, etc.)
- Right-Click Computer: Right-click on the “Computer” icon on your desktop or in the Start menu and choose “Properties.”
- System Properties: In the window that opens, select “Advanced system settings” in the left sidebar.
- Computer Name: Under the “Computer Name” tab, click the “Change” button.
- New Name: Enter the new name you want for your computer in the box.
- OK: Click “OK” to close the dialog boxes and restart your computer.
Table of Quick Steps
| Windows Version | Steps |
|---|---|
| Windows 10 or 11 | Settings > System > About > Rename this PC |
| Older Versions | Right-click “Computer” > Properties > Advanced system settings > Change (under Computer Name) |
Important Notes:
- Administrator Access: You’ll need administrator privileges on your computer to change the name.
- Domain Computers: If your computer is part of a corporate domain, you might not be allowed to change its name yourself. Consult your IT department for assistance.
- Restart is Required: Changes to the computer name won’t fully take effect until you restart.
Key Takeaways
- Customizing your computer’s name helps in its identification and management.
- Changing the computer name in Windows can be done easily through system settings.
- No advanced technical knowledge is required to rename a Windows computer.
Setting Your Computer Name in Windows
When setting up or personalizing a Windows computer, one important step is choosing a suitable name for the device. This helps in identifying the computer on a network and can reflect its purpose or location. Changing the device name is a straightforward process in both Windows 10 and Windows 11.
Using Windows Settings
To change the name of your computer using the Settings app, follow these steps:
- Open Settings by pressing
Win + Ion your keyboard. - Click on System and then select About.
- Under Device specifications, choose Rename this PC.
- Enter the new name for your computer.
- Click Next and you will be prompted to restart the computer to apply changes.
Remember, the computer name should be less than 15 characters with no special characters except hyphens.
Using Control Panel
If you prefer the traditional Control Panel method:
- Press
Win + R, typecontroland hit Enter to open Control Panel. - Navigate to System and Security, then click on System.
- In the System Properties window, find Computer Name and click Change.
- Type the new name and click OK.
- You may need to restart your computer for the changes to take effect.
The same naming rules apply.
Using Command Line Tools
For those comfortable with command-line interfaces, the process involves:
- Open Command Prompt or PowerShell as an administrator.
- To change the name using Command Prompt, type
wmic computersystem where name="%computername%" call rename name="NewName"and press Enter. - In PowerShell, you can use
Rename-Computer -NewName "NewName"and thenRestart-Computerto apply the change.
Complete the steps with a restart to ensure the new name is in use across the network.
Additional Considerations
When renaming a PC, remember:
- The PC name helps distinguish your computer on a network.
- It’s useful for network sharing and remote access tools.
- Choose a name that makes sense for your use, like “LivingRoom-PC” or “Maria-Laptop”.
- Avoid using sensitive information in the computer name.
- Ensure the device name works well for home, work, and public networks.
By following these guidelines, you can give your computer a name that suits your personal or business needs.


