Keeping your Intel HD Graphics driver up to date is essential for ensuring your system runs smoothly and is compatible with the latest applications and games. Manually updating your driver can significantly improve performance and resolve existing issues. This process involves accessing the Intel Download Center, identifying the appropriate driver for your device, and installing it.
To avoid potential glitches during installation, it’s important to follow a structured approach. Many users seek the latest drivers due to compatibility concerns with newer software or games that push hardware limits. Outdated drivers can lead to unexpected system crashes, decreased performance, or graphical glitches. By manually updating, you can bypass automated update restrictions and ensure that your drivers are optimized for your specific hardware configuration.
Before starting the update process, a few preparations can simplify the task. Securing your system with recovery options, backing up critical data, and ensuring a stable internet connection are crucial steps. These precautions help prevent data loss or system failures during installation. Overall, the manual update is straightforward and can greatly enhance your system’s stability and performance.
Here’s where to get the latest drivers:
https://www.intel.com/content/www/us/en/download-center/home.html
Manually Updating Your Intel HD Graphics Driver
Keeping your Intel HD Graphics driver up-to-date is important for optimal performance, especially for gaming and video playback. While Windows often updates drivers automatically, sometimes you might need to do it manually. Here’s how:
1. Identify Your Graphics Driver
First, you need to know which Intel HD Graphics driver you have.
- Press the Windows key + R to open the Run dialog box.
- Type “dxdiag” and press Enter.
- Click on the Display tab.
- Note down the name of your graphics driver and its current version.
2. Download the Latest Driver
- Go to the Intel Download Center website.
- In the search bar, type the name of your graphics driver.
- Select your operating system (Windows 10, Windows 11, etc.).
- Download the latest driver version. Choose the
.zipfile for manual installation.
3. Install the Driver
- Extract the contents of the
.zipfile. - Open Device Manager. You can do this by right-clicking the Start button and selecting Device Manager.
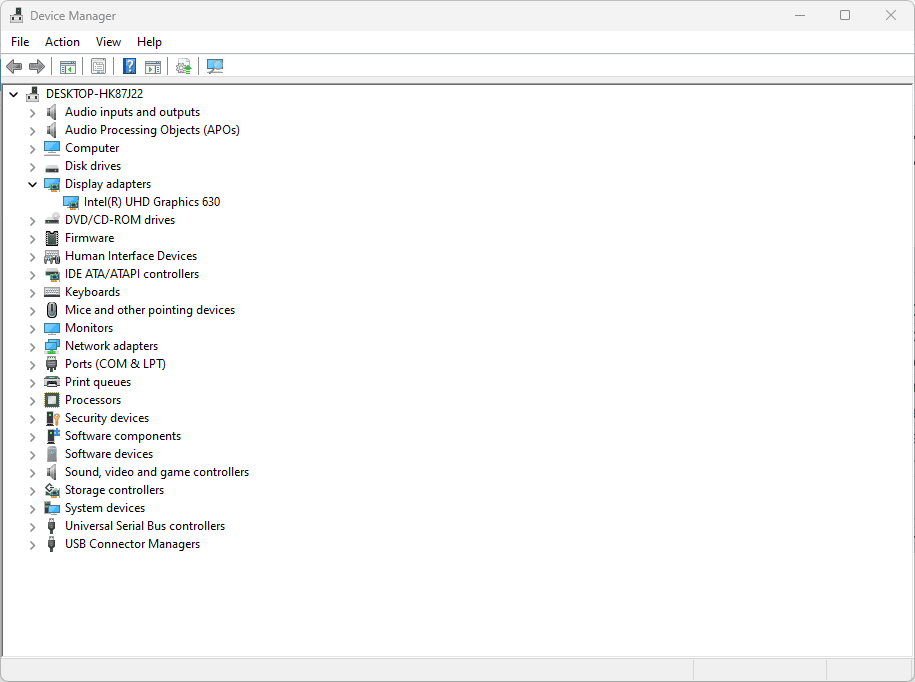
- Expand the Display adapters category.
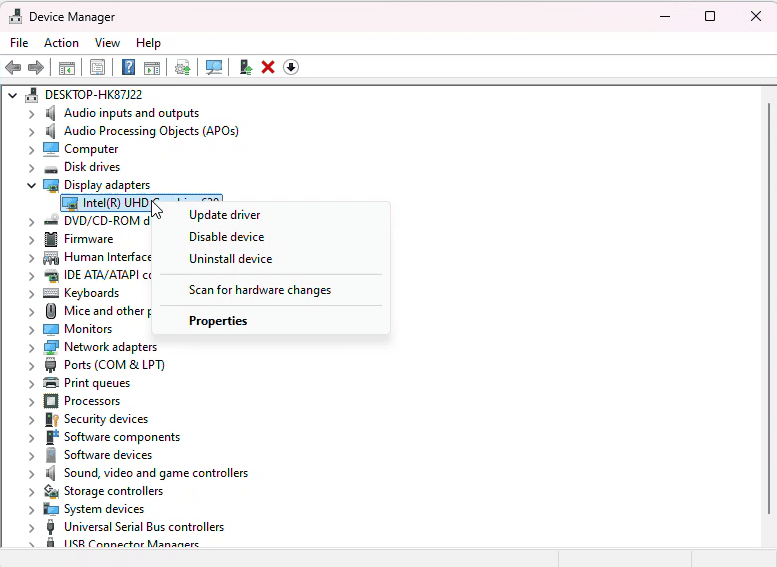
- Right-click on your Intel HD Graphics driver and select Update driver.
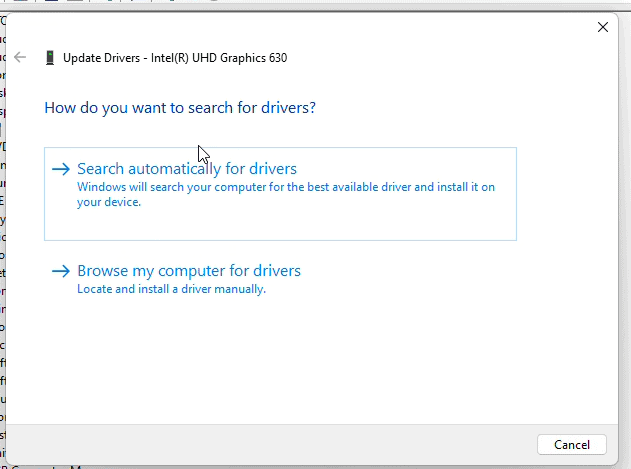
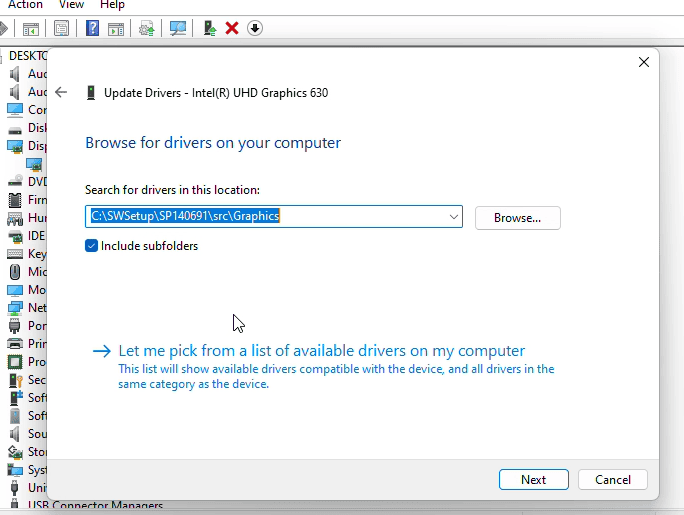
- Choose Browse my computer for drivers.
- Click Browse and navigate to the folder where you extracted the driver files.
- Click Next and follow the on-screen instructions.
4. Verify Installation
- Once the installation is complete, restart your computer.
- Open the DirectX Diagnostic Tool (dxdiag) again to confirm the driver version has been updated.
Alternative Method: Using the Intel Driver & Support Assistant
Intel provides a tool called the Intel Driver & Support Assistant. This tool can automatically scan your system and recommend driver updates, including graphics drivers. You can download it from the Intel website.
Troubleshooting Driver Updates
Sometimes, you might encounter issues during a driver update. Here are a few tips:
- Make sure you have downloaded the correct driver for your operating system and graphics card.
- If you are having trouble installing the driver, try uninstalling the old driver first.
- If the new driver causes problems, you can roll back to the previous driver version in Device Manager.
By following these steps, you can ensure your Intel HD Graphics driver is always up-to-date, giving you the best possible graphics performance.
Key Takeaways
- The manual update avoids automated update restrictions.
- Preparation steps minimize risks during installation.
- Drivers enhance compatibility and performance.
Preparing for the Driver Update
Before manually updating your Intel HD graphics driver, two crucial preparatory steps are determining the current driver version and identifying your specific Intel HD Graphics model.
Determining the Graphics Driver Version
Understanding the current version of your Intel graphics driver is essential. Access the Device Manager by right-clicking on the Start menu and selecting it from the list. In Device Manager, locate the Display adapters category and expand it to view your Intel graphics hardware.
Right-click on your Intel HD Graphics entry and choose Properties. Within the Properties window, navigate to the Driver tab. Here, you can access the details of your current driver version. This information is vital for ensuring you update to a newer version. It is preferable to note this version number for reference during the update process.
Ensuring that your driver is not already the latest version saves time and resources. If the version matches the latest available update, further action may not be necessary.
Identifying Your Intel HD Graphics Model
Identifying the exact model of your Intel HD Graphics is another important step. The model information is typically listed within the Device Manager under Display adapters. For a more precise identification, you can also utilize the Intel® Driver & Support Assistant.
This tool automatically recognizes your hardware model. Knowing your graphics model helps in finding the right driver update. Each Intel graphics model might require a distinct driver version, so accuracy in identification prevents compatibility issues.
Once you know the specific model, you can proceed to download the correct driver from Intel’s official download center, ensuring optimal performance and stability for your system. This step prevents errors and facilitates a smoother update procedure.

