Nginx Proxy Manager is a web-based application that simplifies the process of hosting and managing multiple websites or services behind a single domain. By using this tool, users can easily handle the configuration of Nginx, one of the most powerful open-source web servers. Its user-friendly interface makes advanced server configurations accessible even to those with limited knowledge of command-line operations.
With support for Docker, Nginx Proxy Manager becomes even more versatile, enabling users to deploy it in a containerized environment which is known for its efficiency and ease of scaling. A major feature of the Nginx Proxy Manager is its integration with Let’s Encrypt, providing automated SSL certificate management. This ensures all managed services can be secured with HTTPS, boosting their reliability and security.
What Is Nginx Proxy Manager?
Nginx Proxy Manager (NPM) is a powerful and user-friendly tool for managing reverse proxies with Nginx, particularly suited for self-hosters, developers, and homelab enthusiasts. It gives you a clean, web-based interface to configure Nginx without ever touching a command line, allowing you to route traffic to your internal services easily and securely.
At its core, it acts as a reverse proxy—a server that sits in front of your web apps and forwards requests to them. This lets you expose your services (like a self-hosted website, media server, or app dashboard) to the internet with a domain name and SSL, while hiding their internal IPs and ports.
Why Use Nginx Proxy Manager?
1. Zero Hassle SSL with Let’s Encrypt
With NPM, you can issue and renew SSL certificates from Let’s Encrypt with just a few clicks. No more messing with Certbot or remembering to renew manually. It even supports wildcard certificates and DNS challenge validation, depending on your DNS provider.
2. A GUI for Nginx Configuration
Traditional Nginx setups require editing raw config files. NPM replaces that with a clean interface where you just enter your domain name, forward hostname/IP, port, and a few toggles for things like Websockets support or caching.
3. Multiple Domain and Subdomain Support
Want to serve multiple sites from the same server? NPM handles this with ease. Add as many proxy hosts as you want, each with its own domain/subdomain, SSL, and path-based routing.
4. Access Control Made Easy
NPM supports HTTP authentication out of the box. You can restrict access to any of your services using usernames and passwords. Great for adding a simple security layer in front of something like a dashboard or private app.
5. Docker-Friendly
Nginx Proxy Manager shines in containerized environments. The official Docker image is widely used and easy to deploy. In a typical setup, you’d run NPM in one container and your services in others, all connected via Docker networks.
Core Features
- 🔁 Reverse proxy with load balancing support
- 🔐 Automatic SSL certificate generation and renewal
- 🌐 Multiple domain support, with wildcards
- 🛠️ Web-based UI for Nginx configuration
- 🔑 HTTP basic auth for access control
- 📊 Logging and monitoring dashboard
- 🧱 Custom Nginx configuration snippets per proxy host
Use Cases
Here’s how people commonly use NPM in real-world setups:
- Self-hosted services (e.g., Nextcloud, Jellyfin, Home Assistant)
- Media servers with subdomain routing (
plex.yourdomain.com,radarr.yourdomain.com) - Internal dashboards accessible from anywhere, with auth and SSL
- Development environments to test how apps behave under HTTPS
- Static site hosting from internal storage or Docker containers
How It Works
Under the hood, Nginx Proxy Manager creates and manages Nginx configuration files based on your UI input. When you set up a new proxy host, it creates a virtual host block, configures upstreams, adds SSL parameters, and handles certificate renewals—all in the background.
The system is made of a few components:
- Nginx: The workhorse, handling actual web traffic
- Node.js Backend: Processes your UI inputs and writes configs
- SQLite or MySQL DB: Stores your configuration
- Frontend UI: Built with Vue.js, responsive and clean
Setting It Up (Quick Overview)
Here’s a simplified version of what setup looks like using Docker:
version: '3'
services:
  npm:
    image: 'jc21/nginx-proxy-manager:latest'
    ports:
      - '80:80'
      - '81:81'   # Admin interface
      - '443:443'
    volumes:
      - ./data:/data
      - ./letsencrypt:/etc/letsencrypt
After launching the container, you can access the admin panel at http://your-server-ip:81, log in with the default credentials, and start adding proxy hosts.
Tips for a Smoother Experience
- Use Docker labels + NPM automation tools to auto-add services as you spin them up
- Pair with Cloudflare for DNS and DDoS protection
- Set up IP whitelisting for sensitive routes or admin pages
- Back up your config database before major updates
- Create redirect hosts for legacy URLs or vanity domains
Limitations To Be Aware Of
While incredibly powerful, NPM isn’t a silver bullet. Here are a few things to keep in mind:
- It’s not ideal for extremely high-traffic enterprise setups
- Advanced Nginx tweaks still require manual configuration
- DNS challenge support for wildcard certs depends on your provider
- Limited user access controls (admin vs. viewer)
Final Thoughts
Nginx Proxy Manager gives you the power of Nginx without the complexity, making it an indispensable tool for self-hosters, small businesses, and developers who want HTTPS and reverse proxy routing without writing a single line of config. Whether you’re building out a homelab or deploying apps across multiple domains, NPM brings clarity and control to your web traffic setup.
Key Takeaways
- Nginx Proxy Manager offers a simple UI for complex server setups.
- It supports Docker for easy scaling and deployment.
- SSL certificates from Let’s Encrypt are managed automatically.
Deploying and Configuring Nginx Proxy Manager
Deploying Nginx Proxy Manager simplifies the control of HTTP traffic for your domains. It provides a user-friendly interface for managing proxies, SSL certificates, and more.
Getting Started with Nginx Proxy Manager
Before you dive into the Nginx Proxy Manager, you’ll need to install Docker on your system. Docker helps to run the Nginx Proxy Manager inside a container, making setup and scaling straightforward. Install Docker and Docker Compose on your Linux machine before proceeding.
Configuring Docker and Networking
After Docker is in place, create a new Docker network. This network ensures containers can communicate with each other. Use the following Docker Compose file to set the configuration. It defines volumes to store data, ports to expose services, and restart policies:
- Volumes: Where your data lives
- Ports: Doors for communication
- Restart policy: Keeps the container running
Set up the network with:
docker network create reverse_proxy
Then detail your Docker Compose configuration in a docker-compose.yml file.
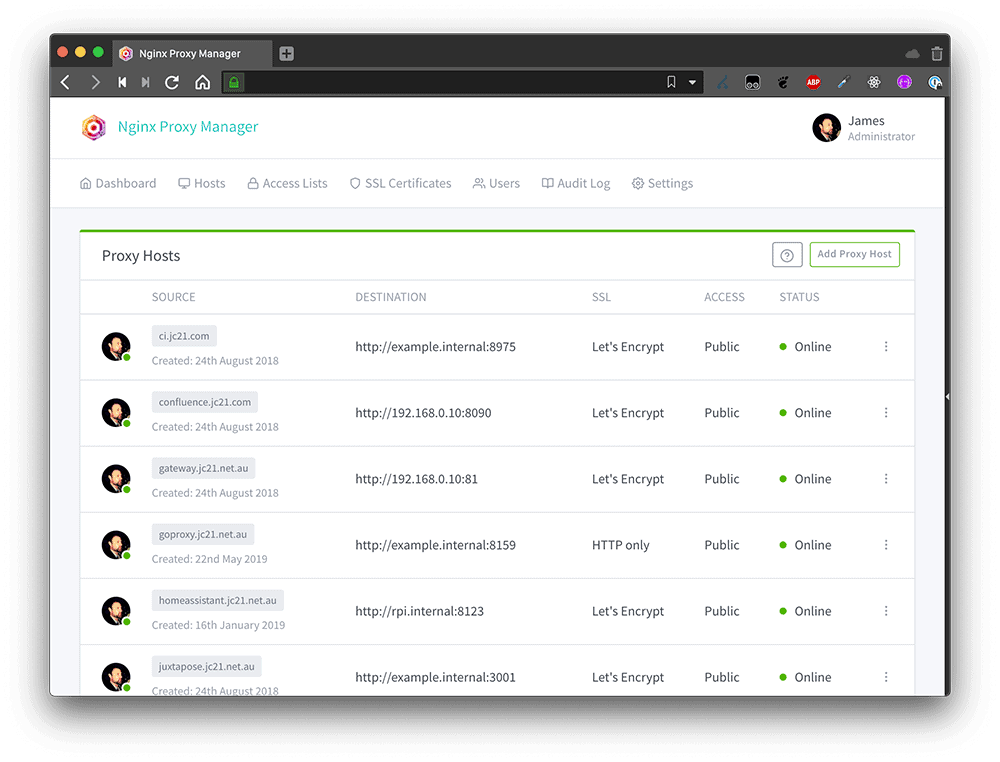
Understanding Proxies and SSL Management
Once installed, log in to the web interface to set up Proxy Hosts. Here you link your domain names to the services running on your network. The Nginx Proxy Manager simplifies obtaining and renewing SSL certificates through Let’s Encrypt. This ensures your sites are secure with HTTPS.
Security and Advanced Features
The admin interface provides advanced features. Block common exploits and manage user permissions. Keep track of changes with the audit log. Access lists give you control over who can access which services. The Nginx Proxy Manager streamlines these configurations without deep Linux skills.


