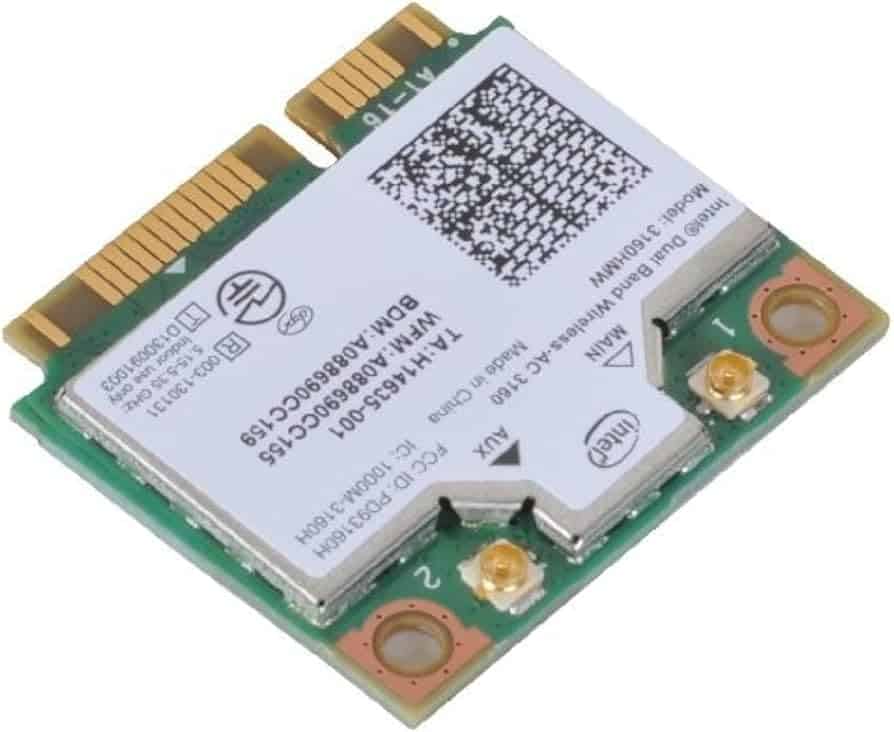
Intel Wireless AC adapters offer fast Wi-Fi speeds, but they can sometimes face connection issues. You can fix most Intel Wireless AC problems by updating drivers, checking router settings, and performing basic troubleshooting steps. These simple actions often restore your connection quickly.
Slow speeds or frequent drops with your Intel Wireless AC adapter can be frustrating. Common causes include outdated drivers, router incompatibility, or interference from other devices. By updating your wireless adapter driver and ensuring your router supports 5 GHz AC mode, you can boost performance and stability.
If your Intel Wireless AC adapter stops working entirely, don’t worry. You can often resolve this by uninstalling and reinstalling the device driver or performing a clean driver installation. These steps help reset the adapter and clear any software glitches.
| Issue | Quick Fix |
|---|---|
| Slow speeds | Update driver, check router settings |
| Connection drops | Reduce interference, update firmware |
| No Wi-Fi detected | Reinstall driver, check hardware |
Troubleshooting Intel Wireless AC Problems
If you’re having trouble with your Intel Wireless AC adapter, you’re not alone. Many users experience issues like slow speeds, dropped connections, or an inability to connect to Wi-Fi altogether. But don’t worry, there are several things you can do to try and fix the problem.
Basic Troubleshooting Steps
Before we dive into more advanced solutions, let’s start with some basic troubleshooting steps:
- Ensure Wi-Fi is enabled: This might seem obvious, but it’s easy to accidentally disable Wi-Fi. Check your computer’s settings to make sure it’s turned on.
- Check your network connection: Make sure you’re connected to the correct Wi-Fi network and that the network is working properly. Try connecting other devices to the network to see if they have the same problem.
- Restart your computer and router: A simple reboot can often resolve temporary glitches that may be causing the issue.
- Check for physical obstructions: Walls, furniture, and other objects can interfere with Wi-Fi signals. Try moving closer to your router to see if that improves the connection.
Advanced Troubleshooting Steps
If the basic steps didn’t resolve the issue, you can try these more advanced solutions:
- Update your network drivers: Outdated or corrupted drivers can cause various Wi-Fi problems. Visit the Intel website or your computer manufacturer’s website to download the latest drivers for your Intel Wireless AC adapter.
- Run the network troubleshooter: Windows has a built-in troubleshooter that can automatically diagnose and fix common network problems. To run it, go to Settings > Network & Internet > Status > Network troubleshooter.
- Reset your network settings: This will reset all your network connections, including Wi-Fi, VPN, and Ethernet. To do this, go to Settings > Network & Internet > Status > Network reset.
- Check for interference: Other devices, such as microwaves and cordless phones, can interfere with Wi-Fi signals. Try turning off or moving these devices away from your computer and router.
- Change your Wi-Fi channel: If there are many Wi-Fi networks in your area, they could be competing for the same channel, causing interference. You can use a Wi-Fi analyzer app to find a less crowded channel.
- Reinstall your Intel Wireless AC adapter: In some cases, reinstalling the adapter can resolve driver or software conflicts. You can do this through the Device Manager in Windows.
Still Having Problems?
If you’ve tried all these steps and you’re still having problems, you may need to contact Intel support or your computer manufacturer for further assistance. They may be able to provide more specific troubleshooting steps or offer a replacement adapter if yours is faulty.
Additional Tips
- Keep your router’s firmware up to date: Router manufacturers regularly release firmware updates that can improve performance and security.
- Use a strong Wi-Fi password: A strong password will help prevent unauthorized access to your network and potential interference.
- Consider a Wi-Fi extender: If you have a large home or a weak Wi-Fi signal, a Wi-Fi extender can help boost the signal and improve coverage.
By following these tips, you can troubleshoot and resolve common Intel Wireless AC problems, ensuring a stable and reliable Wi-Fi connection.
Optimizing Your Wi-Fi Network
Beyond troubleshooting specific problems, there are several things you can do to optimize your Wi-Fi network for better performance:
- Router Placement: Position your router in a central location in your home, away from walls and obstructions. Elevating the router can also improve signal distribution.
- Quality of Service (QoS): Many routers have QoS settings that allow you to prioritize network traffic for certain applications or devices. This can be helpful if you’re experiencing lag while gaming or streaming video.
- Network Security: Use a strong password and enable network encryption (WPA2 or WPA3) to protect your network from unauthorized access.
- Regular Reboots: Rebooting your router periodically can help clear temporary glitches and improve performance.
By following these tips, you can ensure that your Wi-Fi network is running smoothly and providing the best possible performance for all your devices.
Understanding Your Intel Wireless AC Adapter
Intel Wireless AC adapters provide high-speed Wi-Fi connectivity for many devices. Proper setup and maintenance are key to optimal performance.
Exploring Device Manager and Network Adapters
To locate your Intel Wireless AC adapter, open Device Manager on Windows. Expand the Network Adapters section. Look for entries starting with “Intel Wireless” or “Intel Wi-Fi.”
Right-click the adapter and select Properties to view details. Check the driver version and date. Outdated drivers can cause connectivity issues.
Update drivers through Device Manager or Intel’s website. Windows Update may also offer new drivers. Keep your system and BIOS updated for best results.
Identifying Common Wi-Fi Driver Issues
Driver problems often cause Wi-Fi disconnects or slow speeds. Watch for these signs:
- Frequent disconnects
- Inability to connect to 5 GHz networks
- Slow upload/download speeds
- Missing Wi-Fi networks
Try these fixes:
- Restart your computer
- Update the Wi-Fi driver
- Reinstall the driver
- Check for Windows updates
If issues persist, your router may need updating. Ensure it supports 5 GHz and 802.11ac for best performance with Intel Wireless AC adapters.
| Issue | Possible Solution |
|---|---|
| Disconnects | Update driver, check router |
| Slow speeds | Use 5 GHz, update firmware |
| Missing networks | Reinstall driver, update Windows |
Troubleshooting Connectivity Issues
Intel Wireless AC adapters can face connectivity problems. These issues often stem from incorrect settings or outdated drivers. The following tips will help you resolve common problems and improve your Wi-Fi connection.
Checking Wireless Adapter Settings
Start by verifying your wireless adapter settings. Open Device Manager and locate your Intel Wireless AC adapter. Right-click and select Properties. In the Advanced tab, check these key settings:
- Wireless Mode: Set to “802.11ac”
- Channel Width: Choose “Auto”
- Roaming Aggressiveness: Set to “Medium”
Ensure Power Management is optimized. Uncheck “Allow the computer to turn off this device to save power” in the Power Management tab.
Update your adapter’s driver. Visit Intel’s website and download the latest version for your specific model. Install it and restart your computer.
Resolving Connectivity Drops
Connectivity drops can be frustrating. Try these steps to fix the issue:
Check your router’s settings:
- Ensure it supports 5 GHz band
- Configure it for 11ac mode
- Update router firmware
Reduce interference:
- Move away from other electronic devices
- Change Wi-Fi channel on your router
Adjust adapter settings:
- Set “Roaming Aggressiveness” to “High”
- Enable “Throughput Booster”
If problems persist, consider resetting your network adapter. Go to Device Manager, uninstall the adapter, and select “Delete the driver software for this device.” Restart your computer to reinstall the driver.
Utilizing the Network Troubleshooter
Windows has a built-in Network Troubleshooter that can help identify and fix connectivity issues. Here’s how to use it:
- Right-click the network icon in your taskbar
- Select “Troubleshoot problems”
- Follow the on-screen instructions
The troubleshooter will scan for issues and attempt to fix them automatically. It can resolve common problems like:
- IP address conflicts
- DNS server issues
- Network adapter problems
If the troubleshooter doesn’t solve your issue, try resetting your network stack. Open Command Prompt as administrator and run these commands:
netsh winsock reset
netsh int ip reset
ipconfig /release
ipconfig /renew
ipconfig /flushdns
Restart your computer after running these commands to complete the network reset.
Optimizing Windows 11 Wireless Configurations
Windows 11 offers several ways to enhance your wireless connectivity. By tweaking settings and keeping your hardware up-to-date, you can boost your Wi-Fi performance significantly.
Managing Wireless Devices
Windows 11 provides tools to manage your wireless devices effectively. Open the Settings app and navigate to Network & Internet > Wi-Fi. Here you’ll find options to manage known networks and change adapter options.
To prioritize networks:
- Click “Manage known networks”
- Select a network
- Click “Properties”
- Adjust the “Connect automatically” option
You can also optimize Wi-Fi performance by updating your wireless drivers. Right-click the Start button, select Device Manager, expand Network adapters, right-click your Wi-Fi adapter, and choose Update driver.
Consider enabling Wi-Fi 6 (802.11ax) if your router supports it. This newer standard offers faster speeds and better performance in crowded areas.
Configuring WLAN Autoconfig Service
The WLAN AutoConfig service manages your wireless network connections. Ensuring it’s running properly can improve your Wi-Fi stability.
To check and configure the service:
- Press Win + R, type “services.msc”, and press Enter
- Locate “WLAN AutoConfig”
- Double-click and set Startup type to “Automatic”
- Click “Start” if the service isn’t running
If you’re experiencing connection issues, try restarting this service. It can often resolve problems without needing to reboot your entire system.
Enable auto-connect for your preferred networks to ensure seamless connectivity. This can be done in the Wi-Fi settings mentioned earlier.
Upgrading Wi-Fi Adapter and Driver
Keeping your Wi-Fi adapter and its driver up-to-date is crucial for optimal performance. Windows 11 usually handles driver updates automatically, but manual checks can be beneficial.
To check for driver updates:
- Open Settings > Windows Update
- Click “Advanced options”
- Select “Optional updates”
- Look for any available network adapter updates
If Windows doesn’t find updates, visit your computer or adapter manufacturer’s website. They often provide the latest drivers before they’re available through Windows Update.
Consider upgrading your Wi-Fi adapter if it’s outdated. Newer adapters support faster Wi-Fi standards like Wi-Fi 6, offering improved speed and reliability.
| Wi-Fi Standard | Max Speed | Frequency Bands |
|---|---|---|
| Wi-Fi 4 (802.11n) | 150 Mbps | 2.4 GHz, 5 GHz |
| Wi-Fi 5 (802.11ac) | 3.5 Gbps | 5 GHz |
| Wi-Fi 6 (802.11ax) | 9.6 Gbps | 2.4 GHz, 5 GHz |
Frequently Asked Questions
Intel Wireless AC 9560 adapters can sometimes face issues. These questions address common problems and provide solutions for driver detection, error codes, and hardware diagnostics.
How can I resolve driver problems with an Intel Wireless AC 9560 adapter?
To fix driver issues:
- Update your drivers using Intel’s Driver & Support Assistant.
- If problems persist, uninstall the current driver and perform a clean installation.
- Restart your computer after driver updates.
What should I do if my Intel Wireless AC 9560 is not being detected in Windows 11?
If Windows 11 doesn’t detect your adapter:
- Check Device Manager for any yellow exclamation marks.
- Update your BIOS to the latest version.
- Ensure the wireless card is properly seated in its slot.
What are the steps to troubleshoot code 43 error for Intel Wireless AC 9560?
For Code 43 errors:
- Restart your computer.
- Update or reinstall the wireless driver.
- Check for Windows updates and install any available.
- Run the Windows Hardware Troubleshooter.
How to fix the issue when Intel Wireless AC 9560 is showing code 10 error?
To resolve Code 10 errors:
- Uninstall the device from Device Manager.
- Scan for hardware changes to reinstall the driver.
- If the issue persists, try a system restore to a point before the error occurred.
What diagnostics can be performed when the Intel Wireless-AC 9560 driver is not working?
To diagnose driver issues:
- Run the Intel® Driver & Support Assistant for automated diagnostics.
- Use Windows’ built-in network troubleshooter.
- Check event logs for specific error messages.
Can a Wi-Fi adapter malfunction, and how can I identify hardware issues?
Wi-Fi adapters can indeed malfunction. To identify hardware problems:
- Test the adapter on another computer if possible.
- Check for physical damage or loose connections.
- Run manufacturer-specific diagnostic tools.
- If all software solutions fail, consider replacing the adapter.
| Issue | Quick Fix |
|---|---|
| Driver Problems | Update or reinstall drivers |
| Not Detected | Check BIOS and physical connection |
| Code 43 Error | Restart and update drivers |
| Code 10 Error | Uninstall and reinstall device |
| Driver Not Working | Run diagnostic tools |
| Hardware Malfunction | Test on another system or replace |


