For users who like to keep their digital workspaces tidy, macOS Sequoia introduces an automatic window tiling feature. This nifty tool helps arrange open windows into a neat layout. You can quickly snap windows to any corner of your screen by dragging them to the edge.
This productivity feature has long been desired by Mac users. Previously, managing windows on a Mac was cumbersome. Now, with macOS Sequoia, users can snap windows into place effortlessly. This makes multitasking much easier and more organized.
macOS Sequoia’s automatic window tiling is simple and intuitive. Whether you are working on a project or browsing the web, this feature helps keep your desktop uncluttered. Stay focused and efficient with the new tiling options available.
How Window Tiling Works in macOS Sequoia
Window tiling in macOS Sequoia brings long-requested multitasking improvements to the Mac, giving users more control over how their windows snap, resize, and align on screen. It builds on the foundation of macOS’s Split View, but with more flexibility and modern features that rival third-party tools like Magnet and Rectangle.
Key Features of Window Tiling in Sequoia
| Feature | Description |
|---|---|
| Snap Assist | Drag windows to screen edges to auto-resize and fill halves or quarters. |
| Custom Tiling Grid | Create a multi-zone layout across your display – not just halves. |
| Keyboard Shortcuts | Use system-defined hotkeys to snap windows instantly without dragging. |
| Multiple Display Support | Each connected monitor maintains its own independent tiling grid. |
| Layout Memory | macOS remembers your layout across reboots and workspace changes. |
| Mission Control Integration | Works seamlessly with Spaces and full-screen apps. |

How to Use Window Tiling in Sequoia
1. Snap Using Mouse or Trackpad
You can drag a window to the edge or corner of your screen to tile it automatically:
- Left or right edge: Snaps the window to take up 50% of the screen.
- Top edge: Maximizes the window (similar to full-screen, but still part of your desktop).
- Corner: Tiles the window into a quarter of the screen.
As you drag, a translucent overlay shows a preview of where the window will go once you release it.
2. Use Keyboard Shortcuts
macOS Sequoia adds new native keyboard commands:
Control + Option + Left Arrow: Snap window to the left.Control + Option + Right Arrow: Snap window to the right.Control + Option + Up Arrow: Maximize window.Control + Option + Down Arrow: Restore window to previous size.
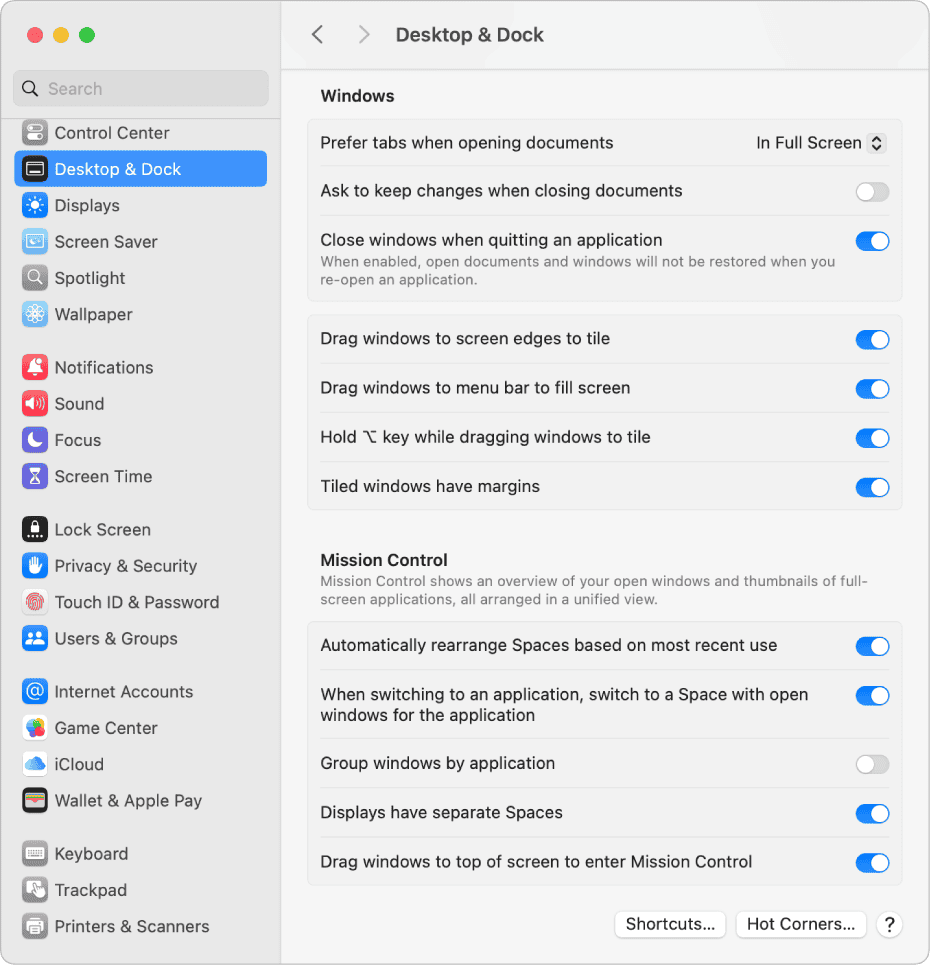
These shortcuts can be customized in System Settings > Keyboard > Shortcuts.
3. Create Custom Layouts
Sequoia lets you define complex grid-based layouts:
- Open the Tiling Manager from the menu bar or via a shortcut.
- Drag windows into any of the available grid zones.
- You can adjust the number of grid zones per screen (e.g., 2×2, 3×3, 6×2).
This is especially useful for large monitors or ultra-wide displays.
Tiling vs. Split View: What’s Different?
| Feature | Split View (Previous macOS) | Window Tiling (Sequoia) |
|---|---|---|
| Dual-window support | Yes | Yes |
| Multi-window layouts | No | Yes (grid tiling) |
| Drag-to-tile support | No | Yes |
| Keyboard snapping | Limited | Full support with customization |
| Window memory | No | Yes, remembers layout |
| External display support | Limited | Full, per-monitor layouts |
Window Tiling essentially replaces the need for third-party apps for most users, offering similar functionality directly within the OS with tighter integration and stability.
Pro Tips for Power Users
- Combine with Stage Manager: You can use tiling alongside Stage Manager for even more organization.
- Mission Control Trick: While in Mission Control, drag a window into a new tiled layout without leaving the view.
- Window Cycling: Hold
Command + Tabwhile tiling to quickly snap multiple apps in sequence.
This upgrade is especially helpful for developers, designers, and anyone managing multiple apps or documents at once. Whether you’re writing code, editing video, or juggling browser tabs and Slack, the tiling tools in Sequoia make it all easier to manage.
Key Takeaways
- Automatic window tiling organizes windows by snapping them to screen edges.
- This feature improves multitasking by keeping windows neat.
- macOS Sequoia makes managing open windows easier and more intuitive.
Essentials of macOS Sequoia Window Tiling
macOS Sequoia has introduced a new way to manage windows. These features can help you stay organized and boost productivity on your MacBook, iMac, or any other supported device.
Overview of Window Tiling in macOS Sequoia
Window Tiling in macOS Sequoia allows users to easily arrange open windows on their screens. By dragging windows to the edges of the display, users can snap them into various positions. This lets you use your screen space efficiently. Options include left, right, top, and bottom placements.
It works on models like the MacBook Pro, MacBook Air, Mac Studio, and Mac Pro. This feature simplifies multitasking by keeping important applications visible and organized.
Interacting with Tiled Windows
Users can interact with tiled windows using different methods. For instance, dragging a window to a screen edge will prompt macOS to suggest tiling positions. Tiled windows can be resized by dragging the borders.
You can also use keyboard shortcuts to manage windows. For example, specific key combinations can move windows between positions. This provides quick access and control over your workspace, enhancing productivity.
MacOS Sequoia Specific Features
macOS Sequoia includes unique features for window tiling. New AI-based suggestions help arrange windows intelligently. When dragging windows, the system may suggest ideal layouts based on the open applications.
Public and developer betas introduced at WWDC also show improved privacy controls. This ensures your data stays safe while you manage your workflow. The integration of these smart features makes window management more seamless and effective on all supported devices.


