If your iPhone is not charging, it could be due to various issues such as problems with the charging cable, power adapter, or the phone itself. To troubleshoot, start by checking for any visible damage to the charging cable or adapter. If the cable is frayed or the adapter looks damaged, you may need to replace these components. Also, check the phone’s charging port for debris or lint that could block the connection. Safely clean the port with a non-metallic tool to resolve the issue. If the problem persists after these initial checks, a forced restart of the iPhone might be necessary.
Troubleshooting a Malfunctioning iPhone Charging Port
Common Causes and Quick Fixes
Several factors can cause your iPhone charging port to stop working. Here are some common culprits and how to address them:
| Issue | Solution |
|---|---|
| Debris or Lint: | Use a toothpick or compressed air to gently remove any obstructions from the port. |
| Damaged Cable or Adapter: | Try a different cable and wall adapter to see if they are the problem. |
| Software Glitch: | Restart your iPhone. If that doesn’t work, try updating to the latest iOS version. |
| Liquid Damage: | If your phone has been exposed to liquid, it may need professional repair. |

Additional Troubleshooting Steps
If the basic fixes don’t work, try these:
- Reset Settings: Go to Settings > General > Transfer or Reset iPhone > Reset > Reset All Settings. This won’t erase your data, but it will reset network settings and preferences.
- DFU Restore: This is a deeper restore that can fix software problems. Connect your iPhone to a computer with iTunes or Finder and follow the instructions for DFU mode.
When to Seek Professional Help
If none of the above solutions work, your iPhone might need a repair.
- Apple Store or Authorized Service Provider: They can diagnose the issue and repair or replace the charging port if necessary.
- Third-Party Repair Shops: Consider this option for a potentially cheaper repair, but be sure to choose a reputable shop.
Preventing Future Problems
- Avoid exposing your phone to liquids or extreme temperatures.
- Clean the charging port regularly with a soft brush or compressed air.
- Use only genuine Apple cables and adapters or certified third-party accessories.
- Don’t force a cable into the port if it doesn’t fit easily.
Dealing with a Loose Charging Port
A loose charging port can be frustrating, but there are a few things you can try before resorting to a repair:
- Check for Debris: Use a flashlight to inspect the port for lint, dirt, or other debris. Gently remove any obstructions with a toothpick or compressed air.
- Try Different Cables: The problem might be with the cable, not the port. Test different cables to see if one fits more securely.
- Avoid Wiggling the Cable: Once you’ve plugged in your phone, try not to move or wiggle the cable. This can worsen the looseness over time.
- Use a Wireless Charger: If your iPhone supports wireless charging, this can be a workaround while you consider repair options.
DIY Repair: Proceed with Caution
If you’re tech-savvy, you might be tempted to fix a loose charging port yourself. However, this is a delicate repair and can easily damage your phone if not done correctly. Proceed with caution and only attempt a DIY repair if you’re confident in your abilities.
Here’s a basic outline of the process:
- Gather Tools: You’ll need a toolkit with precision screwdrivers, spudgers, and other tools designed for electronics repair.
- Open Your iPhone: Carefully follow online guides or videos specific to your iPhone model to open the device.
- Disconnect Battery: Disconnect the battery to avoid electrical damage.
- Remove and Replace Charging Port: Unscrew and disconnect the old charging port, then install the new one.
- Reassemble and Test: Carefully reassemble your iPhone and test the new charging port.
Important Note: DIY repairs can void your warranty and might cause further damage if not done properly. If you’re unsure, it’s best to seek professional help.
Key Takeaways
- Visible damage to the charging cable or adapter requires their replacement
- The iPhone’s charging port should be free of debris or lint for efficient charging
- A forced restart can sometimes resolve charging issues when other steps fail
Identifying Common Charging Issues
When an iPhone is not charging, it could be due to various factors. This section will help you pinpoint the common issues related to charging that you may encounter.
Assessing Cable and Adapter Integrity
Cable: Begin by examining your Lightning cable. Look for visible damage such as fraying or breakage. A damaged cable can prevent your iPhone from charging. Adapter: Check your wall adapter too. It should be an Apple-certified adapter or one with equivalent quality. Faulty adapters can fail to deliver the correct power to charge your iPhone.
Checking the iPhone’s Power Source
Power Source: Sometimes the issue is with the power source. Try connecting the charger to a different wall outlet. If you’re using a USB port, try a direct wall outlet instead. USB ports can sometimes offer less power than what the iPhone requires to charge.
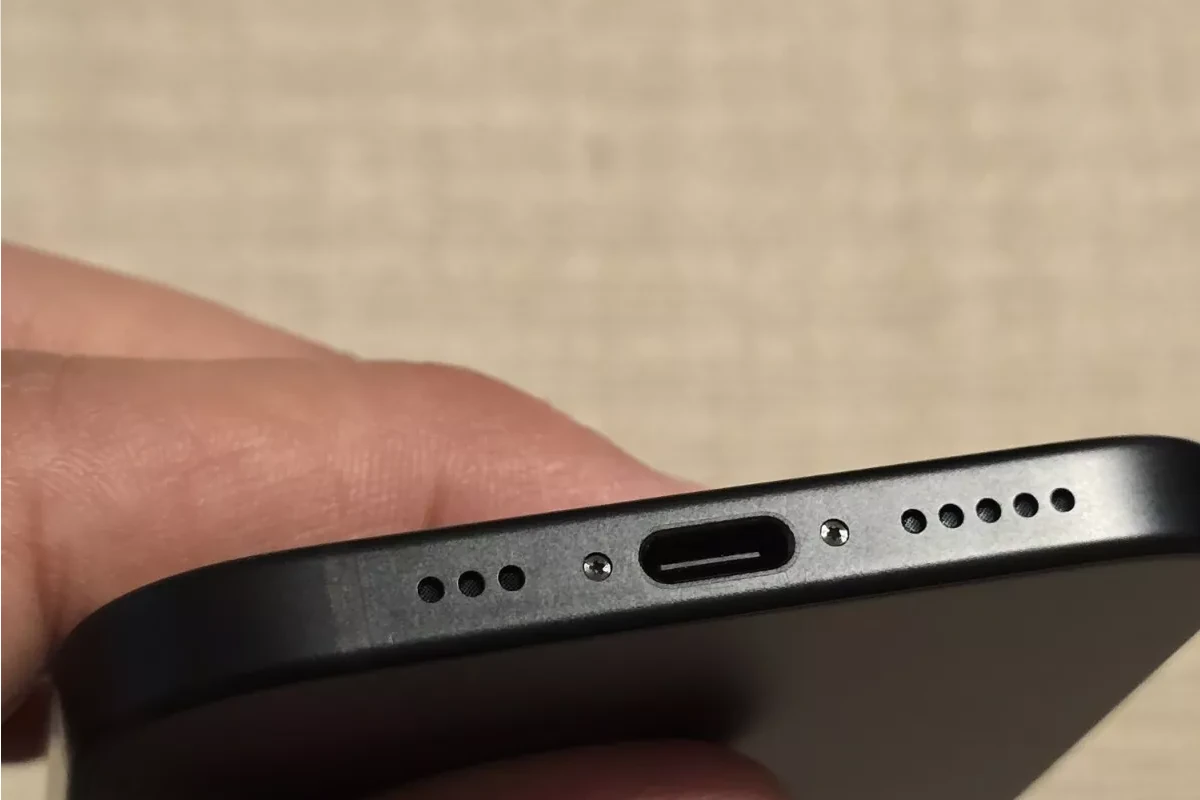
Inspecting the Charging Port for Obstructions
Charging Port: The charging port on your iPhone should be clear of any debris or dust. These can block the connection between the cable and the port. Use a soft brush or a dry cloth to gently clean the port. Be careful not to damage the pins inside.
Advanced Troubleshooting Techniques
When an iPhone won’t charge, advanced steps beyond the basic checks can be taken. These include exploring software settings, assessing battery health, and examining hardware components for possible service needs.
Software and Battery Considerations
It’s vital to ensure the device’s software is up to date. Users should check for any pending software updates in the Settings app and install them if available. Sometimes, a software issue can prevent the iPhone from charging. A forced restart may resolve this. For recent iPhone models, a quick press and release of the volume up and down buttons followed by a press and hold of the side button can perform this reset. If these steps fail, a factory reset or restoring the device through DFU (Device Firmware Update) mode might be necessary, but one should not undertake these without backing up data first.
Hardware and Service Solutions
Physical check-ups are key for hardware issues. Inspect the Lightning port for lint or debris that could block the connection; a soft, dry brush helps here. Look for fraying or damage on the charging cable; using a different, undamaged cable is safer. Consider the possibility of battery aging, which can degrade battery life and charging capacity. If the iPhone is still not charging after these steps, it might require professional service, especially if there’s physical or liquid damage which could be identified by looking at the LCI (Liquid Contact Indicator) in the SIM slot. AppleCare+ or warranty might cover repairs if applicable, so checking the service entitlement is a good idea. Lastly, avoid extreme temperature exposure as this impacts battery health and might lead to charging problems.